User’s Manual
9
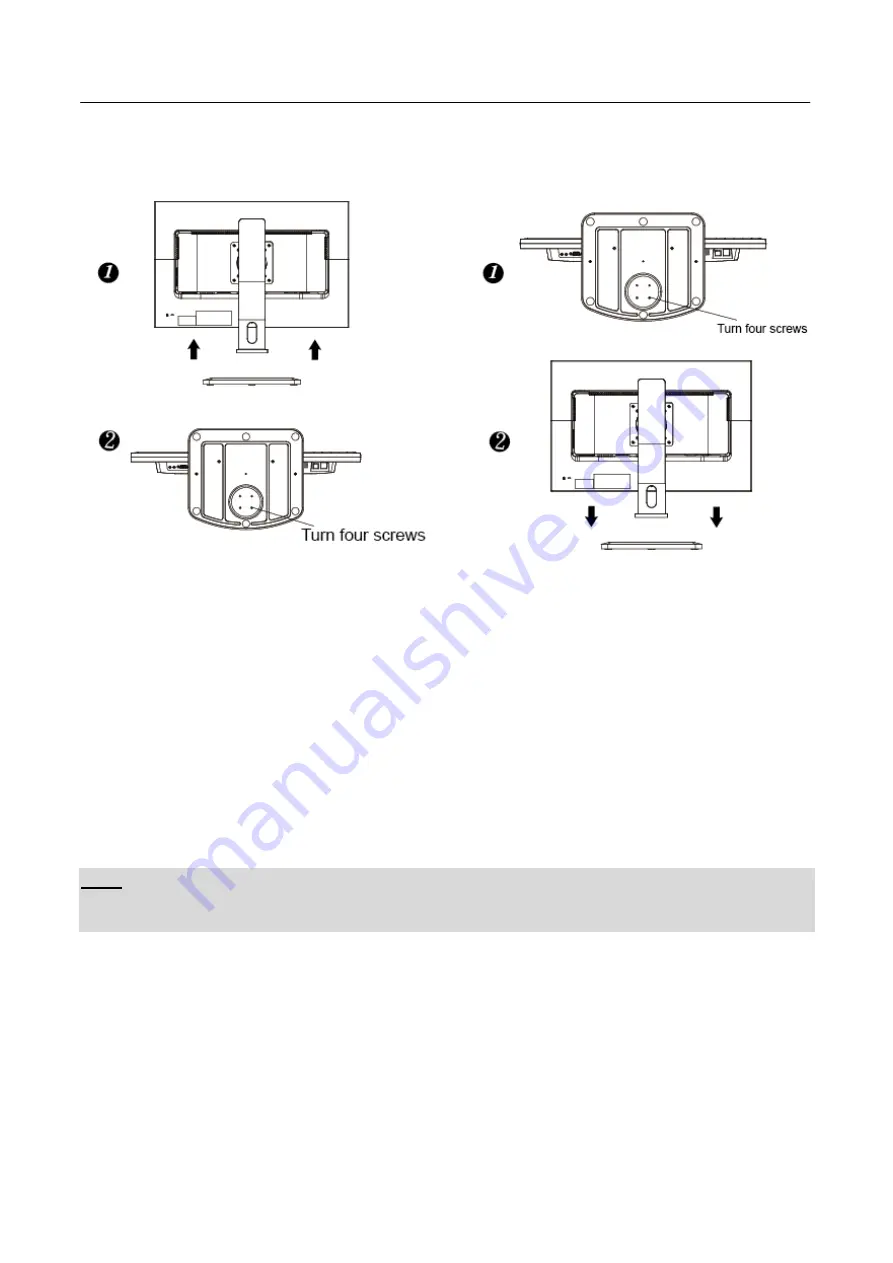
INSTALLATION INSTRUCTIONS
INSTALL
REMOVE
Figure.1. Installing and Removing the Base
INSTALLATION:
1.
Align the monitor with the opening in the base.
2.
Note that the longer section of the base points forward.
3.
Snap the monitor into its base. Align the four screw holes, use a screwdriver to lock screw fixed
on the base.
4.
Verify that the monitor is securely attached to the base by looking at the bottom of the base and
making sure that the lock screw are fully fixed on the base.
REMOVAL:
1. Flip over the monitor so that it is upside down.
2. Use the screwdriver four lock screw will be removed .
3. Gently pull the base from the monitor until they are unattached.
Note:
For the first time installation, the screw must loosen before attaching the monitor to the base.
POWER
POWER SOURCE:
1.
Make sure that the power cord is the correct type required in your area.
2.
This LCD monitor has an Internal universal power supply that allows operation in either
100/120V AC or 220/240V AC voltage area (No user adjustment is required.)
3.
Connect the AC-power cord one end to your LCD monitor’s AC-input socket, the other end to
wall-outlet.
Содержание HANNS.G HP246PDB
Страница 1: ...HP246PDB HSG1342...


