


CONNECTING THE UNIT TO POWER
AC OPERATION
Plug one end of the AC adaptor into the DC power Input, and then plug the other end into AC wall outlet.
Before switching on the unit, make sure that the voltage of your electricity supply is the same on the rating
plate.
BACK-UP BATTERY
The unit has pre-installed a CR-2032 lithium battery inside the back-up battery compartment. In case of power
failure or interrupted AC power, the current time, alarm time and the stored radio stations are preserved in the
memory of the unit by means of battery back-up function.
OPERATE THE CLOCK
When the clock is plugged in, the correct time will be displayed after a few seconds.
(Note : The default Time
Zone is set on Zone 2 - Eastern Time).
The clock will automatically indicate the AM (A) or PM(P) time on the
display.
SELECT THE TIME ZONE
There are 7 time zones programmed as follows:
ZONE 1 – Atlantic Time
ZONE 2 – Eastern Time
(Default Setting)
ZONE 3 – Central Time
ZONE 4 – Mountain Time
ZONE 5 – Pacific Time
ZONE 6 – Yukon Time
ZONE 7 – Hawaiian Time
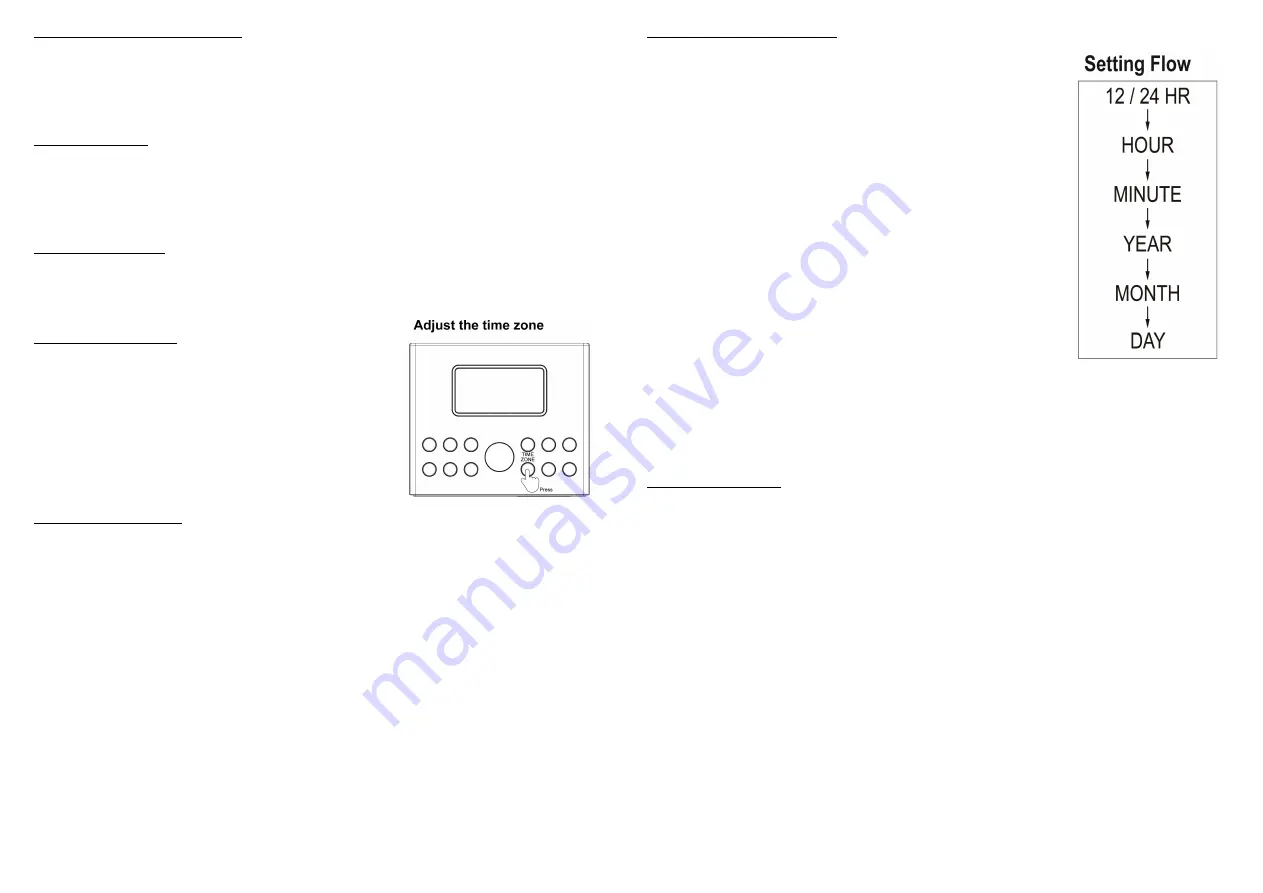
CHANGE THE TIME ZONE
Make sure that the unit is in STANDBY mode. To confirm, press the
STANDBY
Button
While the unit is in
STANDBY
mode, press the
TIME ZONE
Button, the display will show the current time zone
number.
Press the
TIME ZONE
Button repeatedly to select your time zone. When the desire time zone is selected,
release the Button, the time zone will store in the memory after 1-2 seconds.
When you moved to a different time zone, simply change the time zone to the new time zone, the unit will store
the new time zone in the memory.
-3-
SETTING THE CLOCK AND DATE
1. You can only set the Clock and Date when the unit is in STANDBY mode,
( When the unit is in
STANDBY
mode, there will be
NO
function modes)
2.
12 HOURS/ 24 HOURS SETIING
: Press and hold the
TIME/M+/+10
Button for about 1 second, (The display will show
12HR
or
24 HR
)
3. Press the
SKIP+/TU+/LIGHT+
or
SKIP−/TU-/LIGHT-
Button to select the
desired setting. Press
TIME
Button to confirm.
4. After 12HR / 24 Setting, the
HOUR
digit will flash.
5. Press the
SKIP+/TU+/LIGHT+
or
SKIP−/TU-/LIGHT-
Button to adjust the
hour. (In 12 HOUR setting, there will be “
A
” indicating AM and ‘
P
”
indicating PM)
6. When the hour is selected, press the
TIME
Button again, the
MINUTE
digit will begin to flash on the display.
7. Press the
SKIP+/TU+/LIGHT+ or SKIP−/TU-/LIGHT-
Button to adjust the
minute.
8. When the minute is selected, press the
TIME
Button again, the
YEAR
will
show on the display and flash.
9. Press the
SKIP+/TU+/LIGHT+ or SKIP−/TU-/LIGHT-
Button to adjust the
year.
10. When the year is selected, press the
TIME
Button again, the
MONTH
will show on the display and flash.
11. Press the
SKIP+/TU+/LIGHT+ or SKIP−/TU-/LIGHT-
Button to adjust the MONTH.
12. When the MONTH is selected, press the TIME Button again, the
DAY
will show on the display and flash
13. Press the
SKIP+/TU+/LIGHT+ or SKIP−/TU-/LIGHT-
Button to adjust the DAY.
14. When the DAY is selected, press the
TIME
Button again. The display will back to the CLOCK display.
SETTING THE ALARMS
1. You can set up the alarm when the unit is
STANDBY
mode.
2. Press the
ALARM ON/OFF
Button. The display will show :
ALARM ON
” and the default alarm time.
3. Press and hold the
ALARM ON/OFF
Button. The alarm hour will flash
4. Press the
SKIP+/TU+/LIGHT+ or SKIP−/TU-/LIGHT-
Button to select the alarm hour.
5. When the desired alarm hour is selected, press the
ALARM ON/OFF
Button again, the alarm minute digit
will flash.
6. Press the
SKIP+/TU+/LIGHT+ or SKIP−/TU-/LIGHT-
Button to select the alarm minute.
7. When the desired alarm minute is selected, press the
ALARM ON /OFF
Button again, the alarm mode will
flash.
8. Press the
SKIP+/TU+/LIGHT+
or
SKIP−/TU-/LIGHT-
Button to select the alarm modes.
There are three alarm modes:
US
: Alarm wake up mode is
USB **
rA
: Alarm wake up mode is
FM radio
bU
Alarm wake up mode is
buzzer
9. When the desired alarm mode is selected, press the
ALARM ON /OFF
Button again to complete the alarm
setting. The desired alarm time will remain on the display.
10. If you want to turn off the alarm, press the
ALARM ON/OFF
Button. The display will show “ALARM OFF”.
**Note
: For Wake to USB, please make sure a USB device is inserted and can be properly played, otherwise
the unit will default to the buzzer alarm mode automatically.
-4-


