49
48
9.3 GLP DATA
GLP (Good Laboratory Practice) is a set of functions that allows the user to store
or recall data regarding the probe calibration. This feature also allows the user
to associate readings with specific calibrations.
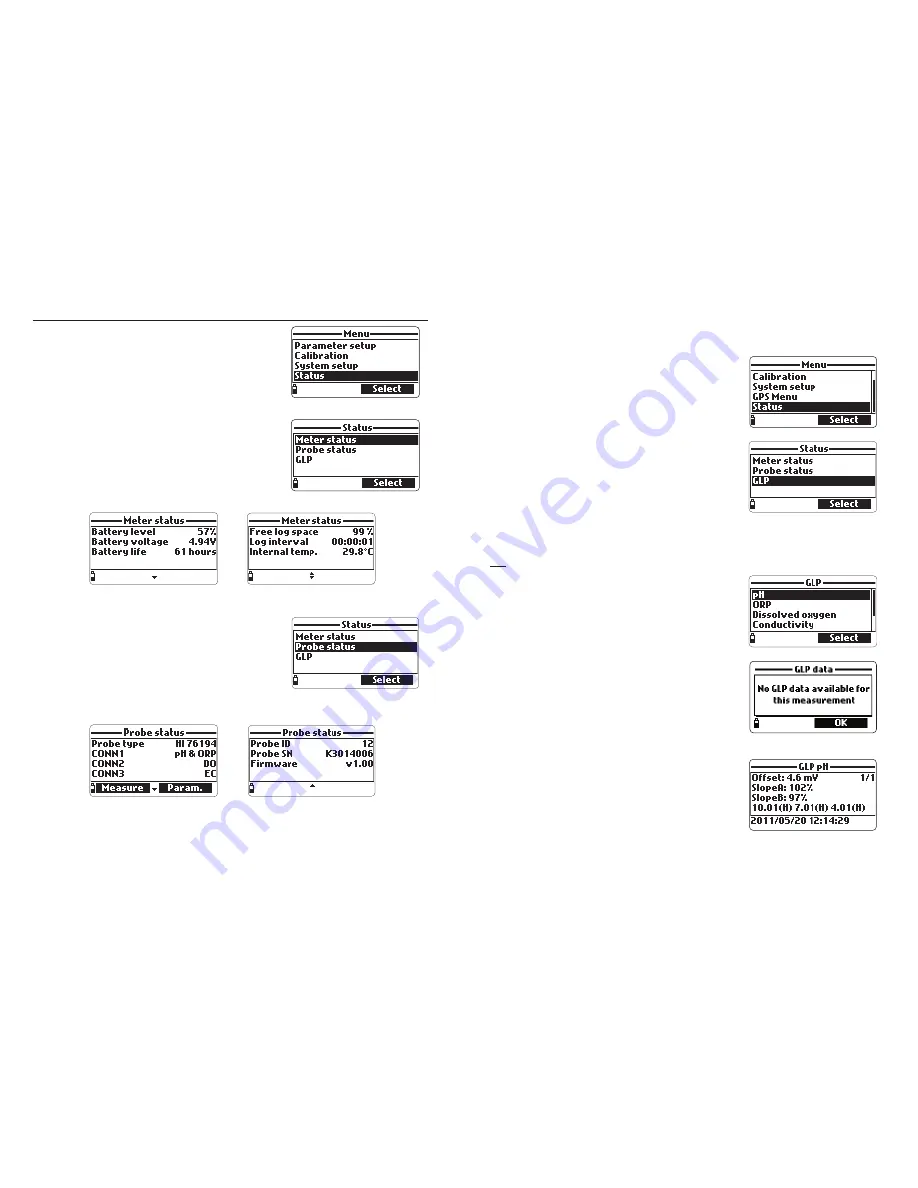
To view GLP data select “GLP” from the “Status”
menu. The complete list of available parameters
appears. Select the desired parameter to view the
stored GLP information.
Note
If no calibration data is available for the
selected parameter, the display shows the
message “No GLP data available for this
measurement”. Press
OK
to return to the
previous screen.
Note
GLP data is stored for the last 5 calibrations.
This calibration history allows the user to detect when readings start to
change and sensors may require cleaning or replacement.
pH
• From the “GLP” menu, select the “pH” option.
• Data regarding the last pH calibration will be
displayed: offset, acidic slope, basic slope,
buffers used, time and date of the calibration.
• Use the arrow keys to scroll through the stored
data for the last 5 calibrations.
• Press
ESC
to return to the “GLP” menu.
Note
A “C” label near the buffer value indicates
a custom point, while an “H” indicates a
HANNA standard buffer value.
If a quick calibration was performed, the buffer values are replaced
with the “Quick calibration” indication.
If no pH calibration has been performed
or if calibration was cleared using the the
“Restore factory calib.” option the offset
and slope values are set to default, and
the message “Factory calibration” is dis-
played. Press
ESC
to return to the previous screen.
Chapter 9 - STATUS
Useful information regarding the meter, probe (if
connected) and GLP calibration data are available
for viewing by selecting “Status” from the main
menu.
9.1 METER STATUS
Select “Meter Status” to display information related
to the battery, logging, internal temperature,
password, Meter ID, serial number and firmware
version. Press [up] and [down] to scroll through
the status screens. Press
ESC
to return to the
“Status” menu.
9.2 PROBE STATUS
Select “Probe Status” to display information related
to the probe type, connected sensors, Probe ID,
serial number and firmware version.
• Press [up] and [down] to scroll through the status
screens.
• Press
ESC
to return to the “Status” menu.
Note
The probe status screen will automatically be displayed when the probe
sensor status has changed. If this occurs, the “Measurement Screen”
and “Parameter Selection” softkeys are available (see Section 5.2).


