1.
Assembly of the Light Fixture
1.1
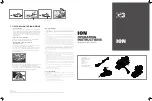
Carefully remove the fixture from its protective packaging.
1.2
This unit is fully assembled, proceed to connect the unit.
To replace bulb
1.3
Turn off the power and allow the bulb to cool.
1.4
Remove the 3 screws by turning counter-clockwise with a
screwdriver.
1.5
Remove the ring, the lens and the gasket.
1.6
Pull out the bulb.
1.7
Insert the new bulb into the bulb socket. Use a soft cloth, as oil
from skin may damage the lamp bulb.
1.8
Replace the gasket, the lens and the ring.
1.9
Attach all the parts with the screws by turning clockwise.
NOTE: The lens should point up and never towards the ground.
1.
Assemblage du luminaire
1.1
Retirer soigneusement le luminaire de son emballage protecteur.
1.2
Ce dispositif est complètement assemblé, il suffit de le brancher.
Pour remplacer l’ampoule :
1.3
Couper l’alimentation et laisser l’ampoule refroidir.
1.4
Retirer les 3 vis à l’aide d’un tournevis en tournant vers la gauche.
1.5
Retirer la bague, la lentille et le joint d’étanchéité.
1.6
Tirer sur l’ampoule.
1.7
Insérer la nouvelle ampoule dans la douille. Utiliser un chiffon
doux, car la séborrhée de la peau peut endommager l’ampoule.
1.8
Replacer la bague, la lentille et le joint d’étanchéité.
1.9
Assembler les pièces avec les vis en tournant vers la droite.
NOTE: La lentille doit être réglée vers le haut, jamais vers le sol.
Rock
Roche
Gasket
Joint d’étanchéité
Lens
Lentille
Connector
Connecteur
20W Halogen MR-16 bulb
Ampoule 20W halogène MR16
Ring
Bague
Screws
Vis


