background image


Page 6 

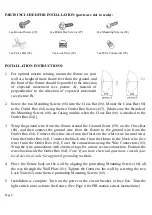
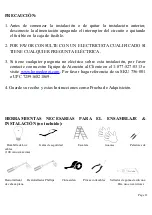
PARTS INCLUDED FOR INSTALLATION (parts are not to scale): 


1ea Ground Screw (#9)                 2ea Outlet Box Screws (#7)                   2ea Mounting Screws (#8) 


1ea Cross Bar (#6)                            2ea Lock Nuts (#2)                             3ea Wire Connectors (#5) 


INSTALLATION INSTRUCTIONS:


1.


For  optimal  motion  sensing,  mount  the  fixture  on  your 
wall at a height of more than 6 feet from the ground, and 
the front of the fixture should be parallel to the direction 
of  expected  movement  (see  picture  A),  instead  of 
perpendicular  to  the  direction  of  expected  movement 
(see picture B). 

 
2.


Screw the two Mounting Screws (#8) into the Cross Bar (#6). Mount the Cross Bar (#6) 
to the Outlet Box (#4) using the two Outlet  Box Screws (#7). [Make sure the threads of 
the Mounting Screws (#8)  are facing outside when  the Cross  Bar (#6)  is attached  to the 
Outlet Box (#4).] 

  
3.


Wrap  the ground wire from  the fixture around  the Ground  Screw  (#9) on the  Cross Bar 
(#6),  and  then  connect  the  ground  wire  from  the  fixture  to  the  ground  wire  from  the 
Outlet Box (#4). Connect the white wire from the fixture to the white wire (neutral wire) 
from the Outlet Box (#4). Connect the black wire from the fixture to the black wire (live 
wire)  from the  Outlet  Box (#4).  Cover the connections using  the  Wire  Connectors (#5). 
Wrap the wire connections with electrical tape for a more secure connection. Position the 
wires back inside the Outlet Box (#4). 

Note: If you have electrical questions, consult your 

local electrical code for approved grounding methods.


4.


Place  the  fixture  body  on  the  wall  by  aligning  the  protruding  Mounting  Screws  (#8)  all 
the way through the Wall Plate (#1). Tighten the fixture to the wall by screwing the two 
Lock Nuts (#2) onto the two protruding Mounting Screws (#8). 

 
5.


Installation  is  complete.  Turn  on  the  power  at  the  circuit  breaker  or  fuse  box.  Turn  the 
light switch on to activate the fixture. (See Page 4 for PIR motion sensor instructions.) 


Содержание 725916821869

Страница 1: ...Page 1 INSTRUCTION MANUAL 1LT Exterior Motion Sensing Wall Lantern Home Depot SKU 756 001 UPC 725916821869 ...

Страница 2: ...ings When the PIR sensor senses a change it automatically illuminates the light bulb for a specified length of time 2 For further security and energy savings the PIR sensor has been engineered with a setting to automatically illuminate your home only at night 3 One light Exterior Wall Lantern in brushed nickel finish with clear bent beveled glass 4 This fixture has been engineered to safely use up...

Страница 3: ...n electrical questions about this fixture please contact our Customer Service Team at 1 877 527 0313 or visit www homedepot com Please reference your SKU 756 001 or UPC 725916821869 4 Keep your receipt and these Instructions for Proof of Purchase TOOLS REQUIRED FOR ASSEMBLY INSTALLATION not included Light Bulb Safety goggles Ladder Gloves Wire strippers 100 watt maximum Flathead screwdriver Philli...

Страница 4: ...detect motion that occurs within eight feet from the fixture Turn the SENS knob fully clockwise and the PIR sensor can detect motion that occurs within forty feet from the fixture 6 The LIGHT knob determines what time of day the light bulb illuminates Turn the LIGHT knob fully clockwise and the sensor sensitivity is poorest and the light bulb illuminates only at night 7 The TIMER knob adjusts the ...

Страница 5: ...Page 5 ASSEMBLY ...

Страница 6: ... the Ground Screw 9 on the Cross Bar 6 and then connect the ground wire from the fixture to the ground wire from the Outlet Box 4 Connect the white wire from the fixture to the white wire neutral wire from the Outlet Box 4 Connect the black wire from the fixture to the black wire live wire from the Outlet Box 4 Cover the connections using the Wire Connectors 5 Wrap the wire connections with electr...

Страница 7: ...Page 7 INSTALLATION ...

Страница 8: ...ct or mishandling This warranty shall not apply to any product that is found to have been improperly installed set up or used in any way not in accordance with the instructions supplied with the product This warranty shall not apply to a failure of the product as a result of an accident misuse abuse negligence alteration or faulty installation or any other failure not relating to faulty material o...

Страница 9: ...Page 9 MANUAL DE INSTRUCCIONES Farola de Pared con Sensible a los Movimientos para Exterioriores de 1 luz Home Depot SKU 756 001 UPC 725916821869 ...

Страница 10: ...dedores Cuando el sensor PIR siente un cambio automáticamente ilumina la bombilla de luz durante un periodo de tiempo especificado 2 Para más seguridad y más ahorros de energía el sensor PIR ha sido diseñado con una programación para iluminar automáticamente su hogar solamente de noche 3 Farola de Pared para Exteriores de Una Luz en acabado de niquel cepillado con cristal claro biselado 4 Esta ins...

Страница 11: ...nstalación por favor contacte con nuestro Equipo de Atención al Cliente en el 1 877 527 0313 o visite www homedepot com Por favor haga referencia de su SKU 756 001 o UPC 725916821869 4 Guarde su recibo y estas Instrucciones como Prueba de Adquisición HERRAMIENTAS NECESARIAS PARA EL ENSAMBLAJE INSTALACIÓN no incluido Bombilla de Luz Gafas de seguridad Escalera Guantes Peladores de cables 100 vatios...

Страница 12: ...o de 8 pies de distancia desde la instalación Girar el pomo de SENTIDOS completamente en sentido horario entonces el sensor PIR puede detectar el movimiento que ocurra dentro de 40 pies de distancia desde la instalación 6 El pomo de LUZ determina en qué momento del día la bombilla de luz se ilumina Girar el pomo de LUZ completamente en sentido horario entonces la sensibilidad del sensor se vuelve ...

Страница 13: ...Page 13 ASAMBLEA ...

Страница 14: ...e tierra de la instalación en el Tornillo de Toma de Tierra 9 que hay en la Barra Cruzada 6 y después conecte el cable de toma de tierra de la instalación al cable de toma de tierra de la Caja de Salida 4 Conecte el cable blanco de la instalación al cable blanco cable neutral de la Caja de Salida 4 Conecte el cable negro de la instalación al cable negro cable vivo de la Caja de Salida 4 Cubra las ...

Страница 15: ...Page 15 INSTALACIÓN ...

Страница 16: ...rantía no se aplicaría a productos que haya sido instalado ajustado o usado inadecuadamente de cualquier forma que no esté de acuerdo con las instrucciones suministradas con el producto Esta garantía no se aplicaría a fallos del producto debido a un accidente mal uso abuso negligencia alteración o instalación errónea o cualquier otro fallo que no esté relacionado con fallos materiales o de mano de...

Страница 17: ...Page 17 MANUAL D INSTRUCTIONS Lanterne Murale d Extérieur Détectrice de Mouvement 1LP Home Depot UGS 756 001 UPC 725916821869 ...

Страница 18: ...ans son environnement Quand le capteur IRP perçoit un changement l ampoule s allume immédiatement pour une durée de temps spécifiée 2 Pour des raisons de sécurité et d économies d énergie supplémentaires le capteur IRP possède un dispositif permettant de n éclairer automatiquement votre maison que la nuit 3 Lanterne Murale d Extérieur à une lampe au fini nickel brossé avec un verre transparent bon...

Страница 19: ...propos de ce luminaire veuillez contacter notre centre de Service à la Clientèle au 1 877 527 0313 ou visiter www homedepot com Veuillez indiquer votre UGS 756 001 ou UPC 725916821869 4 Conserver votre reçu et ces Instructions comme Preuve d Achat OUTILS REQUIS POUR L ASSEMBLAGE L INSTALLATION non inclus Ampoule Lunettes de Protection Echelle Gants Dénudeur de câbles 100 watts maxima électriques T...

Страница 20: ...RP peut détecter un mouvement jusqu à une distance de 2 44 m 8 pieds du luminaire Tourner à fond le bouton CAPTEUR dans le sens horaire et le capteur IRP peut détecter un mouvement jusqu à une distance de 12 20 m 40 pieds du luminaire 6 Le bouton LUMIERE détermine le moment de la journée où l ampoule s allumera Tourner à fond le bouton LUMIERE dans le sens horaire et la sensibilité du capteur sera...

Страница 21: ...Page 21 ASSEMBLAGE ...

Страница 22: ...tour de la Vis de Terre 9 présente sur l Entretoise 6 et puis connecter le câble électrique de terre du luminaire à celui de la Boîte de Sortie 4 Connecter le câble blanc du luminaire au câble blanc câble neutre de la Boîte de Sortie 4 Connecter le câble noir du luminaire au câble noir câble sous tension de la Boîte de Sortie 4 Couvrir les connecteurs grâce aux Serre Fils 5 Envelopper les connexio...

Страница 23: ...Page 23 INSTALLATION ...

Страница 24: ...sation Cette garantie ne s applique pas à tout produit mal installé réglé ou utilisé d une façon autre que celle décrite dans les instructions accompagnant le produit Cette garantie ne s applique pas à un mauvais fonctionnement du produit résultant d un accident mauvaise utilisation abus négligence altération ou installation défectueuse ou tout autre mauvais fonctionnement non causé par un défaut ...

Отзывы: