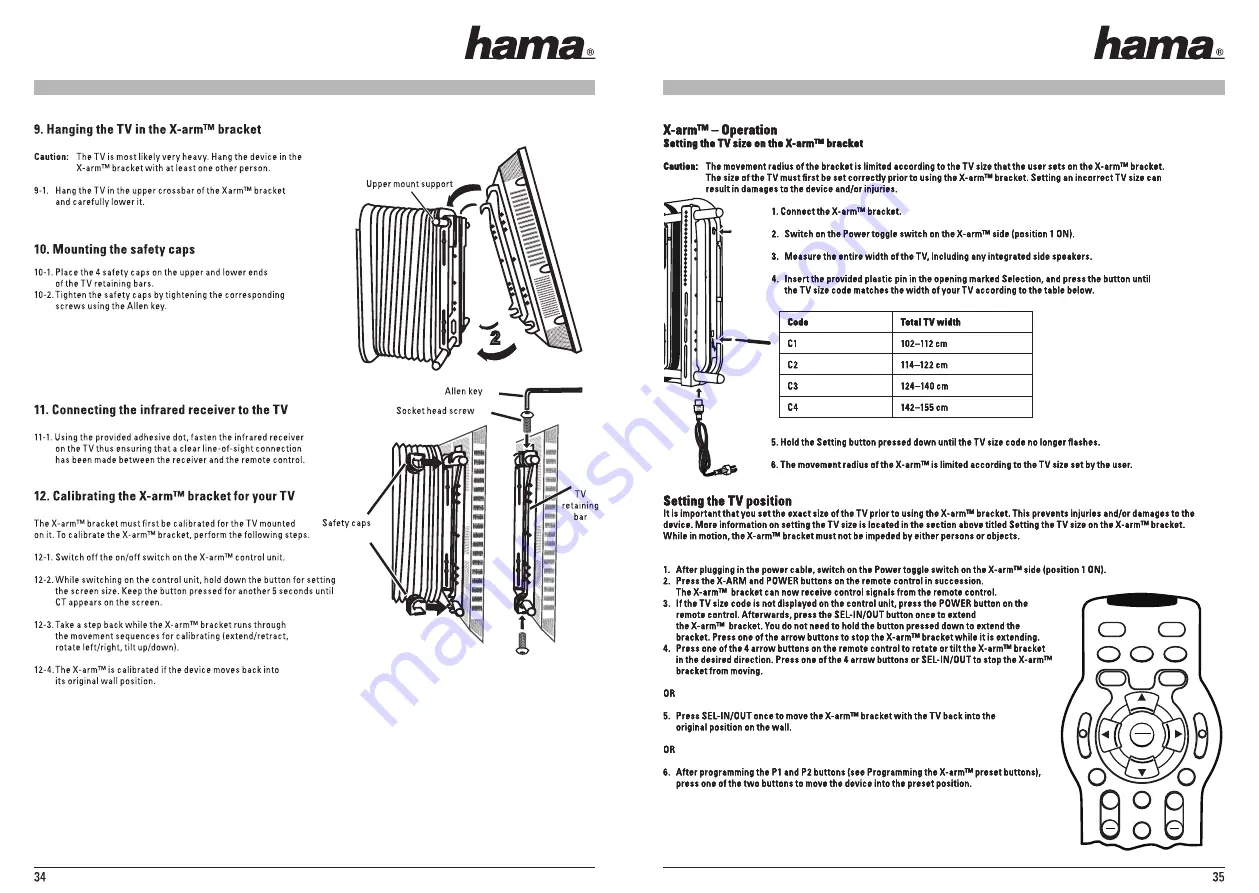
X-arm™ – Operation
Setting the TV size on the X-arm™ bracket
Caution:
The movement radius of the bracket is limited according to the TV size that the user sets on the X-arm™ bracket.
The size of the TV must fi rst be set correctly prior to using the X-arm™ bracket. Setting an incorrect TV size can
result in damages to the device and/or injuries.
1. Connect the X-arm™ bracket.
2. Switch on the Power toggle switch on the X-arm™ side (position 1 ON).
3. Measure the entire width of the TV, including any integrated side speakers.
4. Insert the provided plastic pin in the opening marked Selection, and press the button until
the TV size code matches the width of your TV according to the table below.
Code
Total TV width
C1
102–112 cm
C2
114–122 cm
C3
124–140 cm
C4
142–155 cm
5. Hold the Setting button pressed down until the TV size code no longer fl ashes.
6. The movement radius of the X-arm™ is limited according to the TV size set by the user.
Setting the TV position
It is important that you set the exact size of the TV prior to using the X-arm™ bracket. This prevents injuries and/or damages to the
device. More information on setting the TV size is located in the section above titled Setting the TV size on the X-arm™ bracket.
While in motion, the X-arm™ bracket must not be impeded by either persons or objects.
1. After plugging in the power cable, switch on the Power toggle switch on the X-arm™ side (position 1 ON).
2. Press the X-ARM and POWER buttons on the remote control in succession.
The X-arm™ bracket can now receive control signals from the remote control.
3. If the TV size code is not displayed on the control unit, press the POWER button on the
remote control. Afterwards, press the SEL-IN/OUT button once to extend
the X-arm™ bracket. You do not need to hold the button pressed down to extend the
bracket. Press one of the arrow buttons to stop the X-arm™ bracket while it is extending.
4. Press one of the 4 arrow buttons on the remote control to rotate or tilt the X-arm™ bracket
in the desired direction. Press one of the 4 arrow buttons or SEL-IN/OUT to stop the X-arm™
bracket from moving.
OR
5. Press SEL-IN/OUT once to move the X-arm™ bracket with the TV back into the
original position on the wall.
OR
6. After programming the P1 and P2 buttons (see Programming the X-arm™ preset buttons),
press one of the two buttons to move the device into the preset position.
Set
P1
P2
+
VOL
+
CH
POWER
TV
P1 SET
X-ARM
VCR
DVD
CBL
P2 SET
SEL
IN/OUT
P
R
E
S
E
T
P
R
E
S
E
T
MENU
EXIT
MUTE
FAV
2
1
00049570bda_Pfade.indd Abs2:34-Abs2:35
00049570bda_Pfade.indd Abs2:34-Abs2:35
13.12.2006 13:24:28 Uhr
13.12.2006 13:24:28 Uhr
Содержание X-Arm 49570
Страница 1: ......
Страница 2: ...IRReceiver Soccket Set Selector ScreenSize POWER ...
Страница 5: ... ...
Страница 6: ... X 4 X 4 7 3 7 4 2 1 ...
Страница 12: ...motor motor motor A1 A2 A3 motor motor motor switch switch switch HC Error H1 H2 H3 ...
Страница 13: ......
Страница 15: ...2 x 4 5 1 x 10 2 cm ...
Страница 17: ... X 4 X 4 7 3 7 4 ...
Страница 23: ...motor motor motor switch switch switch HC Error ...
Страница 24: ...motor motor motor A1 A2 A3 H1 H2 H3 ...
Страница 25: ...IRReceiver Soccket Set Selector ScreenSize POWER ...
Страница 28: ... ...
Страница 29: ... X 4 X 4 7 3 7 4 2 1 ...
Страница 35: ...A1 A2 A3 H1 H2 H3 ...
Страница 36: ......
Страница 38: ...2 x 4 5 1 x 10 2 cm ...
Страница 40: ... X 4 X 4 7 3 7 4 ...
Страница 46: ......
Страница 47: ...motor motor motor A1 A2 A3 H1 H2 H3 ...


