8
9
Reception test
• Press the <+> button for at least 3 seconds to activate the test for the reception of weather data. The text “test” is shown on
the display. The reception indicator for the weather data shows the quality of reception. The reception is good if the indicator is
shown, otherwise a new location must be found for installing the weather station.
• The reception test is either ended after approx. 1 minute automatically or by actuating the <+> button.
6. Operations
Alarm function
• Press the <ALARM> button for at least three seconds to set the alarm time. The text “ALM” and the hours display flash. Use the
<+> button for the hour setting. By pressing the <ALARM> button again, the minute setting is activated. The minute display flashes.
Use the <+> button for the minutes setting. Press the <ALARM> button again to end the setting mode for the alarm time.
• Use the <ALARM> button to activate or deactivate the alarm. When the alarm is active, the alarm symbol "(((•)) “ is shown on the
display.
• The alarm signal can be interrupted with the <ALARM> button. Use the <SNOOZE> button to stop the alarm signal for five minutes.
During this time, the alarm signal "(((•))) “ flashes.
Show current weather region
Press the <SET> button to show the current weather region. The text „loc“ appears with the currently defined region on the display.
An overview of the coding of all available regions can be found under Appendix on page 22.
7. Intended usage, exclusion of warranty, and safety information
• This weather station is intended for private usage as an indicator for future weather. The forecasts of this device are to be used as
orientation values and do not represent absolute, precise forecasts.
• The manufacturer or distributor of this weather station assumes no responsibility for incorrect values or any results that may occur
because of these values.
• The weather station is not intended for medical purposes or for the information to the public.
• The manufacturer or distributor has no influence on the transferred weather data or forecasts.
• The capabilities of the weather station depend on the operational functionality of the transmission media, which the manufacturer
or distributor has no influence on. Failures in the transmission media cannot be ruled out.
• This device is not a toy and contains breakable and small parts. Install the device out of the reach of children.
• Improper handling or unauthorized opening of the device voids the guarantee.
• These instructions are not to be reproduced in whole or in part without the written authorization from the manufacturer.
8. Disposal information
Do not dispose off the device as part of household garbage!
Electronic devices are to be disposed of in accordance with the guidelines concerning
electrical and electronic devices via the local collecting point for old electronic devices!
Observe battery regulations
According to the regulations pertaining to batteries, you are required to send used
or defective batteries back to us or to hand them in to the respective local business
or battery collection point. Batteries do not belong in the household waste!
9. Technical specifications
Indoor temperature: Range: 0° to 50°C
Accuracy: ±1°C
Resolution: 0,1°C
Weather data updating: Every 24 hours
Power consumption: 3 x Battery LR6/Mignon/AA
Dimensions (L x W x H) : 30 mm x 122 mm x 133 mm
1. Introduction
La WFC 500 vous offre des prévisions météo professionnelles du jour en cours et des 3 jours suivants. Les prévisions météo sont
effectuées par des professionnels et sont envoyées vers la station en même temps que le signal horaire DCF77, émis depuis
l’Allemagne et le HBG en Suisse, pour une réception à travers toute l’Europe. Les zones de réception du signal horaire sont divisées
en 90 régions météo (60 régions avec une prévision à 4 jours, 30 régions avec une prévision à 2 jours). Votre région ou la région de
vos vacances est sélectionnée très simplement, et les prévisions météo correspondantes s’afficheront à l’écran. Vous consultez alors
à votre guise le bulletin météo en un coup d’œil pour le jour en cours et les jours à venir. La mise à jour des données météo se fait
quotidiennement.
Nous vous invitons à lire attentivement le manuel d’utilisation avant toute mise en oeuvre de la station météo. Gardez-le à portée de
main pour consultation ultérieure.
Ce contrat de vente ne s’applique qu’au récepteur de données météorologiques radiocommandé WFC 500, ainsi qu’à la licence de
réception de données. La création et transmission des données météorologiques, ainsi que la responsabilité quant à l’intégrité des
données ne dépendent que de la société Meteotime. Des informations plus précises sont disponibles sur le site Internet
www.meteotime.com. La réception des données dépend de l’émission par Meteotime. Ce récepteur de données météorologiques
radiocommandé WFC 500 n’est pas adapté à la réception de données émises par d’autres appareils.
2. Affichage
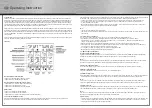
Indicateur de réception des données météo
• Icône affichée -> Données météo réceptionnées dans leur totalité
• Icône clignotante -> Données météo incomplètes
Indicateur de réception du signal horaire DCF77
• Icône clignotante -> Réception de l’heure et de la date en cours
• Icône fixe -> Heure et date mis à jour
• Icône absente -> Heure et date radio pilotées non réceptionnées
Symbole d’alarme
• Symbole fixe -> Alarme activée
• Symbole absent -> Alarme désactivée
• Symbol clignotant -> Alarme activée ou temporairement désactivée (Snooze)
3. Choix du lieu d‘installation de la station
Tout comme le réseau GSM ou la réception des chaînes de télévision, la réception du signal horaire n’est pas optimale dans tous les
endroits. Vous trouverez ci-dessous quelques points qui vous permettront de vérifier le bon fonctionnement de votre appareil.
L’endroit d’installation de votre station météo est important. C’est la raison pour laquelle cette station est dotée d’une fonction de test
de la qualité de réception, de manière à ce que celle-ci puisse être vérifiée dans différents endroits, et que votre station puisse ainsi
être installée dans un endroit approprié.
f
Mode d‘emploi
Содержание WFC-500
Страница 1: ......
Страница 13: ...24 25...


