L
Notebook Mouse »RM 100«
System Requirements:
· IBM compatible PC
· Available USB port
· Microsoft Windows
®
98SE/2000/ME/XP
Installing Hardware:
Connect USB connector of mouse to PC/laptop USB
port or a USB hub. With some Windows
®
versions,
you may be asked for the CD-ROM for your opera-
ting system. Insert the CD-ROM for your operating
system into the disc drive.
Installing Software
Note: You must uninstall or delete your existing
mouse driver before starting to install the new soft-
ware.
1.)
Place the enclosed CD-ROM into the CD-ROM
drive of your laptop or PC.
2.)
Click
Start
->
Run
on your Windows
®
Desktop.
Enter
“x:/3Usetup.exe”
, where
“x”
stands for the
letter assigned to your CD-ROM drive. Now
follow the instructions on the screen.
After installation, it may be necessary to restart
your computer before running the software.
Note:
When installing software in Windows XP, you may
receive a message regarding an unsigned driver.
This will not affecting the performance of the mouse
or its software. Simply ignore and continue with the
installation process.
Configuring the Software Settings
Open the settings menu by clicking the icon at the
bottom right of the screen in the taskbar.
The tabs
“Buttons”
,
“Pointer”
,
“Pointer Options”
,
“Wheel”
,
“Enhanced Buttons”
and
“About”
will
now appear.
Information regarding settings for
“Buttons”
,
“Poin-
ter”
and
“Pointer Options”
can be found in Windo-
ws
®
help.
(Press F1).
1. “Wheel” Tab
- This allows you to set the scroll mode and speed.
1.1 Wheel Mode
- 3D Wheel Mouse Mode:
Standard scroll mode. Supports all wheel
scrolling applications.
- MS Intelli Mouse Compatible Mode:
Optimised scrolling for MS Intelli compatible
applications such as MSOffice applications or
Internet Explorer version 4.0 upwards.
1.2 Scroll Speed
- Scroll X lines per scroll unit:
Specifies number of lines to be scrolled per
scroll unit (raster unit).
- Scroll one page per scroll unit:
Scrolls one page per scroll unit (raster unit).
- Disable Scrolling function:
Switches off scroll function
- Reverse Scroll Direction:
Reverses the vertical scrolling direction
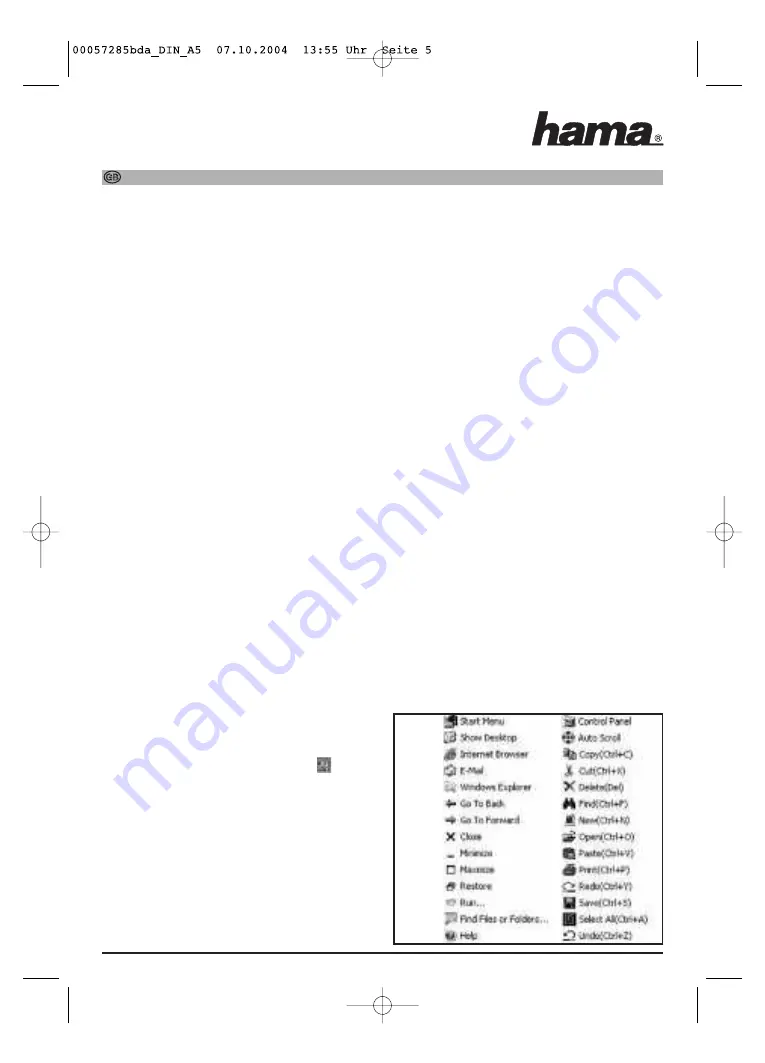
2. “Enhanced Buttons” Tab
This allows you to assign various functions to the
3rd (wheel) button.
An overview of these functions can be found in fig
1. Settings are made by clicking open a menu with
the middle mouse button, then selecting the appro-
priate function.
FIG. 1


