background image

81

Bedienung

PRN45HD

d

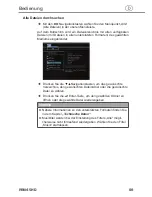
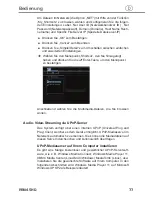
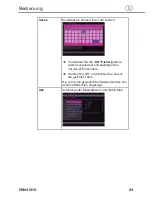
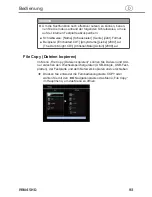
Auf  dem  Bildschirm  erscheint  die  Nachricht  „Ausgewählte  Datei(en) 

zur Liste hinzufügen“ . Die Auswahl mehrerer Dateien ist möglich .

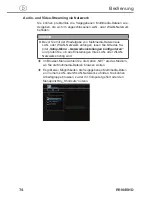
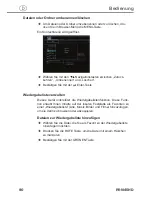
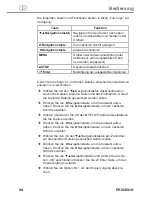
Wiedergabeliste durchsuchen

Öffnen Sie das Browser-Menü wie im Kapitel 


‹

„Browser-Menü 

öffnen und navigieren”

 beschrieben .

Mit den 


‹

▼▲Navigationstasten

 wählen Sie „Wiedergabeliste“ und 

drücken Sie die   Enter-Taste, um die Wahl zu bestätigen .
Wählen Sie mit den 


‹

◄►Navigationstasten zwischen „Alle“, „Mu

-

sik“, Foto“ und „Filme“ .
Bestätigen Sie mit der 


‹

 Enter-Taste .

Die Wiedergabeliste wird geöffnet .

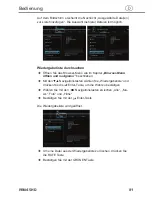
Um eine Datei aus der Wiedergabeliste zu löschen, drücken Sie 


‹

die ROTE Taste .
Bestätigen Sie mit der GRÜNEN Taste .


‹

Содержание PRN45HD

Страница 1: ...N E T W O R K E N T E R T A I N M E N T 00053194 Media Player PRN45HD g Media Player ...

Страница 2: ...gang 16 Multimedia Wiedergabe 16 Integrierter DVB T Empfänger 16 Aufnahmefunktion 16 Netzwerkfunktionen 17 Sonstiges 17 Aufstellen und Anschließen 17 Sicherheitshinweise 17 Auspacken 17 Lieferumfang und Transportinspektion 18 Entsorgung der Verpackung 18 Anforderungen an den Aufstellort 19 Elektrischer Anschluss 19 Netzanschluss 20 Weitere Anschlüsse 20 Anschluss an einen Computer 20 Anschluss ein...

Страница 3: ...n 70 Foto Dateien durchsuchen 71 Video Dateien durchsuchen 72 Audio und Video Streaming via Netzwerk 74 Audio Video Streaming via UPnP Server 77 Dateien oder Ordner umbenennen löschen 80 Wiedergabeliste verwalten 80 Media Dateien verwalten und suchen 82 Musikbibliothek 82 Fotobibliothek 86 Videobibliothek 89 File Copy Dateien kopieren 93 Internetradio 95 Sender 96 Genre 96 Favoriten 96 Suchen 96 N...

Страница 4: ...thaltenen Informationen damit Sie mit Ihrem Ge rät schnell vertraut werden und seine Funktionen in vollem Umfang nutzen können Wir wünschen Ihnen viel Freude beim Gebrauch Informationen zu dieser Bedienungsanleitung Diese Bedienungsanleitung ist Bestandteil des Mediaplayers PRN45HD nachfolgend als Gerät bezeichnet und gibt Ihnen wichtige Hinweise für den bestimmungsgemäßen Gebrauch die Sicherheit ...

Страница 5: ...orliegenden Bedienungsanleitung werden folgende Warnhin weise verwendet Gefahr Ein Warnhinweis dieser Gefahrenstufe kennzeichnet eine dro hende gefährliche Situation Falls die gefährliche Situation nicht vermieden wird kann dies zum Tod oder zu schweren Verletzungen führen Die Anweisungen in diesem Warnhinweis befolgen um die Ge fahr des Todes oder schwerer Verletzungen von Personen zu vermeiden W...

Страница 6: ...ngsgemä ßer Verwendung sind ausgeschlossen Das Risiko trägt allein der Betreiber Urheberrecht Diese Dokumentation ist urheberrechtlich geschützt Jede Vervielfältigung bzw jeder Nachdruck auch auszugsweise so wie die Wiedergabe der Abbildungen auch im veränderten Zustand ist nur mit schriftlicher Zustimmung des Herstellers gestattet Es ist gesetzlich verboten urheberrechtlich geschütztes Material o...

Страница 7: ... Anschlüsse berührt und der elektrische und mechanische Aufbau verändert besteht Stromschlaggefahr Umgang mit Batterien WARNUNG Gefahr durch nicht ordnungsgemäße Verwendung Für den sicheren Umgang mit Batterien beachten Sie folgende Sicherheitshinweise Werfen Sie die Batterien nicht ins Feuer Schließen Sie die Batterien nicht kurz Versuchen Sie nicht die Batterien wieder aufzuladen Überprüfen Sie ...

Страница 8: ...r lischt der Garantieanspruch Eine Reparatur des Gerätes während der Garantiezeit darf nur von einem vom Hersteller autorisierten Kundendienst vorgenommen werden sonst besteht bei nachfolgenden Schäden kein Garantie anspruch mehr Defekte Bauteile dürfen nur gegen Original Ersatzteile ausge tauscht werden Nur bei diesen Teilen ist gewährleistet dass sie die Sicherheitsanforderungen erfüllen werden ...

Страница 9: ...e leuchtet blau wenn dass das Gerät eingeschaltet ist und rot im Standby Modus 3 Infrarot Fernbedienungssensor Der Fernbedienungssensor emp fängt Signale von der Fernbedienung Rechte Seite des Gerätes Memory Card Schlitz Anschluss zum Einstecken einer Memory Card z B SD MMC MS MS Pro 2 2 x USB HOST A Typ Zwei USB Anschlüsse um USB Geräte z B MP3 Player an das Gerät anzuschließen 3 USB Device B Typ...

Страница 10: ...inem angeschlossenen Fernseher herzustellen 4 HDMI HDMI Schnittstelle High Definition Multimedia Interface um einen HD Fernseher High Definition TV anzuschließen Bild und Tonübertragung 5 Y Pb PR COMPONENT VIDEO OUT Komponenten Ausgang Buch se um einen Fernseher anzuschließen nur Bildübertragung 6 A V OUT Ausgang für Video rechter und linker Audiokanal 7 A V IN Eingang für Video rechter und linker...

Страница 11: ...e die Festplatte erneut formatieren Durch einen Aufprall kann ein Fehlersektor auf der Festplatte entstehen Benutzen Sie CHKDSK um die Festplatte zu repa rieren Datensicherung Alle auf der Festplatte gespeicherten Daten können durch Aufprall elektrischen Schlag Stromausfall oder Festplattenformatierung verlo ren gehen Erstellen Sie regelmäßig eine Sicherungskopie der Fest plattendaten Mit einer Si...

Страница 12: ...Ι Wiedergabe Pause 9 HOME Hauptmenü 10 Navigationstasten 11 MENU Menü 12 TIME SHIFT 13 Ι SLOW Zeitlupe 14 ZOOM 15 AUDIO 16 ROT 17 EPG GRÜN 18 Stummschaltung 19 REC Aufnahme 20 COPY Kopieren 21 MUSIC Musik 22 INFO Infofenster 23 VOL Lautstärkeregelung 24 Ι Vorheriger 25 STOP Stopp 26 Ι Nächster 27 Return Zurück 28 ENTER Bestätigung 29 SETUP Einstellungen 30 A B 31 GOTO 32 SUBTITLE Untertitel 33 ANG...

Страница 13: ...EN Kanalnummer und andere Zahlen werte eingeben 5 REPEAT Wiederholungsoption wählen 1 Alle Random oder Aus 6 FAST REWIND Aktuelle Wiedergabe rückspulen 7 FAST FOR WARD Aktuelle Wiedergabe vorspulen 8 ΙΙ PLAY PAUSE Wiedergabe beginnen anhalten 9 HOME Hauptmenü anzeigen 10 NAVIGATIONS TASTEN Cursor innerhalb eines Menüs aufwärts abwärts links und rechts bewegen 11 MENU Menü anzeigen Im Browser Menü ...

Страница 14: ... die Timeshift Funktion 13 Ι SLOW Zeitlupenwiedergabe starten Durch Drücken der Play Taste zur norma len Wiedergabe zurückkehren 14 ZOOM Bild vergrößern oder verkleinern 15 AUDIO Audio Spur wählen 16 ROT Im Browser Menü Dateien auswählen Im EPG Menü geplante Aufzeichnungen hinzufügen löschen 17 EPG GRÜN DTV Menü Elektronische Programmzeitschrift anzeigen die DVB T Programme für die nächste Woche w...

Страница 15: ...27 RETURN Zum vorherigen Untermenü zurück kehren 28 ENTER Optionen innerhalb eines Menüs auswählen 29 SETUP Setupmenü anzeigen 30 A B Anfangs und Endpunkt eines zu wiederholenden Abschnitts bestim men 31 GOTO Zu einer bestimmten Stelle im Titel springen Bestimmung der Stelle mit Hilfe von Titel Kapitel und Zeit 32 SUBTITLE Untertiteloptionen einstellen 33 ANGLE Ändern der Kameraperspektive während...

Страница 16: ...p 1080i 1080p Multimedia Wiedergabe Über USB Datenträger internen Kartenleser SD MMC MS MS Pro Festplatte oder Netzwerk RJ45 oder WLAN Filmwiedergabe AVI MKV TS TP TRP M2TS MPG MP4 M4V MOV VOB ISO IFO DAT WMV ASF RM RMVB FLV Audiowiedergabe MP3 OGG WMA WAV AAC FLAC Fotowiedergabe HD JPEG BMP GIF TIF PNG Integrierter DVB T Empfänger Zum Empfang von digitalen TV Programmen Elektronischer Programm Gu...

Страница 17: ... Bei der Inbetriebnahme des Gerätes können Personen und Sachschäden auftreten Beachten Sie die folgenden Sicherheitshinweise um die Gefahren zu vermeiden Verpackungsmaterialien dürfen nicht zum Spielen verwendet werden Es besteht Erstickungsgefahr Beachten Sie die Hinweise zu den Anforderungen an den Aufstellort sowie zum elektrischen Anschluss des Gerätes um Personen und Sachschäden zu vermeiden ...

Страница 18: ...en Sie eine unvollständige oder beschädigte Lieferung umgehend Ihrem Lieferanten Händler Entsorgung der Verpackung Die Verpackung schützt das Gerät vor Transportschäden Die Verpa ckungsmaterialien sind nach umweltverträglichen und entsorgungs technischen Gesichtspunkten ausgewählt und deshalb recyclebar Die Rückführung der Verpackung in den Materialkreislauf spart Roh stoffe und verringert das Abf...

Страница 19: ...werden kann Elektrischer Anschluss Für einen sicheren und fehlerfreien Betrieb des Gerätes sind beim elektrischen Anschluss folgende Hinweise zu beachten Das Gerät wird über den mitgelieferten AC Adapter mit einer Gleichspannung von 12 V versorgt Schließen Sie das Gerät aus schließlich über den mitgelieferten AC Adapter an die Stromver sorgung an Vergleichen Sie vor dem Anschließen des Gerätes die...

Страница 20: ...mputer Schalten Sie das Gerät ein Verbinden Sie den viereckigen Stecker des USB Kabels anhand der Abbildung mit dem Anschluss für USB Geräte USB DEVICE PORT des Gerätes Verbinden Sie den rechteckigen Anschluss des USB Kabels mit dem USB Port Ihres Computers Haben Sie die Verbindung mit dem USB Kabel hergestellt können Sie Inhalte die auf der internen Festplatte des Gerätes wenn eingebaut gespeiche...

Страница 21: ...z B MP3 Player U Disk USB Stick oder USB Speicherplatte an einen der USB Anschlüsse USB Ports des Gerätes an Auf diese Weise können Sie auf die Inhalte eines USB Massenspei chers zugreifen Anschluss einer Memory Card Stecken Sie die Memory Card z B SD MMC MS MS Pro in Pfeilrichtung in den Memory Card Schlitz an der Seite des Gerätes Auf diese Weise können Sie den Inhalt einer Memory Card durchsu c...

Страница 22: ...t der A V IN Buchse Audio Video Eingang des Gerätes Stecken Sie den 3 farbigen Steckverbinder in die Buchse A V OUT in den Audio Video Ausgang Ihres Fernsehers oder Ihres IPTV Internet Protokoll Fernsehens ein Wenn Sie an Ihren Fernseher eine Set Top Box STB anschließen können Sie Fernsehprogramme direkt vom Fernsehen TV oder In ternet Protokoll Fernsehen IPTV aufzeichnen ...

Страница 23: ...hlüsse direkt mit der A V IN Buchse Audio Video Eingang Ihres Fernsehers oder verwen den Sie den mitgelieferten Scartadapter Schließen Sie die 3 farbigen Anschlüsse an den Scartadapter und den Adapter an die Scart Buchse des Fernsehers an Haben Sie die Verbindung über den Audio Video Ausgang hergestellt können Sie die Dateien vom Gerät auf dem Bildschirm des angeschlos senen Fernsehers oder eines ...

Страница 24: ... Buchse Komponenten Ausgang des Gerätes Verbinden Sie die 3 farbigen Anschlüsse anhand der Abbildung mit der Y Pb PR Buchse Komponenten Eingang Ihres Fernseh gerätes HINWEIS Für Tonübertragung Audio Signal können Sie entweder die A V OUT Buchsen Audio Video Ausgang oder den S PDIF COAXIAL Ausgang Koaxial Audio Ausgang oder die OPTICAL Buchse optischen Audio Ausgang nutzen Haben Sie die Verbindung ...

Страница 25: ... HDMI Aus gang sogar im Mehrkanalverfahren mit übertragen Sie brauchen also keine zusätzliche Audio Verbindung zwischen dem Gerät und einem HD Fernseher High Definition TV herzustellen um Ton mit zu übertra gen Qualitativ stellt der HDMI Ausgang die beste Anschlussart dar Verbinden Sie einen Anschluss des HDMI Kabels anhand der Abbildung mit der HDMI Buchse des Gerätes Verbinden Sie den anderen An...

Страница 26: ...se hen an der ANT RF IN Buchse angeschlossen ist Schließen Sie anhand der Abbildung ein koaxiales Fernsehka bel an die RF OUT Buchse an und verbinden Sie dieses Kabel anschließend mit dem Fernsehgerät oder einem anderen DVB T Fernsehempfänger Das Gerät kann das DVB T Fernsehsignal zu einem anderen Fern sehgerät oder Receiver umleiten Auf diese Weise können Sie DVB T Fernsehprogramme wie gewohnt sc...

Страница 27: ...INK Steckverbinder des Lichtwellen leiters in die optische Buchse S PDIF OPTICAL des Gerätes ein Schließen Sie den anderen Steckverbinder des Koaxialkabels oder des Lichtwellenleiters an Ihre Digital Audio Anlage an Auf diese Weise erhalten Sie einen leistungsstarken Dolby Digital DTS oder MPEG Sound Nähere Informationen zur Konfiguration finden Sie im Kapitel Audio einstellungen ändern HINWEIS Da...

Страница 28: ... des Lieferumfangs Schließen Sie den RJ45 Stecker des Netzwerkkabels an die LAN Schnittstelle des Gerätes an Schließen Sie die andere Seite des Netzwerkkabels an die LAN Schnittstelle Ihres Routers Netzknotens Hub oder Switch an WLAN Anschluss Drahtloses Lokales Netzwerk Schalten Sie das Gerät ein Schließen Sie den drahtlosen WLAN USB Dongle an den USB Port USB HOST des Gerätes an Nähere Informati...

Страница 29: ...chalten Nach dem Anschluss an die DC IN Buchse und dem Drücken der EIN AUS Taste an der Vorderseite des Gerätes erscheint auf dem Bild schirm das Hauptmenü und die Betriebsanzeige leuchtet blau HINWEIS Wahlweise können Sie auch die EIN AUS Standby Taste auf der Fernbedienung drücken um das Gerät einzuschalten Ausschalten Nach dem Drücken der EIN AUS Taste auf der Vorderseite des Gerä tes schaltet ...

Страница 30: ...Setup Menü unter Systemeinstellungen ändern Menüsprache ändern Festplatte einbauen Zum Einbau einer Festplatte folgen Sie den Anweisungen der mitge lieferten Kurzanleitung zum Festplatteneinbau HDD Formatierung durchführen Wenn Sie eine neue SATA HDD Festplatte in Ihrem Gerät installie ren möchten folgen Sie vor dem Gebrauch bitte den Anweisungen zur Formatierung Nähere Informationen finden Sie im...

Страница 31: ...nstellungen konfigurieren und nach Ihren Vorstellungen anpassen Setup Menü öffnen und navigieren Drücken Sie entweder die Fernbedienungstaste SETUP oder wählen Sie mit den Navigationstasten das Menü Setup im Hauptmenü um das Einstellungsmenü zu öffnen Drücken Sie die Navigationstasten so oft bis das gewünsch te Untermenü im Auswahlrahmen erscheint Drücken Sie die Navigationstasten um den gewünscht...

Страница 32: ...s digitale Fernsehen aus Drücken Sie die Enter Taste um die Wahl zu bestätigen und die Einstellung zu aktivieren Kanalsuche durchführen Suche nach verfügbaren digitalen Fernsehsendern Wählen Sie das Untermenü TV und den Menüpunkt Kanalsu che wie im Kapitel Setup Menü öffnen und navigieren beschrieben Auf dem Bildschirm erscheint der gewählte Menüpunkt mit den dazu gehörigen Einstellungswerten Eins...

Страница 33: ...automatisch nach verfügbaren DVB T Fernsehsendern Manuelle Suche Im Modus Manuelle Suche können Sie die Optionen CH Name Bandbreite und Eingabefrequenz wählen Führen Sie mit den Navigations und Zifferntasten eine Aus wahl oder Eingabe durch Drücken Sie die Enter Taste zum Bestätigen ...

Страница 34: ...scheint der gewählte Menüpunkt mit den dazu gehörigen Einstellungswerten Einstellungsoptionen Im Menüpunkt Kanaleinstellungen haben Sie die Möglichkeit den Namen und die Sequenz der DVB T Fernsehsender zu bearbeiten Verwenden Sie die Navigationstasten zur Auswahl und Änderung der Einstellungen Drücken Sie die Enter Taste zum Bestätigen HINWEIS Zum Aktivieren der Sortierfunktion drücken Sie die BLA...

Страница 35: ...n die folgenden Optionen zur Verfügung On Wählen Sie diese Option wenn das Audio Signal un verstärkt weitergegeben werden soll Diese Einstellung eignet sich besonders wenn Sie Musik in der Nacht hören weil die Lautstärke relativ niedrig ist Off Wählen Sie diese Einstellung wenn das Audio Signal stärker sein soll Diese Einstellung eignet sich eher für Musikwiedergabe während des Tages weil die Laut...

Страница 36: ... RAW Wählen Sie mit den Navigationstasten den gewünschten Einstellungswert die gewünschte Einstellungsoption Drücken Sie die Enter Taste um die Wahl zu bestätigen und die Einstellung zu aktivieren Videoeinstellungen ändern In diesem Menü können Sie die Wiedergabe für Videodateien konfi gurieren Seitenverhältnis wählen Wählen Sie das Untermenü Video und den Menüpunkt Seiten verhältnis wie im Kapite...

Страница 37: ... zeigt Wählen Sie diese Einstellung wenn Sie das Gerät an einen Breitbildfernseher Wide Screen angeschlossen haben Wenn Sie diese Option für einen normalen Fernseher wählen wird das Bild aufgrund der vertikalen Kompression verformt Wählen Sie mit den Navigationstasten das gewünschte Bildformat Drücken Sie die Enter Taste um die Wahl zu bestätigen und die Einstellung zu aktivieren Helligkeit einste...

Страница 38: ...Kapitel Setup Menü öffnen und navigieren beschrieben Auf dem Bildschirm erscheint der gewählte Menüpunkt Mit den Navigationstasten stellen Sie den Farbton ein Die neuen Einstellungen werden auf dem Bildschirm eingeblendet Drücken Sie die Enter Taste um die Wahl zu bestätigen und die Einstellung zu aktivieren Sättigung einstellen Wählen Sie das Untermenü Video und den Menüpunkt Sät tigung wie im Ka...

Страница 39: ... System Wählen Sie das Untermenü Video und den Menüpunkt SD Video System wie im Kapitel Setup Menü öffnen und navi gieren beschrieben Auf dem Bildschirm erscheint der gewählte Menüpunkt mit den dazu gehörigen Einstellungswerten Einstellungsoptionen Im Menüpunkt SD Video System können Sie den TV Standard des ausgehenden Video Signals das Farbübertragungsverfahren dem angeschlossenen Fernseher anpas...

Страница 40: ...hnen die folgenden Optionen zur Verfügung HQ HIGH QUALITY Entspricht der besten Videoqualität und nimmt den größten Speicherplatz auf der Festplatte in Anspruch SP STANDARD PLAY Entspricht der sehr guten Videoqualität LP LONG PLAY Entspricht der moderaten Videoqualität EP EXTENDED PLAY Entspricht der normalen Videoqualität SLP SUPER LONG PLAY Entspricht der niedrigen Videoqualität nimmt den gering...

Страница 41: ...cken Sie die Enter Taste um die Wahl zu bestätigen Aufnahmegerät auswählen Wählen Sie das Untermenü Aufnahme und den Menüpunkt Aufnahmegerät wie im Kapitel Setup Menü öffnen und navi gieren beschrieben Auf dem Bildschirm erscheint der gewählte Menüpunkt mit den dazu gehörigen Einstellungswerten Einstellungsoptionen Im Menüpunkt Aufnahmegerät können Sie das Zielmedium wählen wo die Aufzeichnungen g...

Страница 42: ...riffe des Gerätes zulässt das Konto GUEST Ihres Computers aktiv freigegeben ist die Dateiordner die Sie auf Ihrem Computer browsen wollen freigegeben sind und EVERYONE oder GUEST die Zugangsrechte zu den Ordnern hat LAN Einrichtung Wählen Sie das Untermenü Netzwerk und den Menüpunkt LAN Einrichtung wie im Kapitel Setup Menü öffnen und navigieren beschrieben Auf dem Bildschirm erscheint der gewählt...

Страница 43: ... IP Adresse Subnetzmaske Standardgateway DNS Server IP Adresse Benutzen Sie die Navigations und Zifferntasten um die Eingaben zu machen Drücken Sie die Enter Taste um die Eingaben zu bestätigen WLAN Einrichtung Bevor Sie mit der Konfiguration eines WLAN Netzwerks anfangen prüfen Sie ob der WLAN USB Adapter an den USB Anschluss Port USB HOST auf der Rückseite des Gerätes angeschlossen ist der draht...

Страница 44: ...Das Gerät kann bis zu drei drahtlose Netzwerkverbindungen spei chern Drücken Sie die Enter Taste um zum nächsten Schritt zu ge langen Drücken Sie die RETURN Taste um abzubrechen Drücken Sie die ΙΙ PLAY PAUSE Taste zum Testen der Verbin dung Es stehen Ihnen zwei Anschlussarten Zugänge zur Verfügung In frastructure AP Infrastruktur Zugang und Peer to Peer Ad Hoc Rechner Rechner Verbindung Wählen Sie...

Страница 45: ...nte SSID Service Set Identifier um das Funknetz eindeutig identifizieren zu können Drücken Sie die Enter Taste um zum nächsten Schritt zu ge langen Drücken Sie die RETURN Taste um abzubrechen Drücken Sie Goto Taste zur Aktualisierung der SSID Liste Die Abkürzungen in der Spalte SECURITY der SSID Liste haben fol gende Bedeutung WEP Wired Equivalent Privacy und WPA Wi Fi Protected Acces weisen darau...

Страница 46: ...Nehmen Sie mit den Navigationstasten eine Auswahl vor Drücken Sie die Enter Taste für die Eingabe Benutzen Sie CAPS zur Umschaltung zwischen Groß und Klein schreibung Benutzen Sie zum Löschen eines Zeichens und zum Ein fügen eines Leerzeichens Benutzen Sie shift um noch mehr Symbole verfügbar zu ma chen Bestätigen Sie mit OK ...

Страница 47: ...c Rechner Rechner Verbindung konfigurie ren Der Peer to Peer Modus Anschluss Ad Hoc Verbindung wird be nutzt um Computer mit einem WLAN Adapter so genannte WLAN Clients ohne Hilfe eines drahtlosen Routers oder einer drahtlosen Anschlussstelle AP zu verbinden Drücken Sie die Enter Taste um zum nächsten Schritt zu ge langen Drücken Sie die RETURN Taste um abzubrechen Drücken Sie die ΙΙ PLAY PAUSE Ta...

Страница 48: ...den verfüg baren Menüsprachen Mit den Navigationstasten wählen Sie Ihre bevorzugte Me nüsprache Drücken Sie die Enter Taste um die Wahl zu bestätigen Einstellung der Textverschlüsselung ändern Im Menüpunkt Textkodierung können Sie Ihr Alphabet Zeichensys tem wählen und als voreingestellt festlegen Wählen Sie das Untermenü System und den Menüpunkt Text codierung wie im Kapitel Setup Menü öffnen und...

Страница 49: ...tualisierung des Systems Wählen Sie das Untermenü System und den Menüpunkt Systemaktualisierung wie im Kapitel Setup Menü öffnen und navigieren beschrieben Auf dem Bildschirm erscheint der gewählte Menüpunkt mit den zur Verfügung stehenden Aktualisierungsmöglichkeiten Wählen Sie die Funktion Aktualisierung des Erweiterungspake tes um die Erweiterungsdateien für NAS und Webserver zu ak tualisieren ...

Страница 50: ... erscheint der gewählte Menüpunkt Mit den Navigationstasten wählen Sie zwischen manueller und automatischer Zeiteinstellung via DTV Manuelle Einstellung Wählen Sie mit den Navigationstasten die einzelnen Einga befelder Stellen Sie mit den Navigationstasten die Zahlenwerte ein Drücken Sie die Enter Taste um die Einstellungen zu bestäti gen und zu aktivieren HINWEIS Sie können auch die Zifferntasten...

Страница 51: ...Menüpunkte Systemsperre Aktivieren oder deaktivieren Sie mit den Navigationstasten die Kindersicherung Bestätigen Sie mit der Enter Taste Region Wählen Sie mit den Navigationstasten die gewünschte Region Bestätigen Sie mit der Enter Taste Passwort Geben Sie mit den Zifferntasten das Passwort ein Geben Sie nun mit den Zifferntasten ein geändertes Passwort ein und wiederholen Sie das geänderte Passw...

Страница 52: ...auswählen Bestätigen Sie mit der Enter Taste HDD Format Festplatte formatieren Im Menüpunkt HDD Format können Sie die eingebaute Festplatte formatieren Wählen Sie das Untermenü System und den Menüpunkt HDD Format wie im Kapitel Setup Menü öffnen und navigieren beschrieben Auf dem Bildschirm erscheint der gewählte Menüpunkt Wählen Sie mit den Navigationstasten den Menüpunkt HDD Format um die Format...

Страница 53: ...tfahren oder die Schaltfläche Cancel wenn Sie die Formatierung nicht durchführen wollen Bestätigen Sie mit der Enter Taste Auf dem Bildschirm erscheint das erste Eingabefenster Step1 wo Sie die Speicherkapazität für das zeitversetzte Fernsehen die Funkti on Timeshift festlegen Stellen Sie mit den Navigationstasten die Speicherkapazität ein Wählen Sie mit den Navigationstasten die Schaltfläche Wei ...

Страница 54: ...nter Taste um die Formatierung der Fest platte zu starten Die Formatierung dauert einige Minuten Ist die Formatierung erfolg reich erscheint eine entsprechende Meldung auf dem Bildschirm Drücken Sie die Enter Taste um das Formatierungsmenü zu verlassen und zum Hauptmenü zurückzukehren Sie können nun die Festplatte ordnungsgemäß als Festplattenrekor der Player oder externes Speichergerät verwenden ...

Страница 55: ...ückgängig machen Wählen Sie das Untermenü System und den Menüpunkt Werkseinstellungen wie im Kapitel Setup Menü öffnen und navigieren beschrieben Auf dem Bild erscheint der gewählte Menüpunkt Wählen Sie mit den Navigationstasten die Option OK um die Werkseinstellungen wiederherzustellen oder die Option Can cel um den Vorgang abzubrechen Drücken Sie die Enter Taste um die Wahl zu bestätigen und die...

Страница 56: ...er können Sie die Zeitabstände innerhalb einer Diaschau einstel len Stellen Sie mit den Navigationstasten die Zeit ein Bestätigen Sie mit der Enter Taste Übergangseffekt Hier können Sie die Übergangseffekte innerhalb einer Diaschau ein stellen Stellen Sie mit den Navigationstasten den gewünschten Übergangseffekt ein Bestätigen Sie mit der Enter Taste Ken Burns Der Ken Burns Effekt bewirkt ein lang...

Страница 57: ...r die Hintergrundmusik bei der Anzei ge von Bildern einstellen Wählen Sie zwischen Aus Ordner oder Wiedergabeliste Wählen Sie die gewünschte Option mit den Navigationstas ten Bestätigen Sie mit der Enter Taste Bildschirmschoner Hier können Sie den Bildschirmschoner aktivieren deaktivieren Aktivieren deaktivieren Sie den Bildschirmschoner mit den Navigationstasten Bestätigen Sie mit der Enter Taste...

Страница 58: ...lgenden Tasten und Funktionen der Fernbedienung sind in die sem Modus verfügbar Taste Funktion Enter Anzeige der Programmliste Navigationstasten Sender umschalten Sender können während der aktiven Aufzeichnung nicht umgeschaltet werden Zifferntasten Eingabe der Sendernummern Bestäti gen Sie die Eingabe mit der Enter Taste REC Aufzeichnung des aktuellen Fernsehpro gramms beginnen TIME SHIFT Timeshi...

Страница 59: ... Bildschirm erscheint eine Liste mit allen Fernseh und Radio programmen Wählen Sie mit den Navigationstasten einen Sender und bestätigen Sie mit der Enter Taste Drücken Sie dieTasten Ι PREV und Ι NEXT um eine Seite nach oben oder unten zu scrollen Informationsleiste Während Sie mit den Navigationstasten Sender umschalten wird eine Informationsleiste mit den Senderinformationen angezeigt ...

Страница 60: ...eine Information Option versenkt erscheint ist die Option ver fügbar Elektronische Programmzeitschrift anzeigen Drücken Sie die EPG Taste während Sie DVB T Fernsehpro gramme anschauen um die elektronische Programmzeitschrift anzuzeigen Zum Sender umschalten drücken Sie die Tasten Ι PREV und Ι NEXT Um das Datum zu ändern drücken Sie die Navigationstas ten Zum Ändern des Programms drücken Sie die Na...

Страница 61: ...ie die TTX Taste um das Teletextmenü aufzurufen HINWEIS Das Teletextmenü kann nur aufgerufen werden wenn das über tragene Programm Teletext unterstützt Mit Hilfe der Navigationstasten und der Zifferntasten können Sie die Inhalte des Teletextmenüs anzeigen ...

Страница 62: ... Navigationstasten einen Untertitel und bestätigen Sie mit der Enter Taste Video In Menü Mit diesem Menü können Sie über die A V IN Buchse an der Rücksei te des Gerätes audiovisuelle Signale wiedergeben oder aufzeichnen oder von der Timeshift Funktion Gebrauch machen Wählen Sie mit den Navigationstasten das Menü Video in AV Eingang im Hauptmenü um das Menü zu öffnen ...

Страница 63: ... Aufnahme im Hauptmenü um das Menü zu öffnen Zeitplan erstellen Wählen Sie mit den Navigationstasten die Option Bearbei ten auf der Menüleiste Auf dem Bildschirm erscheint ein entsprechendes Einstellungsmenü Wählen Sie mit den Navigationstasten den Befehl Einen neuen Zeitplan hinzufügen und drücken Sie die Enter Taste um die Wahl zu bestätigen Mit den Navigationstasten wählen Sie die einzelnen Ein...

Страница 64: ... Täglich Mon Fri Montag bis Freitag Mon Sat Montag bis Samstag oder an einem gewählten Wochentag Gerät Wählen Sie den Speicher für die Aufzeich nung Qualität Wählen Sie eine der folgenden Aufzeich nungsqualitäten HQ SLP EP LP oder SP Je höher die Aufzeichnungsqualität desto mehr Speicherplatz braucht die Aufnahme Links im Menüpunkt Freier HDD Spei cher ist zu sehen wie lange in Minuten das Gerät e...

Страница 65: ...die Enter Taste um die Wahl zu bestätigen Bearbeiten Sie den gewählten Zeitplan wie im vorherigen Kapitel Zeit plan erstellen beschrieben Zeitplan löschen Wählen Sie mit den Navigationstasten die Option Löschen auf der Menüleiste Das Menü mit den Zeitplänen erscheint auf dem Bildschirm Mit den Navigationstasten wählen Sie den Zeitplan den Sie entfernen wollen und drücken Sie die Enter Taste um die...

Страница 66: ...mit den Navigationstasten die Option Status auf der Menüleiste Ein Menü mit den Zeitplänen erscheint auf dem Bildschirm Mit den Navigationstasten wählen Sie den Zeitplan dessen Zustand Sie überprüfen wollen und drücken Sie die Enter Taste um die Wahl zu bestätigen Auf dem Bildschirm erscheint eine Optionsmeldung mit der Sie den Status des ausgewählten Zeitplans ändern können Mit den Navigationstas...

Страница 67: ...en Sie entweder die Fernbedienungstaste BROWSER oder wählen Sie mit den Navigationstasten das Menü Browser im Hauptmenü um das Menü zu öffnen Mit den Navigationstasten wählen Sie das Medium wo die gewünschten Dateien gespeichert werden Sie können eines der verfügbaren Medien wählen USB Angeschlossenes USB Gerät Card Eingesteckte Memory Card HDD Eingebaute Festplatte DVD Angeschlossenes Gerät mit D...

Страница 68: ... un ten zum Auswählen von Geräten Ordnern oder Dateien Navigationstas ten Wählen Sie eine Filteroption Alle Musik Bilder und Videos Ι PREV Ι NEXT Zur vorhergehenden nächsten Seite gehen Enter Ausgewählte Option öffnen oder bestäti gen ROT Dateien im Browser HDD Menü aus wählen GRÜN Ausgewählte Dateien zur Wiedergabeliste hinzufügen RETURN Zum vorhergehenden Menü zurückkeh ren ...

Страница 69: ... eingeblendet Drücken Sie die Navigationstasten um das gewünschte Verzeichnis den gewünschten Dateiordner oder die gewünschte Datei zu wählen Drücken Sie die Enter Taste um den gewählten Ordner zu öffnen oder die gewählte Datei wiederzugeben HINWEIS Nähere Informationen zu den unterstützten Formaten finden Sie in dem Kapitel Technische Daten Musiktitel werden bei der Einstellung des Filters Alle m...

Страница 70: ...rdner oder die gewünschte Musik Datei zu wählen Drücken Sie die Enter Taste um den gewählten Ordner zu öffnen oder die gewählte Musik Datei wiederzugeben Die folgenden Tasten und Funktionen stehen während der Musikwie dergabe zur Verfügung Taste Funktion ΙΙ PLAY PAUSE Wiedergabe starten unterbrechen Fast Rewind Fast Forward Zurück Vorspulen Wählen Sie durch wie derholtes Drücken eine Geschwindigke...

Страница 71: ... Verzeichnis den gewünschten Dateiordner oder die gewünschte Foto Datei zu wählen Drücken Sie die Enter Taste um den gewählten Ordner zu öffnen oder die gewählte Foto Datei wiederzugeben das ge wählte Foto auf dem Bildschirm einzublenden Die folgenden Tasten und Funktionen stehen während der Bildwieder gabe zur Verfügung Taste Funktion ΙΙ PLAY Wiedergabe starten Ι PREV Ι NEXT Vorheriges oder nächs...

Страница 72: ... Menü Sonstiges Video Dateien durchsuchen Mit den Navigationstasten wählen Sie den Menüpunkt Fil me Video Dateien in der oberen Menüleiste Auf dem Bildschirm wird ein Dateiverzeichnis mit allen verfügbaren Video Dateien des gewählten Mediums eingeblendet Drücken Sie die Navigationstasten um das gewünschte Verzeichnis den gewünschten Dateiordner oder die gewünschte Video Datei zu wählen Drücken Sie...

Страница 73: ...lungseinstellungen 1 Alle und Aus ZOOM Bild zoomen vergrößern verkleinern INFO Informationsleiste während der Wiedergabe ein ausblenden GOTO Anzeige des Wiedergabesuchmenüs A B Anfangs und Endpunkt eines zu wiederholen den Abschnitts festlegen ANGLE Ändern der Kameraperspektive während der Wiedergabe von DVDs mit mehren Kamera perspektiven MENU Während der DVD Wiedergabe zum Haupt menü zurückkehre...

Страница 74: ...werk anfangen lesen Sie bitte das Ka pitel Setup Menü Netzwerkeinstellungen konfigurieren und prüfen Sie ob alle Einstellungen Ihres LAN oder WLAN Netzwerks richtig sind Im Browser Menü wählen Sie die Option NET als das Medium wo Sie die Multimedia Dateien browsen wollen Es gibt zwei Möglichkeiten die freigegebenen Multimedia Datei en in einem LAN oder WLAN Netzwerk zu finden Sie können Arbeitsgru...

Страница 75: ...Filme HINWEIS Wenn Sie Video Dateien mit hoher Auflösung Auflösung bis zu 720p 1080i 1080p im LAN oder WLAN Netzwerk browsen kann es bei der Übertragung zum Gerät zu Verzögerungen kommen da die Dateien gepuffert werden Das liegt an der begrenzten Netzwerkgeschwindigkeit oder der Signalstärke und ist ganz normal Unter bestimmten Netzwerk Bedingungen kann es vorkommen dass eine Arbeitsgruppe nicht z...

Страница 76: ... Dateiserver IP ein worauf Sie vom Menü punkt My_Shortcuts zugreifen können Drücken Sie die MENU Taste um ein Kontext Menü zu öffnen Wählen Sie mit den Navigationstasten den Menüpunkt Add Hinzufügen und bestätigen Sie mit der Enter Taste um ein weiteres Kontext Menü zu öffnen ...

Страница 77: ... Menüpunkt zu bestätigen Anschließend wählen Sie die Multimedia Dateien die Sie browsen wollen Audio Video Streaming via UPnP Server Das System verfügt über einen internen UPnP Universal Plug and Play Client welcher es dem Gerät ermöglicht UPnP Mediaserver im Netzwerk automatisch zu erkennen Sie können die Mediadateien auf diesen Servern durchsuchen und kontinuierlich übertragen UPnP Mediaserver a...

Страница 78: ...Ihrer Windows Media Player Bibliothek Öffnen Sie Windows Media Player 11 Um Mediadateien der Bibliothek hinzuzufügen oder zu entfernen klicken Sie auf Bibliothek Bibliothek hinzufügen Erweiterte Einstellungen Klicken Sie auf Bibliothek Medienfreigabe Sie können jetzt Geräten den Zugriff auf die Medienbibliothek erlau ben verbieten Um Ihr Gerät zuzulassen klicken Sie auf Zulassen ...

Страница 79: ...drücken Sie die Enter Taste um die Wahl zu bestätigen Durchsuchen Sie nun die von Windows Media Player 11 freigegebene Medienbibliothek HINWEIS Stellen Sie sicher dass sich Ihr Gerät und Ihr Computer in dem gleichen lokalen Netzwerk und Subnet befinden Firewalls können die Kommunikation Ihres Gerätes mit dem Computer verhindern Öffnen Sie die Anschlüsse manuell und fügen Sie Ihr Gerät zur sicheren...

Страница 80: ...r Taste Wiedergabeliste verwalten Dieses Gerät unterstützt die Wiedergabelistenfunktion Diese Funk tion erlaubt Ihnen Inhalte auf der lokalen Festplatte als Favoriten zu einer Wiedergabeliste Alle Musik Bilder und Filme hinzuzufügen um sie dann zu browsen oder abzuspielen Dateien zur Wiedergabeliste hinzufügen Wählen Sie die Datei die Sie als Favorit zu der Wiedergabeliste hinzufügen möchten Drück...

Страница 81: ...itel Browser Menü öffnen und navigieren beschrieben Mit den Navigationstasten wählen Sie Wiedergabeliste und drücken Sie die Enter Taste um die Wahl zu bestätigen Wählen Sie mit den Navigationstasten zwischen Alle Mu sik Foto und Filme Bestätigen Sie mit der Enter Taste Die Wiedergabeliste wird geöffnet Um eine Datei aus der Wiedergabeliste zu löschen drücken Sie die ROTE Taste Bestätigen Sie mit ...

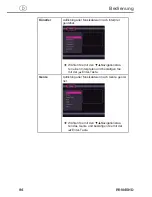
Страница 82: ...atte durchsuchen können Wählen Sie das Menü Media Library im Hauptmenü um das Menü aufzurufen Musikbibliothek Wählen Sie mit den Navigationstasten das Untermenü Musik Wählen Sie mit den Navigationstasten zwischen Aktualisie ren Suchen Alles Künstler Genre und Album Bestätigen Sie mit der Enter Taste Aktualisierung Aktualisierung und Synchronisierung aller auf der internen Festplatte gespeicherten ...

Страница 83: ... Verwenden Sie die Navigations tasten zur Auswahl und bestätigen Sie mit der Enter Taste Wählen Sie OK und drücken Sie erneut die Enter Taste Die von Ihnen gewünschten Dateien werden nun auf dem Bildschirm angezeigt Alle Auflistung aller Musikdateien in der Bibliothek ...

Страница 84: ... nach Interpret geordnet Wählen Sie mit den Navigationstas ten einen Interpreten und bestätigen Sie mit der Enter Taste Genre Auflistung aller Musikdateien nach Genre geord net Wählen Sie mit den Navigationstas ten das Genre und bestätigen Sie mit der Enter Taste ...

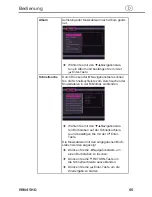
Страница 85: ...chleiste zum Durchsuchen der Musikdateien in der Bibliothek einblenden Wählen Sie mit den Navigationstas ten Buchstaben auf der Schnellsuchleis te und bestätigen Sie mit der Enter Taste Die Musikdateien mit den eingegebenen Buch staben werden angezeigt Drücken Sie die Navigationstaste um einen Buchstaben zu löschen Drücken Sie die RETURN Taste um die Schnellsuchleiste auszublenden Drücken Sie die ...

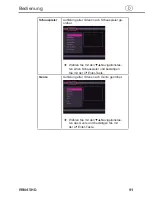
Страница 86: ...en das Untermenü Foto Wählen Sie mit den Navigationstasten zwischen Aktualisie ren Suchen Alles Künstler und Datum Bestätigen Sie mit der Enter Taste Aktualisierung Aktualisierung und Synchronisierung aller auf der internen Festplatte gespeicherten Fotos mit der Bibliothek ...

Страница 87: ...n Verwenden Sie die Navigations tasten zur Auswahl und bestätigen Sie mit der Enter Taste Wählen Sie OK und drücken Sie erneut die Enter Taste Die von Ihnen gewünschten Dateien werden nun auf dem Bildschirm angezeigt Alle Auflistung aller Fotos in der Bibliothek ...

Страница 88: ...leiste zur Vorschau von Fotos in der Bibliothek einblenden Wählen Sie mit den Navigationstas ten Buchstaben auf der Schnellsuchleis te und bestätigen Sie mit der Enter Taste Fotodateien die mit den eingegebenen Buchsta ben beginnen werden angezeigt Drücken Sie die Navigationstaste um einen Buchstaben zu löschen Drücken Sie die RETURN Taste um die Schnellsuchleiste auszublenden Drücken Sie die Ente...

Страница 89: ...n das Untermenü Film Wählen Sie mit den Navigationstasten zwischen Suchen Alle Künstler Schauspieler Genre und Jahr Bestätigen Sie mit der Enter Taste Aktualisierung Aktualisierung und Synchronisierung aller auf der internen Festplatte gespeicherten Videos mit der Bibliothek ...

Страница 90: ... Verwenden Sie die Navigati onstasten zur Auswahl und bestätigen Sie mit der Enter Taste Wählen Sie OK und drücken Sie erneut die Enter Taste Die von Ihnen gewünschten Dateien werden nun auf dem Bildschirm angezeigt Alle Auflistung aller Videos in der Bibliothek ...

Страница 91: ... nach Schauspieler ge ordnet Wählen Sie mit den Navigationstas ten einen Schauspieler und bestätigen Sie mit der Enter Taste Genre Auflistung aller Videos nach Genre geordnet Wählen Sie mit den Navigationstas ten das Genre und bestätigen Sie mit der Enter Taste ...

Страница 92: ...iste zur Vorschau von Videos in der Bibliothek einblenden Wählen Sie mit den Navigationstas ten Buchstaben auf der Schnellsuchleis te und bestätigen Sie mit der Enter Taste Videodateien die mit den eingegebenen Buch staben beginnen werden angezeigt Drücken Sie die Navigationstaste um einen Buchstaben zu löschen Drücken Sie die RETURN Taste um die Schnellsuchleiste auszublenden Drücken Sie die Ente...

Страница 93: ...le Enchanted CD1 AmyAdams Liebe 2007 avi The Dark Knight CD1 ChristianBale Action 2008 avi File Copy Dateien kopieren Im Menü File Copy Dateien kopieren können Sie Dateien und Ord ner zwischen den Wechselspeichergeräten USB Dongle USB Fest platten der Festplatte und dem Netzwerk kopieren und verschieben Drücken Sie entweder die Fernbedienungstaste COPY oder wählen Sie mit den Navigationstasten das...

Страница 94: ... und das Zielmedium worauf die kopierten Dateien gespeichert werden sollen Drücken Sie die Navigationstaste um die Auswahl aufzu heben Drücken Sie die Navigationstaste um den nächsten Schritt zu wählen Wählen markieren Sie mit der ΙΙ PLAY Taste die Quelldateien die Sie kopieren wollen Drücken Sie die Navigationstaste um die Auswahl aufzu heben Drücken Sie die Navigationstaste um den nächsten Schri...

Страница 95: ...Öffnen des Internetradio Menüs wird es einige Sekunden dauern bis die Daten vom Internet heruntergeladen werden Bitte haben Sie einen Augenblick Geduld Nähere Informationen über SHOUTcast finden Sie auf der Web seite www shoutcast com Die folgenden Tasten und Funktionen stehen im Menü Internet Radio zur Verfügung Taste Funktion Navigationstasten Navigieren Sie den Cursor nach oben unten zum Auswäh...

Страница 96: ...ielt einen Sender suchen Wählen Sie den mit den Navigationstasten den Menüpunkt Suchen Eine virtuelle Tastatur erscheint auf dem Bildschirm Geben Sie den Namen des gesuchten Senders ein Nehmen Sie mit den Navigationstasten eine Auswahl vor Drücken Sie die Enter Taste für die Eingabe Benutzen Sie CAPS zur Umschaltung zwischen Groß und Klein schreibung Benutzen Sie zum Löschen eines Zeichens und zum...

Страница 97: ...er WLAN angeschlos sen haben und das Netzwerk zum Gebrauch fertig ist geben Sie den Prompt NAS oder IP Address in das Fenster Ausführen Run ein das Sie im Windows Startmenü öffnen können Wahlweise können Sie den Prompt NAS oder IP Address in das Adressenfeld von Internet Explorer Ihres Computers eingeben Beispielsweise wenn die IP Adresse Ihres Gerätes 192 168 0 9 ist geben Sie den Prompt 192 168 ...

Страница 98: ...u installieren gehen Sie wie folgt vor Kopieren Sie install img oder die Erweiterungsdateien in das Hauptverzeichnis des USB Sticks schließen Sie diesen an den USB PORT des Gerätes an Schalten Sie das Gerät durch Drücken der EIN AUS Taste aus und entfernen Sie das Stromkabel des Netzadapters aus der Buchse DC IN auf der Rückseite des Gerätes Halten Sie die EIN AUS Taste an der Vorderseite des Gerä...

Страница 99: ...kt Benachrichtigen Sie den Kundendienst Fernbedienung funktioniert nicht Falsche Ausrich tung Die Fernbedienung zeigt nicht auf das Gerät Zu weit entfernt Stellen Sie sicher dass die Fernbedienung nicht zu weit vom Gerät entfernt ist Batterien leer Wechseln Sie die Batte rien der Fernbedienung beim Einlegen der neuen Batterien auf richtige Pola rität achten Auf dem Fern sehbildschirm wird kein Bil...

Страница 100: ...rt Schließen Sie alle Programme die eventuell auf die Daten des Gerä tes zugreifen einschließlich Windows Explorer Falls dies nicht hilft schließen Sie bitte alle Programme und warten Sie weitere 20 Sekun den versuchen Sie dann erneut das USB Gerät über den grünen Pfeil zu trennen Falls es dann immer noch nicht funktioniert sollten Sie das Gerät herunterfahren und dann das USB Kabel herausziehen F...

Страница 101: ...age 5 Warum hat das Fernsehgerät während des Betriebs einen kurz blinkenden blauen Bildschirm oder Bildschirmschoner Antwort Dies ist während der Initialisierung des Systems normal Es erstellt die entsprechenden Parameter so dass es die richtigen Videosignale an den Fernseher senden kann Wenn der Fernseher während der Initialisierung falsche Signale erhält oder die Signale nicht stabil sind und da...

Страница 102: ...nö tigt dieser einige Zeit für die Initialisierung Warten Sie bitte 1 2 Minu ten und versuchen Sie dann erneut die SSID Liste zu aktualisieren Frage 9 Ich kann über den Pfad Browser Netzwerk Menü keine auf meinem Computer gemeinsam genutzten Dateien sehen Antwort Überprüfen Sie folgende Sachverhalte Schließen Sie das Gerät an ein Netzwerk an und vergeben Sie zunächst die IP Adresse Aktivieren Sie ...

Страница 103: ...rbindung Wenn Sie mit der deaktivierten Firewall eine Verbindung herstellen können müssen Sie das Gerät eventuell zur zuverlässigen Liste hin zufügen oder die Firewall für den lokalen Intranet Zugang konfigurie ren Deaktivieren Sie im schlimmsten Fall Ihre Firewall lange genug um das Gerät zu verwenden Aktivieren Sie sie dann erneut Frage 11 Ich verwende den 802 11n WLAN Dongle mit einem drahtlose...

Страница 104: ...r so wie in der linken Abbildung dargestellt Wählen Sie das Format JPEG geben Sie den Dateinamen ein und klicken Sie auf das Icon Speichern Nachdem Sie auf Speichern gedrückt haben wird ein neues Fenster geöffnet siehe Abbildung rechts Wählen Sie Grund linie Standard oder Optimierte Grundlinie Klicken Sie auf das Icon OK Frage 13 Warum kann das Gerät die Festplatte nicht finden Antwort Vergewisser...

Страница 105: ...sich bitte an den Kundendienst Lagerung Sollten Sie das Gerät längere Zeit nicht benutzen schalten Sie das Gerät aus trennen Sie es von der Stromversorgung und lagern Sie es an einem sauberen trockenen Ort ohne direkte Sonneneinstrahlung Anhang Support und Kontaktinformationen Bei defekten Produkten Bitte wenden Sie sich bei Produktreklamationen an Ihren Händler oder an die Hama Produktberatung In...

Страница 106: ...che S PDIF Buchse DC IN 12V Unterstützte Dateisysteme FAT FAT32 NTFS EXT3 Unterstützte Formate AVI MKV TS M2TS MPG MP4 MOV M4V VOB ISO IFO DAT WMV ASF RM RMVB FLV Auflösung bis zu 720p 1080i 1080p MP3 OGG WMA WAV AAC FLAC HD JPEG BMP GIF TIF PNG Unterstützte Video Formate MPEG 1 HD MPEG 2 HD MPEG 4 SP ASP AVC H 264 WMV9 VC 1 RealNetworks RM RMVB 8 9 10 bis zu 720p Unterstützte Audio Formate MP2 3 ...

Страница 107: ...ufnahmeformat DTV TS Aufnahmeformat AV IN MPG MPEG2 MP2 Allgemein Stromversorgung 100 240 V AC 50 60 Hz Stromverbrauch AC Adapter 0 5 W Standby 1 W Betrieb ca 20 W Betriebstemperatur 5 C to 35 C 36 F to 95 F Betriebsfeuchtigkeit 5 to 80 RH Festplatte 3 5 SATA HDD Abmessungen BxHxT 230 x 64 x 168 mm Nettogewicht inkl AC Adapter ca 2 1 kg Einsatzbeschränkungen Dieses Gerät darf in Frankreich nur in ...

Страница 108: ...ia playback 122 Integral DVB T receiver 122 Recording function 122 Network functions 123 Miscellaneous 123 Setup and connection 123 Safety precautions 123 Unpacking 123 Scope of supply and transport inspection 124 Disposal of the packaging 124 Demands on the installation location 125 Electrical connection 125 Mains connection 126 Further connections 126 Connection to a computer 126 Connection of a...

Страница 109: ... Browsing music files 176 Browsing photo files 177 Browsing video files 178 Audio and video streaming via network 180 Audio and video streaming via UPnP server 183 Renaming deleting files or folders 186 Managing your playlist 186 Managing and searching for media files 188 Music library 188 Photo library 192 Video library 195 File copy 199 Internet radio 201 Stations 202 Genre 202 Favourites 202 Se...

Страница 110: ...ion contained in this booklet to familiarise yourself quickly with the appliance and be able to make full use of its functions We wish you a lot of pleasure with the appliance Information on this instruction manual This instruction manual forms an integral part of the PRN45HD media player hereinafter referred to as appliance and contains important information on the intended use safety connection ...

Страница 111: ... or use of non approved spare parts Warnings The following warnings are used in the present instruction manual Danger A warning of this category draws attention to an impending dangerous situation If the dangerous situation is not avoided it may lead to serious injury or even death Follow the instructions in this warning to avoid the danger of serious injury or even death WARNING A warning of this...

Страница 112: ...liance for other than its intended purpose The risk has to be borne solely by the appliance owner Copyright This documentation is protected by copyright Any duplication or reprinting in whole or in part and the reproduction of the illustrations even in modified form is permitted only with the writ ten approval of the manufacturer It is forbidden by law to copy broadcast display transmit via cable ...

Страница 113: ... live connections are touched and or the electrical and mechanical configuration is changed Handling batteries WARNING Danger from incorrect use For safe handling of batteries please observe the following safety instructions Do not throw the batteries into a fire Do not short circuit the batteries Do not try to re charge the batteries Check the batteries at regular intervals Leaking battery acid m...

Страница 114: ...Repairs to the appliance during the warranty period may only be carried out by service centres authorised by the manufacturer as the warranty will otherwise be voided in the event of subsequent damage Defective parts may only be replaced with original spare parts Only these parts guarantee that the safety requirements are satisfied Protect the appliance against moisture and the ingress of liquids ...

Страница 115: ...ghts up Blue when the appliance is switched on and Red in standby mode 3 Infrared remote control sensor The remote control sensor receives signals from the remote control Right side of the appliance Memory card slot Slot for insertion of a memory card e g SD MMC MS MS Pro 2 2 x USB HOST A Type Two USB interfaces for connection of USB peripherals e g MP3 player to the appliance 3 USB device B Type ...

Страница 116: ...dio link to an interfaced TV set 4 HDMI HDMI interface High definition multimedia interface for con nection of an HD TV high definition TV picture and sound transmis sion 5 Y Pb PR COMPONENT VIDEO OUT Component output jack for con nection of a TV set picture transmission only 6 A V OUT Output for video right and left audio channel 7 A V IN Input for video right and left audio channel 8 DC IN DC ja...

Страница 117: ...d check the latest information on our website www hama de before reformatting the hard disk A collision can cause a faulty sector to occur on the hard disk Use CHKDSK to repair the hard disk Data backup All data stored on the hard disk can be lost due to an impact electric shock power failure or hard disk formatting Create a backup copy of the hard disk data at regular intervals A backup copy allo...

Страница 118: ...Fast rewind 7 Fast forward 8 ΙΙ Playback pause 9 HOME Main menu 10 Navigation buttons 11 MENU 12 TIME SHIFT 13 Ι SLOW 14 ZOOM 15 AUDIO 16 RED 17 EPG GREEN 18 Mute 19 REC Record 20 COPY 21 MUSIC 22 INFO Info window 23 VOL Volume control 24 Ι Previous 25 STOP 26 Ι Next 27 Return 28 ENTER Confirmation 29 SETUP Settings 30 A B 31 GOTO 32 SUBTITLE 33 ANGLE Camera angle 34 BLUE 35 Teletext yellow ...

Страница 119: ...net 4 NUMERIC BUTTONS Enter channel number and other numerical values 5 REPEAT Select repeat option 1 all random or OFF 6 FAST REWIND Rewind current playback 7 FAST FOR WARD Wind current playback forwards 8 ΙΙ PLAY PAUSE Start interrupt playback 9 HOME Display main menu 10 NAVIGATION BUT TONS Move the cursor up down left and right within a menu 11 MENU Display menu In the browser menu Re name dele...

Страница 120: ... vates the time shift function 13 Ι SLOW Start slow motion playback Return to normal playback by pressing the Play button 14 ZOOM Enlarge or reduce the picture size 15 AUDIO Select the audio track 16 RED In the browser menu Select files In the EPG menu Add delete planned recordings 17 EPG GREEN DTV menu Display electronic programme guide the DVB T programmes for the next week are displayed on the ...

Страница 121: ...TURN Return to the previous sub menu 28 ENTER Select options within a menu 29 SETUP Display setup menu 30 A B Mark the start and end point of a section to be repeated 31 GOTO Jump to a particular point in the title mark the point using title chapter and time 32 SUBTITLE Set subtitle options 33 ANGLE Change the camera perspective during the playback of DVDs with several camera perspectives 34 BLUE ...

Страница 122: ...p 1080i 1080p Multimedia playback Via USB data media internal card scanner SD MMC MS MS Pro hard disk or network RJ45 or WLAN Film playback AVI MKV TS TP TRP M2TS MPG MP4 M4V MOV VOB ISO IFO DAT WMV ASF RM RMVB FLV Audio playback MP3 OGG WMA WAV AAC FLAC Photo playback HD JPEG BMP GIF TIF PNG Integral DVB T receiver For reception of digital TV programmes Electronic programme guide EPG Teletext Sub...

Страница 123: ...autions Danger Personal injuries and property damage may occur when start ing up the appliance Observe the following safety precautions to avoid the dangers Packaging materials must not be used as toys Risk of suffoca tion Observe the information on the demands on the installation lo cation and on the electrical connection of the appliance to avoid personal injury and material damage Unpacking Rem...

Страница 124: ... Report an incomplete or damaged delivery to your supplier dealer immediately Disposal of the packaging The packaging protects the appliance from transport damage The packaging materials have been selected according to environmental and waste disposal aspects and can therefore be recycled The return of the packaging to the material cycle helps conserve raw materials and reduces the production of w...

Страница 125: ...n an emergency Electrical connection For safe and trouble free operation of the appliance the following in structions have to be observed for the electrical connection The appliance is supplied with a DC voltage of 12 V via the AC adapter supplied Connect the appliance to the mains power sup ply only via the AC adapter supplied Before connecting the appliance compare the connection data of the AC ...

Страница 126: ...n to a computer Switch on the appliance Connect the square plug of the USB cable to the USB device port USB DEVICE PORT of the appliance as shown in the figure Connect the rectangular plug of the USB cable to the USB Port of your computer When you have made the connection with the USB cable you can manage the contents on the internal hard disk of the appliance if in stalled via your local PC ...

Страница 127: ...e device e g MP3 player U disk USB stick or USB storage disk to one of the USB ports of the appliance In this way you can access the contents of a USB mass storage de vice Connection of a memory card Push the memory card e g SD MMC MS MS Pro into the memory card slot on the side of the appliance in the direction of the arrow In this way you can browse the contents of a memory card ...

Страница 128: ... to the A V IN jack audio video input of the appliance as shown in the figure Connect the 3 coloured plug to the A V OUT jack audio video output of your TV set or IPTV Internet protocol TV If you connect a set top box STB to your television you can record TV programmes directly from the television TV or Internet protocol TV IPTV ...

Страница 129: ...nnect the 3 coloured plugs directly to the A V IN jack audio video input of your TV or use the Scart adapter supplied Con nect the 3 coloured plugs to the Scart adapter and the Scart adapter to the Scart jack of the TV When you have made the connection via the audio video output you can play back the files from the appliance on the screen of the con nected TV or of another video appliance ...

Страница 130: ...k component output of the appliance as shown in the figure Connect the 3 coloured plugs to the Y Pb PR jack component input of your TV set as shown in the figure NOTE For audio transmission audio signal you can use either the A V OUT jacks audio video output or the S PDIF COAXIAL output coaxial audio output or the OPTICAL jack optical audio output When you have made the connection via the componen...

Страница 131: ...transmitted together with the video signals via the HDMI output You therefore need no additional audio connection between the appliance and an HD television high definition TV to transmit the sound The HDMI output represents the connection type with the highest quality Connect one end of the HDMI cable to the HDMI jack of the ap pliance as shown in the figure Connect the other end of the HDMI cabl...

Страница 132: ...e antenna for the DVB T television is connected to the ANT RF IN jack Connect a coaxial TV cable to the RF OUT jack as shown in the figure and then connect this cable to the TV set or another DVB T TV receiver The appliance can redirect the DVB T TV signal to another TV set or receiver In this way you can watch the DVB T TV programmes as nor mal while the appliance records another DVB T programme ...

Страница 133: ...ply plug the TOSLINK connector of the optical waveguide into the S PDIF OPTICAL jack of the appliance Connect the other plug of the coaxial cable or the optical waveguide to your digital audio system In this way you obtain a powerful Dolby Digital DTS or MPEG sound Further information on the configuration can be found in chapter Changing audio settings NOTE The coaxial cable or optical waveguide a...

Страница 134: ... not part of the scope of supply Connect the RJ45 plug of the network cable to the LAN interface of the appliance Connect the other end of the network cable to the LAN interface of your router network hub or switch WLAN connection Wireless local network Switch on the appliance Connect the wireless WLAN USB dongle to the USB HOST port of the appliance Further information on the wireless setup can b...

Страница 135: ... Switching on After connecting the cable to the DC IN jack and pressing the ON OFF button on the front of the appliance the main menu appears on the screen and the indicator lamp lights up blue NOTE Alternatively you can also press the ON OFF standby but ton on the remote control to switch on the appliance Switching off After pressing the ON OFF button on the front of the appliance the appliance s...

Страница 136: ...pter Setup menu under Changing system settings Change menu language Installing a hard disk For installation of a hard disk follow the instructions in the supplied quick start guide on hard disk installation Carrying out HDD formatting If you wish to install a new SATA HDD hard disk in your appliance please observe the instructions on formatting before use Further in formation can be found in chapt...

Страница 137: ...cording network and system settings and adapt them to your wishes Opening setup menu and navigation Either press the SETUP button on the remote control or select the menu Setup in the main menu using the navigation buttons to open the settings menu Press the navigation buttons until the desired sub menu is displayed in the selection box Press the navigation buttons to select the desired menu item ...

Страница 138: ...using the navigation buttons Press the Enter button to confirm the selection and activate the setting Carry out channel search Search for available digital TV channels Select the sub menu TV and the menu item Channel search as described in chapter Opening setup menu and naviga tion The selected menu item with the corresponding setting values setting options appears on the screen Select Search run ...

Страница 139: ... system automatically searches for available DVB T TV channels Manual search In Manual search mode you can select the options CH name Bandwidth and Input frequency Carry out a selection or input using the navigation and numeric buttons Press the Enter button to confirm ...

Страница 140: ... tion The selected menu item with the corresponding setting values setting options appears on the screen Under the menu item Channel settings you can edit the names and the sequence of the DVB T TV channels Use the navigation buttons to select and change the settings Press the Enter button to confirm NOTE Press the BLUE button on the remote control to activate the sorting function ...

Страница 141: ...dio signal The following options are available here On Select this option if the audio signal is to be transmitted unamplified This setting is particularly suitable if you wish to listen to music at night because the volume is relatively low Off Select this setting if the audio signal is to be stronger This setting is more suitable for music playback during the day because the volume is high Comfo...

Страница 142: ...I RAW SPDIF LPCM SP DIF RAW Select the desired setting value desired setting option using the navigation buttons Press the Enter button to confirm the selection and activate the setting Changing video settings In this menu you can configure the playback for video files Selecting the aspect ratio Select the sub menu Video and the menu item Aspect ratio as described in chapter Opening setup menu and...

Страница 143: ...as a full screen picture Select this setting if you have connected the appliance to a wide screen TV set If you select this option for a normal TV set the picture will be distorted due to the vertical com pression Select the desired picture format using the navigation but tons Press the Enter button to confirm the selection and activate the setting Setting the brightness Select the sub menu Video ...

Страница 144: ...as de scribed in chapter Opening setup menu and navigation The selected menu item appears on the screen Set the tint using the navigation buttons The new settings are displayed on the screen Press the Enter button to confirm the selection and activate the setting Setting the colour saturation Select the sub menu Video and the menu item Colour satu ration as described in chapter Opening setup menu ...

Страница 145: ... selection SD video system Select the sub menu Video and the menu item SD video system as described in chapter Opening setup menu and navigation The selected menu item with the corresponding setting values setting options appears on the screen Under menu item Video system you can adapt the TV standard of the outgoing video signal the colour transmission system to the con nected TV set The followin...

Страница 146: ...y The following options are available here HQ HIGH QUALITY Corresponds to the best video quality and takes up the most memory space on the hard disk SP STANDARD PLAY Corresponds to a very good video quality LP LONG PLAY Corresponds to a moderate video quality EP EXTENDED PLAY Corresponds to the normal video quality SLP SUPER LONG PLAY Corresponds to a lower video quality and takes up the least mem...

Страница 147: ...tion buttons Press the Enter button to confirm the selection Select the recording device Select the sub menu Recording and the menu item Record ing device as described in chapter Opening setup menu and navigation The selected menu item with the corresponding setting values setting options appears on the screen Under menu item Recording device you can select the target me dium where the recordings ...

Страница 148: ...ermits access to the appliance The GUEST account of your computer is active enabled The file folders you wish to browse on your computer are ena bled and EVERYONE or GUEST has access rights to the folders LAN setup Select the sub menu Network and the menu item LAN setup as described in chapter Opening setup menu and naviga tion The selected menu item with the corresponding setting values setting o...

Страница 149: ...is you have to enter the following data IP address subnet mask standard gateway DNS server IP address Use the navigation button and numeric keys to make the inputs Press the Enter button to confirm the inputs WLAN setup Before you start the configuration of a WLAN network check that The WLAN USB adapter is connected to the USB HOST port on the rear of the appliance The wireless router or the acces...

Страница 150: ...en The appliance can save up to three wireless network connections Press the Enter button to proceed to the next step Press the RETURN key to abort the setting Press the ΙΙ PLAY PAUSE button to test the connection Two types of connection access are available here Infrastructure AP Infrastructure access and peer to peer ad hoc Computer to computer connection Select one of the connections and confir...

Страница 151: ...t Identifier in order to be able to unambigu ously identify the wireless network Press the Enter button to proceed to the next step Press the RETURN key to abort the setting Press the Goto button to refresh the SSID list The abbreviations in the column SECURITY of the SSID list have the following meaning WEP Wired Equivalent Privacy and WPA Wi Fi Protected Access indicate that a network is encrypt...

Страница 152: ...via the virtual keyboard Make your selection using the navigation buttons Press the Enter button for the input Press CAPS to switch between capital and small letters Press to delete a character and to insert a space Press Shift to make more symbols available Confirm the input with OK ...

Страница 153: ... the screen Peer to peer ad hoc Configuring a computer to computer con nection The peer to peer mode access ad hoc connection is used to connect computers with a WLAN adapter WLAN clients without the use of a wireless router or wireless access point AP Press the Enter button to proceed to the next step Press the RETURN key to abort the setting Press the ΙΙ PLAY PAUSE button to test the connection ...

Страница 154: ...nu languages appears on the screen Select your preferred menu language using the navigation buttons Press the Enter button to confirm the selection Changing the text encryption setting Under the menu item Text encryption you can select your alphabet character system and set it as the default Select the sub menu System and the menu item Text en cryption as described in chapter Opening setup menu an...

Страница 155: ... button to confirm the selection Upgrading the system Select the sub menu System and the menu item System update as described in chapter Opening setup menu and navigation The selected menu item with the available update possibilities appears on the screen Select the function Update the expansion package to update the expansion files for NAS and web server Select System update to update the firmwar...

Страница 156: ...igation The selected menu item appears on the screen Choose between manual and automatic time setting via DTV using the navigation buttons Manual setting Select the individual input fields using the navigation but tons Set the numerical values using the navigation buttons Press the Enter button to confirm and activate the settings NOTE You can also use the numeric buttons on the remote control for...

Страница 157: ...on the screen System lock Activate or deactivate the child safety system using the navigation buttons Confirm the input with the Enter button Region Select the desired region using the navigation buttons Confirm the selection with the Enter button Password Enter the password with the numeric buttons Now enter a new password with the numeric buttons and repeat the new password as confirmation Confi...

Страница 158: ...on buttons Confirm the selection with the Enter button HDD format Format hard disk Under the menu item HDD Format you can format the installed hard disk Select the sub menu System and the menu item HDD format as described in chapter Opening setup menu and naviga tion The selected menu item appears on the screen Select the the menu item HDD Format using the naviga tion buttons to start the formatti...

Страница 159: ...ting the hard disk or the button Cancel if you do not wish to carry out formatting Confirm the selection with the Enter button The first input window Step1 appears on the screen where you set the memory capacity for time shift viewing the time shift function Set the memory capacity using the navigation buttons Select the button Next using the navigation buttons and confirm the selection with the E...

Страница 160: ...he Enter button to start the formatting of the hard disk Formatting takes a few minutes When formatting has been success fully completed a corresponding message appears on the screen Press the Enter button to quit the formatting menu and return to the main menu You can now use the hard disk in the normal manner as a hard disk recorder player or external storage device ...

Страница 161: ...et all later changes Select the sub menu System and the menu item Works settings as described in chapter Opening setup menu and navigation The selected menu item appears on the screen Select the option OK using the navigation buttons to restore the works settings or the option Cancel to abort the procedure Press the Enter button to confirm the selection and to restore the works settings Miscellane...

Страница 162: ...u can set the time intervals between slides in a slide show Set the time using the navigation buttons Confirm the setting with the Enter button Transition effect Here you can set the transition effects between slides in a slide show Set the desired transition effect using the navigation but tons Confirm the setting with the Enter button Ken Burns The Ken Burns effect creates a gradual zooming in d...

Страница 163: ...ns for the background music during the dis play of pictures Choose between OFF Folder or Playlist Select the desired option using the navigation buttons Confirm the selection with the Enter button Screensaver Here you can activate deactivate the screensaver Activate deactivate the screensaver using the navigation buttons Confirm the selection with the Enter button Film preview Here you can activat...

Страница 164: ...ng buttons and functions of the remote control are available in this mode Button Function Enter Displays the programme list Navigation but tons Change channels Channels cannot be changed during the active recording Numeric buttons Enter the channel numbers Confirm the input with the Enter button REC Start the recording of the current TV programme TIME SHIFT Activate the time shift function SUBTITL...

Страница 165: ...mbers and names A list of all the TV and radio programmes appears on the screen Select a channel using the navigation buttons and confirm with the Enter button Press the buttons Ι PREV and Ι NEXT to scroll one page up or down Information bar While switching channels using the navigation buttons an infor mation bar with the station information is displayed ...

Страница 166: ...HD high definition If information an option is displayed embedded the option is avail able Displaying electronic programme guide Press the EPG button while watching DVB T TV programmes to display the electronic programme guide EPG To change channels press the buttons Ι PREV and Ι NEXT To change the date press the navigation buttons To change the programme press the navigation buttons Using the MEN...

Страница 167: ...menu Press the TTX button to call up the teletext menu NOTE The teletext menu can only be called up when the transmitted programme supports teletext Use the navigation buttons and the numeric buttons to dis play the contents of the teletext menu ...

Страница 168: ...title using the navigation buttons and confirm the selection with the Enter button Video In menu Under this menu item you can play back or record audiovisual signals or use the time shift function via the A V IN jack on the rear of the ap pliance Select the menu Video in AV input in the main menu using the navigation buttons to open the menu ...

Страница 169: ...e main menu using the navigation buttons to open the menu Create recording plan Select the option Edit in the menu bar using the navigation buttons A corresponding setting menu appears on the screen Select the command Add a new recording plan using the navigation buttons and press the Enter button to confirm the selection Select the individual input fields using the navigation but tons Set the ind...

Страница 170: ...y day Mon Fri Mon Sat or on a selected day of the week Device Select the memory for the recording Quality Select one of the following recording quali ties HQ SLP EP LP or SP The higher the recording quality the more memory space the recording requires On the left under menu item Free HDD memory you can see how long in minutes the appliance will record a pro gramme with a given recording quality Ni...

Страница 171: ...e Enter button to confirm the selec tion Edit the selected recording plan as described in the previous section Create recording plan Delete recording plan Select the option Delete in the menu bar using the naviga tion buttons The menu with the recording plans appears on the screen Select the recording plan you wish to delete using the navigation buttons and press the Enter button to confirm the se...

Страница 172: ...g plan Select the option Status in the menu bar using the naviga tion buttons A menu with the recording plans appears on the screen Select the recording plan whose status you wish to check using the navigation buttons and press the Enter button to confirm the selection An option message appears on the screen with which you can change the status of the selected recording plan Using the navigation b...

Страница 173: ...navigation Either press the BROWSER button on the remote control or select the menu Browser in the main menu using the navi gation buttons to open the menu Using the navigation buttons select the medium where the desired files are stored You can select one of the available media USB Interfaced USB device Card Inserted memory card HDD Installed hard disk DVD Interfaced device with DVD Network Netwo...

Страница 174: ...n button Move the cursor up or down to select devices folders or files Navigation but tons Select a filter option All music photos and videos Ι PREV Ι NEXT Go to previous next page Enter Open or confirm the selected option RED Select files in browser HDD menu GREEN Add selected files to the playlist RETURN Return to the previous menu ...

Страница 175: ...dium is displayed on the screen Press the navigation buttons to select the desired directory the desired file folder or the desired file Press the Enter button to open the selected folder or to play back the selected file NOTE Further information on the supported formats can be found in the chapter Technical data Music titles may possibly not be played back continuously with the filter setting All...

Страница 176: ...ory the desired file folder or the desired music file Press the Enter button to open the selected folder or to play back the selected music file The following buttons and functions are available during the music playback Button Function ΙΙ PLAY PAUSE Start interrupt playback Fast Rewind Fast Forward Wind forward back Select the speed by pressing the button repeatedly REPEAT Repeat settings 1 All a...

Страница 177: ...to select the desired directory the desired file folder or the desired photo file Press the Enter button to open the selected folder or to play back the selected photo file to display the selected photo on the screen The following buttons and functions are available during the photo playback Button Function ΙΙ PLAY Start playback Ι PREV Ι NEXT Display previous or next photo Navigation but tons Tur...

Страница 178: ...usic in chapter Setup menu Miscellaneous Browsing video files Select the menu item Films video files in the upper menu bar using the navigation buttons A file directory with all the available video files on the selected medium is displayed on the screen Press the navigation buttons to select the desired directory the desired file folder or the desired video file Press the Enter button to open the ...

Страница 179: ...ngs 1 All and OFF ZOOM Zoom picture enlarge reduce INFO Display hide the information list during the playback GOTO Displays the playback search menu A B Mark the start and end point of a section to be repeated ANGLE Change the camera perspective during the playback of DVDs with several camera per spectives MENU Return to the main menu during the DVD playback AUDIO Change the audio track during the...

Страница 180: ...AN network please read the chapter Setup menu Configure network settings and check whether all the set tings of your LAN or WLAN network are correct In the browser menu select the option NET as the medium where you wish to browse the multimedia files There are two ways of finding the shared multimedia files on a LAN or WLAN network You can browse the work group to which your computer belongs or us...

Страница 181: ... g under menu item Films NOTE If you browse video files with high definition definition up to 720p 1080i 1080p in the LAN or WLAN network there can be delays during the transfer to the appliance as the files are buff ered This is due to the limited network speed or signal strength and is quite normal Under certain network conditions it is possible that a work group is not accessible or does not ap...

Страница 182: ... Specific file server IP which you can access from the menu item My_Shortcuts Press the MENU button to open a context menu Select the menu item Add using the navigation buttons and confirm the selection with the Enter button to open a further context menu ...

Страница 183: ...les you wish to browse Audio and video streaming via UPnP server The system has an internal UPnP Universal Plug and Play client that enables the appliance to automatically detect UPnP media servers in the network You can browse the media files on these servers and continuously transfer them Installing a UPnP media server on your computer There is a wide range of free and commercial UPnP server sof...

Страница 184: ...ents of your Windows Media Player library from any where in your house Start Windows Media Player 11 To add media files to or remove media files from the library click Library Add library Extended settings Click Library Media sharing You can now enable or bar appliances for access to the media library To enable your appliance click Enable ...

Страница 185: ... select the UPnP Server and press the Enter button to confirm the selection Now browse the media library shared by Windows Media Player 11 NOTE Ensure that your appliance and your computer are in the same local network and same subnet Firewalls can block the communication between your appliance and the computer Open the connections manually and add you appliance to the reliable list or deactivate ...

Страница 186: ...nfirm the selection with the Enter button Managing your playlist This appliance supports the playlist function This function allows you to compile contents on the local hard disk as favourites in a playlist all music photos and films before browsing or playing back Adding files to the playlist Select the file you wish to add to the playlist as a favourite Press the RED button to mark with file wit...

Страница 187: ...cribed in chapter Opening browser menu and navigation Select Playlist using the navigation buttons and press the Enter button to confirm the selection Select between All Music Photo and Films using the navigation buttons Confirm the selection with the Enter button The playlist is opened To delete a file from the playlist press the RED button Confirm with the GREEN button ...

Страница 188: ...nal hard disk Select the menu Media Library in the main menu to call up the menu Music library Select the sub menu Music using the navigation buttons Select between Update Search All Artist Genre and Album using the navigation buttons Confirm the selection with the Enter button Update Updating and synchronising all the music files stored on the internal hard disk with the library ...

Страница 189: ...r music files by title Use the navigation buttons for your selection and confirm with the Enter button Select OK and press the Enter but ton again The found files are now displayed on the screen All List of all the music files in the library ...

Страница 190: ...he music files arranged by artist Select an artist using the navigation buttons and confirm with the Enter button Genre List of all the music files arranged by genre Select the genre using the naviga tion buttons and confirm with the Enter button ...

Страница 191: ... button you can display the quick search bar for searching for music files in the library Select letters on the quick search bar using the navigation buttons and confirm with the Enter button The music files with the entered letters are displayed Press the navigation button to delete a letter Press the RETURN button to hide the quick search bar again Press the Enter button to start the playback ...

Страница 192: ...u Photo using the navigation buttons Select between Update Search All Artist and Date us ing the navigation buttons Confirm the selection with the Enter button Update Updating and synchronising all the photos stored on the internal hard disk with the library ...

Страница 193: ...ch for photos by title Use the navigation buttons for your selection and confirm with the Enter button Select OK and press the Enter but ton again The found files are now displayed on the screen All List of all the photos in the library ...

Страница 194: ...utton you can display a quick search bar for previewing photos in the library Select letters on the quick search bar using the navigation buttons and confirm with the Enter button Photo files beginning with the entered letters are displayed Press the navigation button to delete a letter Press the RETURN button to hide the quick search bar again Press the Enter button to start the playback ...

Страница 195: ...Film using the navigation buttons Select between Search All Artist Actor Genre and Year using the navigation buttons Confirm the selection with the Enter button Update Updating and synchronising all the videos stored on the internal hard disk with the library ...

Страница 196: ...ch for videos by title Use the navigation buttons for your selection and confirm with the Enter button Select OK and press the Enter but ton again The found files are now displayed on the screen All List of all the videos in the library ...

Страница 197: ...all the videos arranged by actor Select an actor using the navigation buttons and confirm with the Enter button Genre List of all the videos arranged by genre Select the genre using the naviga tion buttons and confirm with the Enter button ...

Страница 198: ...tton you can display the quick search bar for previewing videos in the library Select letters on the quick search bar using the navigation buttons and confirm with the Enter button Video files beginning with the entered letters are displayed Press the navigation button to delete a letter Press the RETURN button to hide the quick search bar again Press the Enter button to start the playback ...

Страница 199: ...xamples Enchanted CD1 AmyAdams Love 2007 avi The Dark Knight CD1 ChristianBale Action 2008 avi File copy Under menu item File Copy you can copy and shift files and folders between the interchangeable storage devices USB dongle USB hard disks the hard disk and the network Either press the COPY button on the remote control or select the menu File Copy in the main menu using the navigation buttons to...

Страница 200: ...he target medium on which the copied files are to be stored us ing the navigation buttons Press the navigation button to cancel the selection Press the navigation button to select the next step Select mark the source files you wish to copy using the ΙΙ PLAY button Press the navigation button to cancel the selection Press the navigation button to select the next step Select the target folder in whi...

Страница 201: ...en the Internet radio menu is opened for the first time it will take a few seconds for the data to be downloaded from the Internet Please be patient for a few moments Further information on SHOUTcast can be found on the website www shoutcast com The following buttons and functions are available in the menu Internet Radio Button Function Navigation but tons Move the cursor up or down to select radi...

Страница 202: ...s Search Here you can search for a specific station Select the menu item Search using the navigation buttons A virtual keyboard appears on the screen Enter the name of the de sired station Make your selection using the navigation buttons Press the Enter button for the input Press CAPS to switch between capital and small letters Press to delete a character and to insert a space Press Shift to make ...

Страница 203: ... connected the appliance to a LAN or WLAN and the network is ready for use enter the prompt NAS or IP ad dress in the Run window that you can open in the Windows start menu Alternatively you can enter the prompt NAS or IP address in the address field of Internet Explorer on your computer For example if the IP address of your appliance is 192 168 0 9 enter the prompt 192 168 0 9 or NAS and click th...

Страница 204: ...tall a new firmware version Copy the file install img or the expansion files to the main direc tory of the USB stick then connect the stick to the USB port of the appliance Switch off the appliance by pressing the ON OFF button and disconnect the power cable of the mains adapter from the DC IN jack on the rear side of the appliance Keep the ON OFF button on the front of the appliance pressed do no...

Страница 205: ... defective Contact After Sales Serv ice Remote control does not func tion Pointing the wrong way The remote control is not pointing towards the ap pliance Too far away Ensure that the remote control is not too far away from the appliance Batteries dis charged Change the batteries in the remote control pay attention to correct polarity when inserting the new batteries No picture ap pears on the TV ...

Страница 206: ...What can I do Answer Close all programs that may be accessing data on the device includ ing Windows Explorer If this does not help please close all the pro grams and wait another 20 seconds then try to disconnect the USB device again by clicking the green arrow If that still doesn t help switch off the appliance and then disconnect the USB cable Question 2 File and folder names exist that I have n...

Страница 207: ... filter e g photos music or films Question 5 Why does the TV set have a briefly flashing blue screen or screen saver during operation Answer This is normal during initialisation of the system It creates the corre sponding parameters so that it can transmit the right video signals to the TV set If the TV set receives wrong signals during initialisation or the signals are not stable and hence flicke...

Страница 208: ...the WLAN USB adapter is connected to the appliance it takes a short time for the initialisation Please wait 1 or 2 minutes and then try to refresh the SSID list again Question 9 I can see no shared files on my computer via the path Browser Network menu Answer Please check the following Connect the appliance to a network and then first assign the IP address Activate NetBIOS of TCP IP on your comput...

Страница 209: ...terrupt the connection If you can make a connection with the firewall deactivated you may have to add the appliance to the trusted list or configure the firewall for the local Intranet access In the worst case deactivate your firewall as long as necessary to allow the appliance to be used Then activate it again Question 11 I am using the 802 11n WLAN dongle with a wireless 802 11n router Why is th...

Страница 210: ...select the function File and subsequently Save as as shown in the left hand figure Select the JPED format enter the file name and click the Save icon After clicking Save a new window is opened as shown in the figure on the right Select Baseline standard or Opti mised baseline Click the OK icon Question 13 Why can t the appliance find the hard disk Answer Ensure that the firmware is correctly insta...

Страница 211: ...e Storage If you do not intend to use the appliance for a longer period of time switch off the appliance and disconnect it from the power supply and keep it in a clean and dry location without direct exposure to sunlight Annex Support and contact information For defective products In the event of product complaints please contact your dealer or the Hama product support Internet World Wide Web Prod...

Страница 212: ...cal S PDIF jack DC IN 12V Supported file systems FAT FAT32 NTFS EXT3 Supported formats AVI MKV TS M2TS MPG MP4 MOV M4V VOB ISO IFO DAT WMV ASF RM RMVB FLV definition up to 720p 1080i 1080p MP3 OGG WMA WAV AAC FLAC HD JPEG BMP GIF TIF PNG Supported video formats MPEG 1 HD MPEG 2 HD MPEG 4 SP ASP AVC H 264 WMV9 VC 1 RealNetworks RM RMVB 8 9 10 up to 720p Supported audio formats MP2 3 OGG Vorbis WMA ...

Страница 213: ...TV recording format TS AV IN recording format MPG MPEG2 MP2 General Power supply 100 240 V AC 50 60 Hz Current consumption AC adapter 0 5 W Standby 1 W Operation approx 20 W Operating temperature 5 C to 35 C 36 F to 95 F Humidity during operation 5 to 80 RH Hard disk 3 5 SATA HDD Dimensions WxHxD 230 x 64 x 168 mm Net weight incl AC adapter approx 2 1 kg Operation restrictions This appliance may o...

Страница 214: ...e restrictions translate to certain responsibilities for you if you distribute copies of the software or if you modify it For example if you distribute copies of such a program whether gratis or for a fee you must give the recipients all the rights that you have You must make sure that they too receive or can get the source code And you must show them these terms so they know their rights We prote...

Страница 215: ...hole which is a work based on the Program the distribution of the whole must be on the terms of this License whose permissions for other licensees extend to the entire whole and thus to each and every part regardless of who wrote it Thus it is not the intent of this section to claim rights or contest your rights to work written entirely by you rather the intent is to exercise the right to control ...

Страница 216: ...icense would not permit royalty free redistribution of the Program by all those who receive copies directly or indirectly through you then the only way you could satisfy both it and this License would be to refrain entirely from distribution of the Program If any portion of this section is held invalid or unenforceable under any particular circumstance the balance of the section is intended to app...

Страница 217: ... YOU SHOULD THE PROGRAM PROVE DEFECTIVE YOU ASSUME THE COST OF ALL NECESSARY SERVICING REPAIR OR CORRECTION IN NO EVENT UNLESS REQUIRED 12 BY APPLICABLE LAW OR AGREED TO IN WRITING WILL ANY COPYRIGHT HOLDER OR ANY OTHER PARTY WHO MAY MODIFY AND OR REDISTRIBUTE THE PROGRAM AS PERMITTED ABOVE BE LIABLE TO YOU FOR DAMAGES INCLUDING ANY GENERAL SPECIAL INCIDENTAL OR CONSEQUENTIAL DAMAGES ARISING OUT O...

Страница 218: ...ijen op het einde van gebruik in te dienen bij openbare verzamelplaatsen speciaal opgezet voor dit doeleinde of bij een verkooppunt Verdere specificaties aangaande dit onderwerp zijn omschreven door de nationale wet van het betreffende land Dit symbool op het product de gebruiksaanwijzing of de verpakking duidt erop dat het product onderworpen is aan deze richtlijnen Door te recycleren hergebruike...

Страница 219: ...ать электрические и электронные приборы а также батареи и аккумуляторы после их использования в специально предназначенных для этого пунктах сбора либо в пунктах продажи Детальная регламентация этих требований осуществляется соответствующим местным законодательством Необходимость соблюдения данных предписаний обозначается особым значком на изделии инструкции по эксплуатации или упаковке При перера...

Страница 220: ...ser utilizado em espaços fechados A declaração de conformidade segundo a directiva R TTE 99 5 CE è pode ser consultada em www hama com o Dit toestel mag in Frankrijk alleen in droge en gesloten ruimtes gebruikt worden De conformiteitsverklaring conform de R TTE richtlijn 99 5 EG vindt u onder www hama com u Заявление о соответствии товара нормам R TTE 99 5 EG см на веб узле www hama com i In Franc...

Отзывы: