Confidential
9
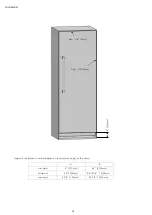
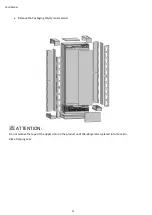
There is a stainless steel door and stainless kick plate option. Please consult the authored service.
Ventilation:
Vent holes where the air enters and exits the unit must not be blocked or obstructed. In addition, you must
periodically clean the dust and dirt that accumulate on these holes in time.
Electrical Connection:
•
Never use an extension cable.
•
The power socket must definitely be grounded and checked by an authorized person.
•
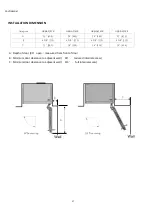
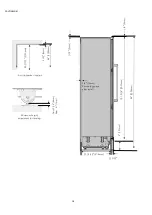
Location of the electrical wiring must comply with the dimensions specified in the manual.
ATTENTION:
RISK OF ELECTRIC SHOCK
Electrical grounding is necessary. This appliance is equipped with a three-pin plug
to protect you against possible electric shocks.
•
Do not remove the round grounding terminal from the plug.
•
Do not use two-pin grounding adapters.
•
Do not use extension cables to energize the product.
ATTENTION:
Do not connect the grounding cable to the gas pipe. Please have the grounding checked by a qualified electrician if
you are not sure about the grounding of the product. Do not install a fuse on the neutral line or grounding circuit.
WARNING:
Please wait for 3-6 hour before energizing the product to protect it against possible damages. This way, the
refrigerant and the lubricants in the system get balanced.
Water Connection
•
Pressure of the mains water must be in compliance with the values specified in the manual.
•
Location of the water system must comply with the dimensions specified in the manual.
IMPORTANT INFORMATION:
Bypass is recommended for the water filtering system if a reverse osmosis system is used.
Содержание HRBIAF18PR
Страница 25: ...25 Removing the vent hole assembly Remove 5 screws to take out the Vent Hole Assembly...
Страница 49: ...Confidential 49 HRBIAF24PR HRBIAR24PR HRBIAR30PR TF 18BINFIA...
Страница 54: ...Confidential 54 Installing the furniture door 1 Attach the furniture door to the door...
Страница 58: ...Confidential 58 Clip the cover furniture door bracket HRBIAF24PR HRBIAR24PR HRBIAR30PR...
Страница 59: ...Confidential 59 Attach and screw the upper lower decorationcover HRBIAF18PR...
Страница 60: ...Confidential 60 Attach and screw the upper lower decorationcover HRBIAF24PR HRBIAR24PR...
Страница 63: ...Confidential 63 Attach the Trim door side Item No3...
Страница 68: ...Confidential 68 Remove the upper adjustment kits HRBIAF18PR...
Страница 76: ...Confidential 76 Attach the Hinge Slot Caps removed from the left side to the Hinge Caps to the rightside...
Страница 77: ...Confidential 77 Installing the door Place the door to the refrigerator and fix it with 4screws...
Страница 90: ...Confidential 90 Attach the middle closing parts trim furniture middle ItemNo5 between two refrigerators...
Страница 91: ...Confidential 91 You can see previous pages for other installation procedures...
Страница 92: ...Confidential 92...


