29
Operation
3.2.2
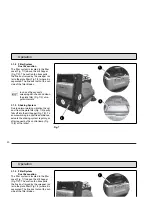
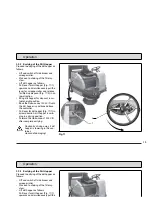
Emtying of the Dirt Hopper
Proceed to emtying of the dirt hopper as
follows:
• Lift and switch off side broom and
sweeper roller.
• Proceed to shaking of the filter sy-
stem.
• Lift dirt hopper as follows:
Pull lever for dirt hopper (Fig. 11/1)
upwards and simultaneously pull the
lever for sweeper roller and release
for lifted-up disposal (Fig. 11/2) in ar-
row direction.
• Bring dirt hopper for disposal in sui-
table height position.
• Back the Hako-Jonas 1200 V/D until
the dirt hopper is positioned above
the container.
• Pull lever for dirt hopper (Fig. 11/1) in
arrow direction, dirt hopper is swin-
ging in emtying position.
• Forward the Hako-Jonas 1200 V/D
after complete emtying.
Caution by driving away, if dirt
hopper is towering in the con-
tainer:
Hazard of damaging!
Fig.11
1
2
Содержание Jonas 1200 V
Страница 1: ...Instruction Manual Hako Jonas 1200 V D 6300 10 6300 20...
Страница 12: ...12 Safety information Fig 1 1 2 10 3 4 5 6 7 8 9 9 11 12 13 13 Safety information 10 9 9 11 13 13...
Страница 13: ...13 Safety information Fig 2 2 1 9 4 5 6 3 6 7 8 Safety information 5 6 3 8...
Страница 22: ...22 Operation Operation...
Страница 38: ...36 5 5...
Страница 67: ......


