


4. INITIAL SETUP
A. Setup the iron holder
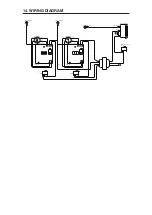
(1) Cleaning Sponge
1. Fit the small sponge pieces into the hollows of the
iron holder base.
2. Add an appropriate amount of water into the iron
holder base. The small sponge will absorb water
and help keep the large sponge damp at all times.
3. Dampen the large sponge and place it on the iron
holder base.
(2) Cleaning Wire
Place it in the iron holder as shown on the right.
See “B. Using the cleaning wire” in section
“7. MAINTENANCE”.
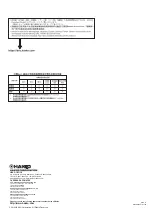
The angle of the iron receptacles is adjustable by
changing the fastening position of the screws.
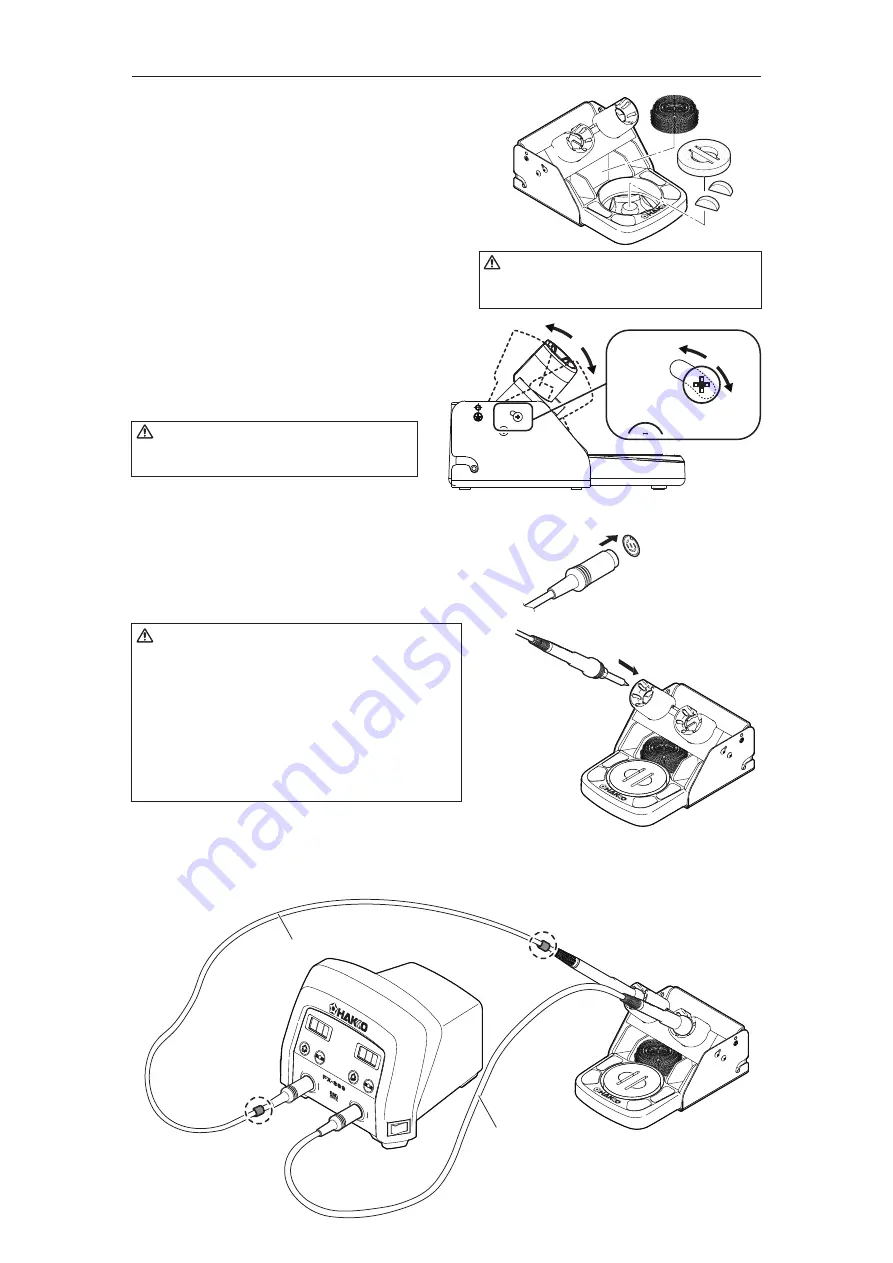
B. Connect the iron to the station
1. Connect the cord assembly to the receptacle.
2. Place the iron into the iron holder.
3. Plug the power cord into an appropriate power
supply.
※ When using two soldering irons simultaneously
Attachment of the color bands to one of the soldering irons will help identify which soldering
iron is connected to receptacle “A.IRON” and “B.IRON”.
(1)
(2)
CAUTION
Be sure the sponge is moistened with water
before use to avoid damaging the tip.
CAUTION
Increasing the angle of the iron receptacle will
cause an increase in the iron grip temperature.
CAUTION
• Be sure to turn off the power before connecting or
disconnecting the cord assembly for the iron to and
from the receptacle to avoid damaging the circuit
board.
• Do not use any iron other than those listed in Section
1 of this manual. Doing so may result in inadequate
performance and / or possible damage to the unit.
• The unit is protected against electrostatic discharge
and must be grounded for full efficiency.
Push on the plug until
it stops, making sure it is
securely connected.
Receptacle
To disconnect, hold the plug
and pull it out of the receptacle.
With color bands
Without color band


