background image

49- 2000675  Rev. 2

7

E

N

G

L

IS

H


WARNING

 OVEN SAFETY INSTRUCTIONS

WARNING

 NEVER cover any slots, holes, or 

passages in the oven bottom or cover an entire rack 
with materials such as aluminum foil or oven liners. 
Doing so blocks air flow through the oven and may 
cause carbon monoxide poisoning. Never place foil 
or oven liners on the oven bottom. They can trap 
heat causing risk of smoke or fire.

•  St and away from t he range when opening t he oven 

door. Hot  air or st eam which escapes can cause burns 
t o hands, face and/ or eyes.

•  Never place cooking ut ensils, pizza or baking st ones, 

or any t ype of foil or liner on t he oven floor. These 
it ems can t rap heat  or melt , result ing in damage t o t he 
product  and risk of shock, smoke or fire.

•  Place oven racks in desired locat ion while oven is cool. 

If rack must  be moved while oven is hot , be careful t o 
avoid t ouching hot  surfaces.

•  Do not  leave it ems such as paper, cooking ut ensils, or 

food in t he oven when not  in use. It ems st ored in an 
oven can ignit e.

•  Do not  leave it ems on t he cookt op near t he oven vent . 

It ems may overheat  result ing in a risk of fire or burns.

•  Never broil wit h door open. Open- door broiling is not  

permit t ed due t o overheat ing of cont rol knobs.

READ AND SAVE THESE INSTRUCTIONS

IMPORTANT SAFETY INFORMATION

READ ALL INSTRUCTIONS BEFORE USING THE APPLIANCE

SAFETY INFORMATION

How to Remove Protective Shipping Film and Packaging Tape

Carefully grasp a corner of t he prot ect ive shipping film wit h 
your fingers and slowly peel it  from t he appliance surface. Do 
not  use any sharp it ems t o remove t he film. Remove all of t he 
film before using t he appliance for t he first  t ime.
To assure no damage is done to the finish of the product, the 
safest way to remove the adhesive from packaging tape on new 
appliances is an application of a household liquid dishwashing 
detergent. Apply with a soft cloth and allow to soak.

NOTE:


The adhesive must  be removed from all part s. It  

cannot  be removed if it  is baked on. 
Consider recycling opt ions for your appliance packaging 
mat erial.

PROPER DISPOSAL OF YOUR APPLIANCE

Dispose of or recycle your appliance in accordance wit h Federal and Local Regulat ions. Cont act  your local aut horit ies for 
t he environment ally safe disposal or recycling of your appliance.

WARNING

 COOKTOP SAFETY INSTRUCTIONS (Cont.)

•   To minimize t he possibilit y of burns, ignit ion of 

flammable mat erials and spillage, t he handle of a 
cont ainer should be t urned t oward t he cent er of t he 
range wit hout  ext ending over nearby burners.

•   Do not  use a wok wit h a round met al support  ring. The 

ring may t rap heat  and block air t o t he burner result ing 
in a carbon monoxide hazard.

•   Do not  at t empt  t o lift  t he cookt op. Doing so may 

damage t he gas t ubing t o t he surface burners result ing 
in a gas leak and risk of fire.

•   Do not  use aluminum foil t o cover t he grat es or line 

any part  of t he cookt op. Doing so may result  in carbon 
monoxide poisoning, overheat ing of t he cookt op 
surfaces, or a pot ent ial fire hazard.

Содержание QGSS740

Страница 1: ...ESPAÑOL Para consultar una version en español de este manual de instrucciones visite nuestro sitio de internet Haierappliances com User Manual QGSS740 GasRanges 49 2000675 Rev 2 11 21 GEA ...

Страница 2: ......

Страница 3: ... TABLEOFCONTENTS HAIERWEBSITE Have a question or need assistance with your appliance Try the Haier Website 24 hours a day any day of the year You can also shop for more great Haier products and take advantage of all our on line support services designed for your convenience In the US Haierappliances com SAFETY INFORMATION 4 USING THERANGE 8 Connecting Your Wifi Enabled Oven 8 Remote Enable Equipme...

Страница 4: ...rly installed anti tip bracket See installation instructions shipped with the bracket for complete details before attempting to install For Free Standing and Slide In Ranges To check if the bracket is installed and engaged properly look underneath the range to see that the rear leveling leg is engaged in the bracket On some models the storage drawer or kick panel can be removed for easy inspection...

Страница 5: ...als Avoid scratching or impacting glass doors cooktops or control panels Doing so may lead to glass breakage Do not cook on a product with broken glass Shock fire or cuts may occur Do not leave children alone or unattended in an area where an appliance is in use They should never be allowed to climb sit or stand on any part of the appliance CAUTION Do not store items of interest to children in cab...

Страница 6: ... this instruction may result in severe burns WARNING COOKTOP SAFETY INSTRUCTIONS WARNING NEVEROperate the Top Surface Cooking Section of this Appliance Unattended Failure to follow this warning statement could result in fire explosion or burn hazard that could cause property damage personal injury or death If a fire should occur keep away from the appliance and immediately call your fire departmen...

Страница 7: ...ackaging Tape Carefully grasp a corner of the protective shipping film with your fingers and slowly peel it from the appliance surface Do not use any sharp items to remove the film Remove all of the film before using the appliance for the first time To assure no damage is done to the finish of the product the safest way to remove the adhesive from packaging tape on new appliances is an application...

Страница 8: ...by the manufacturer could void the user s authority to operate the equipment Compatible Apple or Android devices and home WiFi network required REMOTE ENABLE EQUIPMENT This device complies with part 15 of the FCC Rules Operation is subject to the following two conditions 1 This device may not cause harmful interference and 2 this device must accept any interference received including interference ...

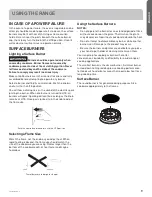
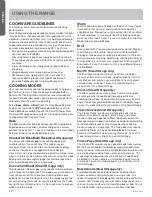
Страница 9: ...mains at LITE Once gas is ignited turn the knob to adjust the flame size Selecting a Flame Size Watch the flame not the knob as you adjust heat When rapid heating is desired the flame size should match the size of the cookware you are using Flames larger than the bottom of the cookware will not heat faster and may be hazardous Using the Surface Burners NOTES Do not operate the burner for an extend...

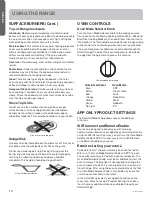
Страница 10: ...vels above allowable standards This could be hazardous to your health OVEN CONTROLS Oven Mode Selector Knob Turn the Oven Mode Selector knob to the mode you want Your oven has the following cooking modes Warm Bake and Broil See Cooking Modes section and Steam Clean for more information The illuminated oven knob flashes orange during preheat and turns solid orange when the oven is preheated The ove...

Страница 11: ...s too hot or too cold and wish to change it This adjustment affects Bake and Convection Bake modes Select Product Setting in the SmartHQ app Auto Oven Light When this feature is enabled the oven light will turn on for every oven cycle Select Product Setting in the SmartHQ app to turn this feature on or off Bake Setting This feature allows you to set default Bake settings to Traditional Bake or Con...

Страница 12: ...information It is not necessary to preheat when using this mode Warm Warm mode is designed to keep hot foods hot Cover foods that need to remain moist and do not cover foods that should be crisp Preheating is not required Do not use Warm to heat cold food It is recommended that food not be kept warm for more than 2 hours To use this mode turn the Oven Mode Selector knob to Warm Broil Always broil ...

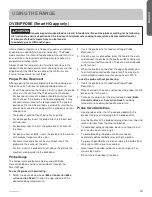
Страница 13: ...ake and Convection Roast through the SmartHQ app To use the probe with preheating 1 Select the desired cook mode Bake Convection Bake or Convection Roast through the app and select the desired cooking temperature 2 Insert the probe into the food see Proper Probe Placement 3 Once the oven is preheated place the food in the oven and connect the probe to the probe outlet making sure it is fully inser...

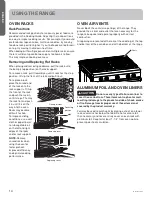
Страница 14: ...Racks may become difficult to slide To improve sliding conditions use a soft cloth or paper towel to rub vegetable oil on the left and right edges of the racks and or rack supports NOTE Remove unused racks when using the oven for faster preheat improved efficiency and optimal cooking performance OVEN AIRVENTS Never block the vents air openings of the range They provide the air inlet and outlet tha...

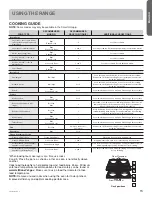
Страница 15: ...od below the broil heater Boneless chicken breasts Broil Low Bake 3 Move food down for more doneness less searing and up for greater searing browning when broiling For best performance when broiling center food below the broil element or burner Whole turkey Bake Convection Roast 1 Use a low sided pan such as a broil pan Preheating is not necessary Turkey Breast Bake Convection Roast 3 Use a low si...

Страница 16: ... fruit juices tomato sauces and basting liquids containing acids may cause discoloration and should be wiped up as soon as hot surfaces cool then clean and rinse Oven Racks All oven racks may be cleaned by hand with an abrasive cleaner or steel wool After cleaning the racks use a soft cloth or paper towel to rub a small amount of vegetable oil on the left and right edges of the rack This will ensu...

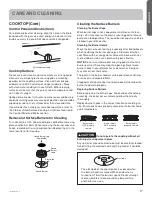
Страница 17: ...rticles The round burner caps may also be cleaned in your dishwasher Cleaning the Burner Heads Wash the burner heads routinely especially after bad spillovers which could clog the burner openings Lift burners off when cool Wash with hot soapy water Rinse with clean water For more stubborn stains use a brush with plastic bristles NOTE Do not use steel wool or scouring pads to clean the burner parts...

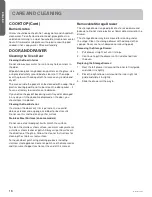
Страница 18: ...leaner and a sponge scrubber for best results Do not use this method on any other surface Stainless Steel Surfaces on some models Do not use a steel wool pad it will scratch the surface To clean the stainless steel surface use warm sudsy water or a stainless steel cleaner or polish Always wipe the surface in the direction of the grain Follow the cleaner instructions for cleaning the stainless stee...

Страница 19: ...mproved lighting inside the oven clean the glass cover frequently using a wet cloth This should be done when the oven is completely cool OVEN DOOR The door is very heavy Be careful when removing and lifting the door Do not lift door by the handle To Remove the Door 1 Fully open the door 2 Pull the hinge locks up and away from the range frame to the unlocked position 3 Firmly grasp both sides of th...

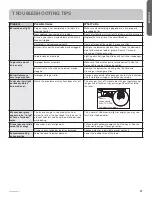
Страница 20: ...oil on broil pan wrap tightly and add slits conforming to those in the pan to allow grease to drain Oven temperature too hot or too cold Oven temperature needs adjustment See the Oven Controls section Oven appears not to work A fuse in your home may be blown or the circuit breaker tripped Replace the fuse or reset the circuit breaker Oven controls improperly set See the Using the Oven section Oven...

Страница 21: ...he burners for cleaning See the Care and Cleaning of the range section Burner flames are very large or yellow Improper air to gas ratio If range is connected to Propane gas contact the technician who installed your range or made the conversion Surface burners light but bake and broil burners do not Gas to the oven burners may have been shut off The oven gas shut off is located on the gas regulator...

Страница 22: ...ole and exclusive remedy is product repair as provided in this Limited Warranty Any implied warranties including the implied warranties of merchantability or fitness for a particular purpose are limited to one year or the shortest period allowed by law This limited warranty is extended to the original purchaser and any succeeding owner for products purchased for home use within the USA If the prod...

Страница 23: ... website information The following products and more are available ACCESSORIES Accessories Small Broiler Pan 8 x 1 x 13 Parts Oven racks Oven burners Light bulbs Cleaning Supplies CitruShine Stainless Steel Wipes Stainless Steel Appliance Cleaner Non scratch Cleaning Pads for Ceramic Cooktops Ceramic Cooktop Cleaner Ceramic Cooktop Scraper Kit Kit includes cream and cooktop scraper Graphite Lubric...

Страница 24: ...TANT Do Not Return ThisProduct To The Store If you have a problem with thisproduct please call 1 877 337 3639 for the name and telephone number of the nearest authorized service center DATED PROOFOFPURCHASEREQUIRED FORWARRANTY SERVICE ...

Страница 25: ...Manual del usuario QGSS740 Estufasa Gas 49 2000675 Rev 2 11 21 GEA ...

Страница 26: ...2 49 2000675 Rev 2 ESPAÑOL ...

Страница 27: ...exión de su Horno con WiFi Activado 8 Equipamiento Remoto Activado 8 En Caso de Corte de Corriente 9 Quemadores 9 Controles del Horno 10 Configuración del Producto Sólo Desde la Aplicación 10 Modo Sabático 11 Pautas de Uso de Utensilios 12 Modos de Cocción 12 Sonda del Horno 13 Estantes del Horno 14 Ventilaciones de Aire del Horno 14 Papel de Aluminio y Cobertores del Horno 14 Guía de Cocción 15 C...

Страница 28: ...ación enviadas con el soporte para obtener detalles completos antes de iniciar la instalación Para Estufas Sin Apoyo y Deslizabless Para controlar si el soporte es instalado y ajustado de forma apropiada mire que debajo de la estufa la pata niveladora trasera esté ajustada al soporte En algunos modelos el cajón de almacenamiento o el panel de protección se pueden retirar para una fácil inspección ...

Страница 29: ...un producto con un vidrio roto Es posible que se produzcan descargas incendio o cortes No deje a los niños solos o fuera de su radio de atención en el área donde el electrodoméstico se encuentre en uso Nunca se les deberá permitir trepar sentarse o pararse sobre ninguna parte del electrodoméstico ADVERTENCIA No coloque artículos de interés para los niños sobre los gabinetes que están sobre un horn...

Страница 30: ... debido a un cambio repentino de temperatura ADVERTENCIA MANTENGA LOS MATERIALES INFLAMABLES ALEJADOS DE LA ESTUFA Si esto no se cumple se podrán sufrir lesiones personales graves o incendios No guarde ni use materiales inflamables en un horno o cerca de la parte superior de la estufa incluyendo papel plástico sostenedores de ollas trapos cobertores de pared cortinas paños y gasolina u otros vapor...

Страница 31: ... Cómo Retirar la Película Protectora de Envío y la Cinta de Embalaje Con cuidado tome un extremo de la película protectora de envío con los dedos y lentamente retire la misma de la superficie del electrodoméstico No utilice ningún producto filoso para retirar la película Retire toda la película antes de usar el electrodoméstico por primera vez Para asegurar que no haya daños sobre el acabado del p...

Страница 32: ...dispositivo de acceso remoto instalado en este horno que no están expresamente aprobados por el fabricante podrían anular la autoridad del usuario para operar el equipamiento EQUIPO DE ACCESO REMOTO INSTALADO Este dispositivo cumple con la Parte 15 de la Normativa de la FCC Su funcionamiento está sujeto a las dos condiciones siguientes 1 Este dispositivo no podrá ocasionar interferencias nocivas y...

Страница 33: ... la llama Selección del Tamaño de la Llama Observe la llama no la perilla a medida que reduce el calor Cuando se desee calentar de forma rápida el tamaño de la llama de un quemador deberá ser equivalente al tamaño del utensilio de estufa que esté usando Cuando las llamas sean más grandes que la parte inferior del utensilio de estufa no calentarán el utensilio más rápido y podrían ser riesgosas Uso...

Страница 34: ...ares permitidos Esto puede ser peligroso para su salud CONTROLES DEL HORNO Perilla del Selector de Modo del Horno Gire la perilla del Selector de Modo del Horno hacia el modo que desee Su horno cuenta con los siguientes modos de cocción Warm Calentar Bake Hornear y Broil Asar Para más información consulte la sección de Modos de Cocción y Limpieza al Vapor La perilla iluminada del horno parpadea de...

Страница 35: ...ea modificarla Este ajuste afecta los modos Bake Hornear y Convection Bake Hornear por Convección Seleccione Product Setting Configuración del Producto en la aplicación SmartHQ Luz del Horno Automática Cuando estafunción estéactivada laluzdelhorno seencenderáen cada ciclo delhorno SeleccioneProduct Setting Configuración delProducto en laaplicación SmartHQ paraactivar o desactivar estafunción Confi...

Страница 36: ...sonda paramás información consulte lasección de laSonda No es necesario realizar el precalentamiento al usar este modo Warm Calentar El modo Warm Calentar fue diseñado para mantener calientes las comidas calientes Cubra las comidas que necesitan mantener la humedad y no cubra aquellas comidas que deban quedar crocantes No se requiere precalentar las mismas No use la función Warm Calentar para cale...

Страница 37: ... el modo de cocción deseado Hornear Hornear por Convección o Dorar por Convección a través de la aplicación y seleccione la temperatura de cocción deseada 2 Inserte la sonda en la comida consulte sobre la Ubicación Correcta de la Sonda 3 Una vez que el horno fue precalentado coloque la comida en el mismo y conecte la sonda en su correspondiente tomacorriente asegurándose de que esté completamente ...

Страница 38: ... las condiciones de deslizamiento use una tela suave o una toalla de papel para frotar aceite vegetal sobre los extremos izquierdo y derecho de los estantes y o sobre los soportes del estante NOTA Retire los estantes en desuso al usar el horno para un precalentamiento más rápido mayor eficiencia y un rendimiento óptimo de la cocción VENTILACIONES DE AIRE DEL HORNO Nunca bloquee las ventilaciones a...

Страница 39: ...a comida más abajo para que quede más preparada y menos soasada y más arriba para soasar dorar al asar Para un mejor rendimiento al asar centre la comida debajo del elemento que emite calor para asar Pavo entero Hornear Dorado por Convección 1 Use una olla chata tal como una olla para asar No se requiere precalentarla Pechuga de Pavo Hornear Dorado por Convección 3 Use una olla chata tal como una ...

Страница 40: ...ue contengan ácidos pueden ocasionar descoloración y se deberán limpiar en cuanto las superficies calientes se enfríen y luego se deberán enjuagar Estantes del Horno Todas las parrillas del horno se podrán limpiar a mano con un limpiador abrasivo o viruta Luego de limpiar los estantes use una tela suave o una toalla de papel para frotar una pequeña cantidad de aceite vegetal sobre los extremos tan...

Страница 41: ...las Limpieza de las Cabezas de los Quemadores Limpie las cabezas de los quemadores de formarutinaria especialmente luego de derrames importantes que podrían bloquear las aberturas del quemador Retire los quemadores cuando estén fríos Lave los mismos con aguacaliente y jabón Enjuague con agualimpia Paraeliminar las manchas más rebeldes use un cepillo con cerdaplástica NOTA No use lana de acero ni e...

Страница 42: ...ponja con estropajo para obtener un mejor resultado No use este método sobre ninguna otra superficie Superficies de Acero Inoxidable en algunos modelos No use virutas de acero éstas dañarán la superficie Para limpiar la superficie de acero inoxidable use agua tibia con jabón o un limpiador o pulidor para acero inoxidable Siempre limpie la superficie en la dirección del veteado Siga las instruccion...

Страница 43: ...do una tela húmeda Esto se deberá hacer cuando el horno esté completamente frío PUERTA DEL HORNO La puerta es muy pesada Tenga cuidado al retirar y levantar la puerta No levante la puerta usando la manija Para retirar la puerta 1 Abra la puerta totalmente 2 Empuje los bloqueos de la bisagra hacia arriba y afuera de la estructura de la estufa hasta la posición de desbloqueo 3 Firmemente tome ambos ...

Страница 44: ...gregue cortes conforme con aquellos en la olla para permitir que la grasa sea drenada La temperatura del horno es demasiado caliente o demasiado fría La temperatura del horno debe ser ajustada Consulte la sección de Controles del Horno El horno parece no funcionar Es posible que un fusible de su hogar se haya quemado o que el disyuntor se haya desconectado Reemplace el fusible o reinicie el disyun...

Страница 45: ...hendiduras al costado del quemador se podrán atascar Retire los quemadores para su limpieza Consulte la sección de Cuidado y limpieza de la estufa Llamas de los quemadores son muy grandes o amarillas Promedio inadecuado de aire a gas Si la estufa es conectada a gas Propano contacte al técnico que instaló la estufa o que hizo la conversión Los quemadores superficiales se iluminan pero los quemadore...

Страница 46: ...USIÓN DEGARANTÍASIMPLÍCITAS Su única y exclusiva alternativa es la reparación del producto como se indica en la Garantía Limitada Las garantías implícitas incluyendo garantías implícitas de comerciabilidad o conveniencia sobre un propósito particular se limitan a un año o al período más corto permitido por la ley Esta garantía limitada se extiende al comprador original y a cualquier propietario po...

Страница 47: ...án disponibles ACCESORIOS Accesorios Olla para Asar Pequeña 8 x 1 x 13 Piezas Estantes del horno Elementos del horno Lámparas de luz Suministros de Limpieza Limpiadores de Acero Inoxidable CitriShine Limpiador de Electrodomésticos de Acero Inoxidable Almohadilla de Limpieza Para Superficies de Cocción de Cerámica Que No Produzca Rayones Limpiador de la Placa de Cocción de Cerámica Espátula para Pl...

Страница 48: ...da Si tiene un problema con este producto por favor comuníquese al 1 877 337 3639 para solicitar el nombre y número telefónico del centro de servicio al cliente autorizado máscercano NECESITA UNA PRUEBA DECOMPRA FECHADA NÚMERO DEMODELO Y DESERIEPARA EL SERVICIO DELA GARANTÍA ...

Отзывы: