


G
etting
S
tarted
EN-17 Digital LED LCD Television Instruction Manual
Press
C
button
to
se
l
ect
the
item
re
q
uires
ad
j
usting.
Press
D
button
to
ad
j
ust
the
se
l
ection
item.
W
hen
you
are
satisfied
w
ith
your
choice,
press
the
E
EXIT
button
to
return
to
norma
l v
ie
w
ing
or
press
MENU
button
to
return
to
the
pre
v
ious
menu.
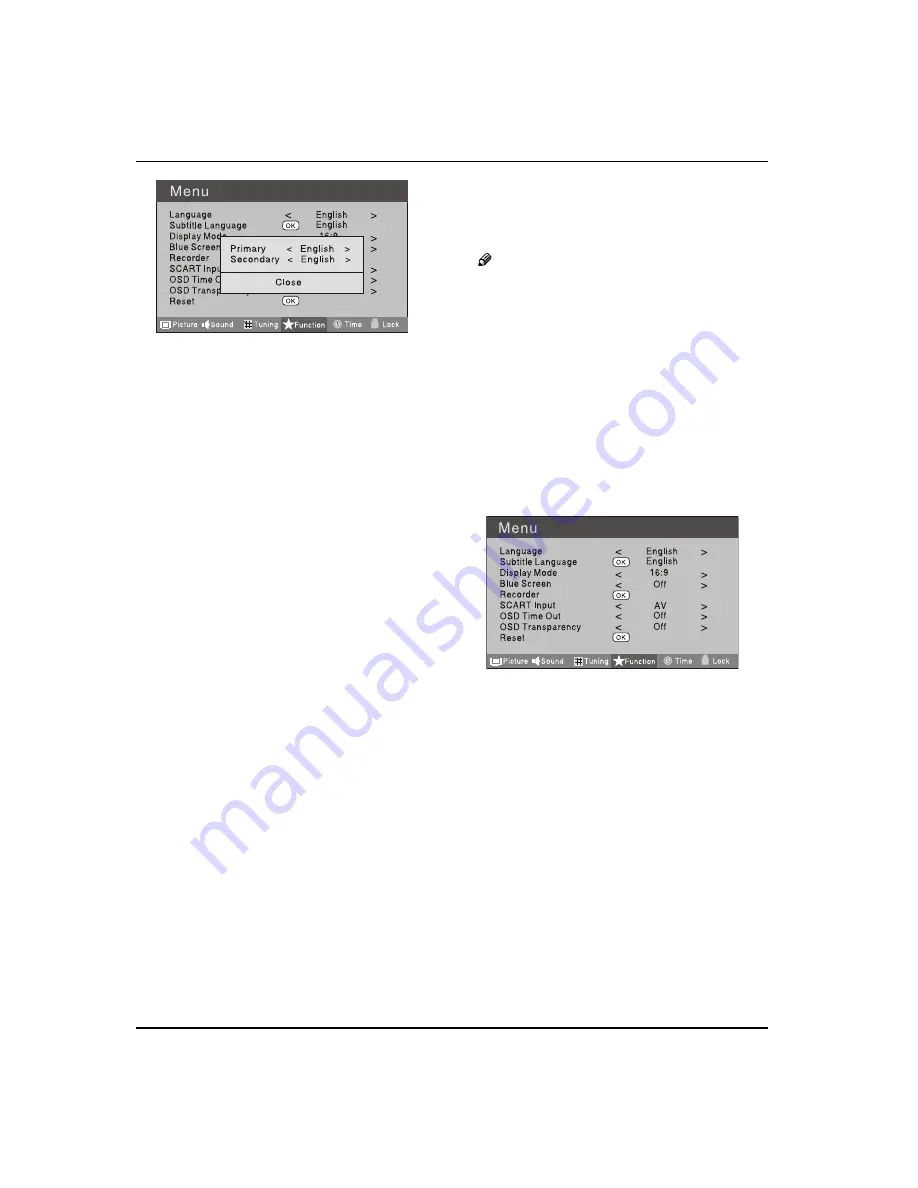
Language
V
T
o
se
l
ect
the
menu
l
anguage.
Subtitle Language
V
T
o
se
l
ect
the
S
ubtit
l
e
l
anguage.
Display Mode
V
T
o
set
the
picture
proportion,
press
button
to
se
l
ect
4:3/Z
oom
1/Z
oom
2/W
ide
/16:9/A
uto.
Y
ou
can
q
uick
l
y
se
l
ect
the
desired
mode
by
SCREEN
button
on
the
remote
contro
l
.
4:3 mode
t
C
hoose
4:3
w
hen
you
w
ant
to
v
ie
w
a
picture
w
ith
an
origina
l 4:3
aspect
ratio,
w
ith
gray
bars
appearing
at
both
the
l
eft
and
right
sides.
16:9 mode
t
C
hoose
16:9
w
hen
you
w
ant
to
ad
j
ust
the
picture
hori
z
onta
ll
y,
in
a
l
inear
proportion
to
fi
ll
the
entire
screen.
Zoom1
t
C
hoose
Zoom1
w
hen
you
w
ant
to
v
ie
w
the
picture
w
ithout
any
a
l
teration.
H
o
w
e
v
er,
the
top
and
bottom
portions
of
the
picture
w
i
ll
be
cropped.
Zoom2
t
C
hoose
Zoom2
w
hen
you
w
ant
the
picture
to
be
a
l
tered,
both
v
ertica
ll
y
e
x
tended
and
cropped.
T
he
picture
taking
a
ha
l
f
w
ay
trade
o
ff
bet
w
een
a
l
teration
and
screen
co
v
erage.
Wide
t
C
hoose
W
ide
w
hen
you
w
ant
to
ad
j
ust
the
picture
in
a
non
-l
inear
proportion,
that
is,
more
en
l
arged
at
top
sides
and
no
a
l
teration,
at
bottom
side.
Blue Screen
V
T
his
w
i
ll
se
l
ect
the
character
background
co
l
our.
Note
T
he
Bl
ue
S
creen
function
is
on
l
y
a
v
ai
l
ab
l
e
for
O
ATV
mode.
Recorder
V
T
o
record
the
DTV
program.
D
etai
l
s
of
R
ecording
are
described
on
the
page
of
25-27
.
SCART Input
V
T
he
item
does
not
w
ork.
OSD Time Out
V
T
o
set
ho
w l
ong
you
w
ant
the
menus
to
appear
on
-
screen.
E
ach
press
of
button
repeated
l
y
to
se
l
ect
the
number
of
preset
minutes,
the
T
ime
w
i
ll
be
set
in
se
q
uence
:
o
ff
,
10
sec,
15
sec,
30
sec,
45
sec,
60
sec.
OSD Transparency
V
T
o
set
the
transparency
background
of
OSD
,
the
transparency
w
i
ll
be
set
in
se
q
uence
: Off
,
25%
,
50%
,
75%
,
100%
.
Reset
V
T
o
reco
v
er
to
the
defau
l
t
v
a
l
ue.
Содержание LET40T3
Страница 30: ......
Страница 31: ...0090504932T...


