background image

16

FUNCTION SETTING 

4.Press CH+/- button to select different item, press 
   VOL+/- button to adjust. 
AAA: using this function can improve the 
brightness, contrast and arrangement of image.
There are ON, SPLIT, MOVE and ZOOM four
modes.
CTI: opening this function can restrain the 
different color from crossing and interfering, in 
order to improve the quality of picture.
LTI: opening this function can dynamically optimize 
the brightness of image, in order to improve the 
quality of picture.
DLC: opening this function can adjust the sight depth 
of image according to the image content dynamically
optimize.
SKIN: opening this function can optimize the skin of 
character in the image, in order to make the image
more natural.
DNR: use digital mode to restrain the image noise, in 
order to reduce the interference. There are OFF, 
WEAK, MEDIUM and STRONG four modes.

SAVE MODE
Using this function can reduce the power consumption
of TV set.
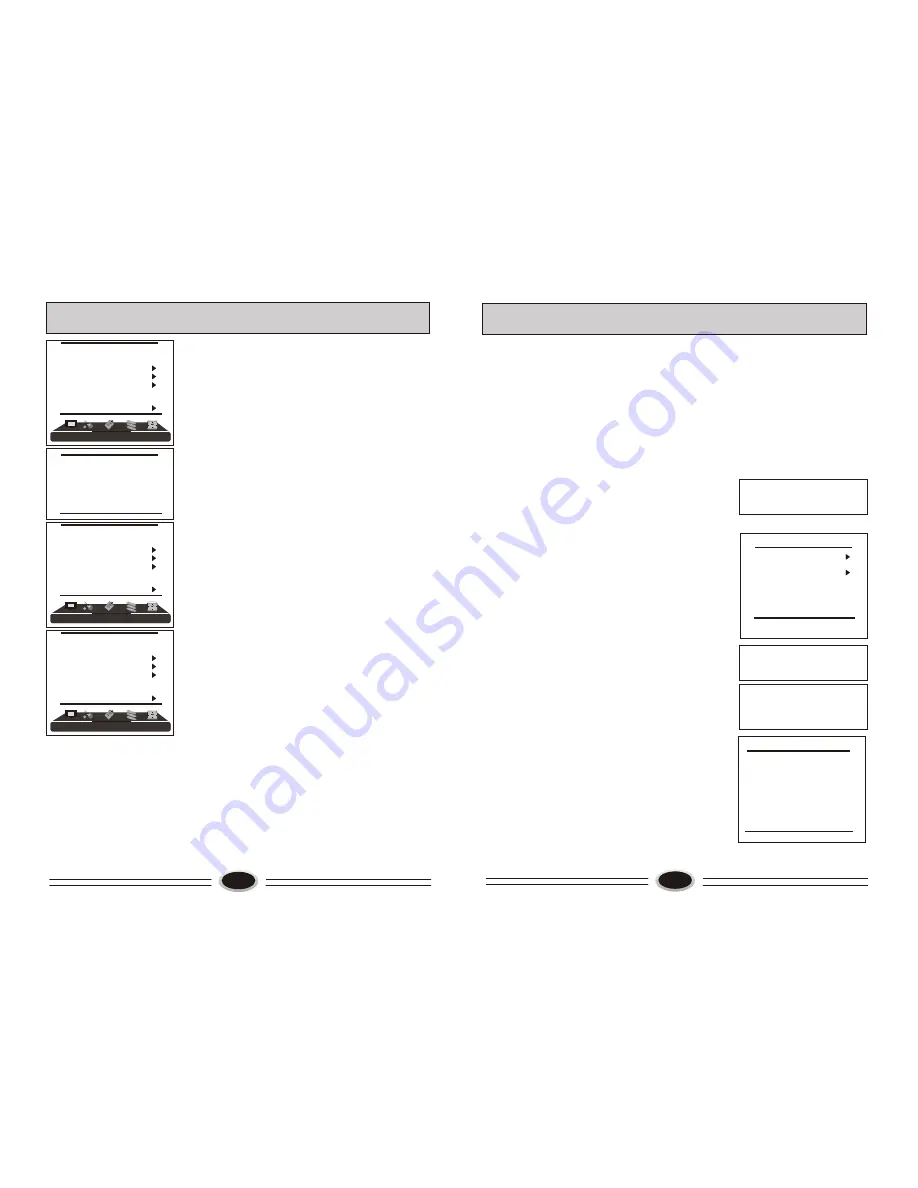
1.Press MENU button to make the main menu display.
2.Press VOL+/- button to select FUNCTION menu.
3.Press CH+/- button to select SAVE MODE item.
4.Press VOL+/- button to select AUTO, MODE1 or
   MODE2.

CLOSED CAPTION
1.Press MENU button to make the main menu display.
2.Press VOL+/- button to select FUNCTION menu.
3.Press CH+/- button to select CLOSED CAPTION item.
4.Press VOL+/-  button to select  OFF, CC1, CC2,CC3,
    CC4,TEXT1, TEXT2, TEXT3 or TEXT4.

When CCD is in OFF mode,


the CCD content will not 

display; when it is in CC 1 mode, the CLOSED
CAPTION will be started, and the contents of  
CLOSED CAPTION1 will


be displayed after the 

FUNCTION menu disappears; in a similar way, 
in CC 2/CC3/CC4 mode, the contents of CLOSED 
CAPTION2/CLOSE


CAPTION3/CLOSE 

CAPTION4 will be displayed after the FUNCTION
menu disappears. When it is in TEXT1 mode, the 

FUNCTION

LANGUAGE           ENGLISH
BLUE SCREEN                OFF
OSD SETTING
IMAGE POSITION         
ADVANCE
SAVE MODE                AUTO
CLOSED CAPTION       OFF
PARENT CONTROL

FUNCTION

LANGUAGE           ENGLISH
BLUE SCREEN                OFF
OSD SETTING
IMAGE POSITION         
ADVANCE
SAVE MODE                AUTO
CLOSED CAPTION       OFF
PARENT CONTROL

FUNCTION

LANGUAGE           ENGLISH
BLUE SCREEN                OFF
OSD SETTING
IMAGE POSITION         
ADVANCE
SAVE MODE                AUTO
CLOSED CAPTION       OFF
PARENT CONTROL

AAA


ON

CTI


ON

LTI


ON

DLC


ON

SKIN


ON

DNR


MEDIUM

17

PARENT CONTROL
1.Press MENU button to make the main menu display.
2.Press VOL+/- button to select FUNCTION menu.
3.Press CH+/- button to select PARENT CONTROL 
   item.
4.Pressing VOL+/- button to enter, the TV set will 
   remind you input password(the default password 
   is 0000.).It will enter parent control menu.

CHANGE PASSWORD
1.Press CH+/- button to select CHANGE PASSWORD 
   item.
2.Press VOL+/- button to enter, it will remind you input 
   new password. Later you will input new password again
   to confirm.
3. After that it displays changed ok.

TV RATING
1.Press CH+/-  button to select TV RATING item.
2.Press VOL+/- button to enter TV RATING menu.

CH+/-

1.Press CH+/- button to select MOVIE RATING item.
2.Press VOL+/- button to select NONE, G, PG, PG13, R,
    NC17 or  X.

ENGLISH RATING
1.Press CH+/- button to select MOVIE RATING item.
2.Press VOL+/- button to select NONE, E, C, C8+, G,
    PG or 14+.

3. Press 

 button to move the cursor to the

    rating you need to set in TV RATING menu,
    press VOL+/- button to move the cursor to ALL, 
    FV, V, S, L or D, then press P.G. button 
    to set it U or B.
 
MOVIE RATING

FUNCTION SETTING 

CHANGE PASSWORD
PARENT CONTROL         OFF
TV RATING       
MOVIE RATING                   G
ENGLISH RATING               E
FRENCH RATING                 E

     PLEASE  INPUT 
PASSWORD
               * * * *

TEXT1will be started, and the contents of TEXT1 
will be displayed after the FUNCTION menu 
disappears; in a similar way, when it is TEXT2/
TEXT3/TEXT4 mode, the TEXT2/TEXT3/TEXT4 
will be started, and the content of TEXT2/TEXT3/
TEXT4 will be displayed after the FUNCTION menu 
disappears. 
  Note: when the set has the OSD on

-

screen, the CCD

 function


will disappear and will reappear when the OSD


 moves off screen.

             INPUT NEW
PASSWORD
               * * * *

             INPUT NEW
PASSWORD
               * * * *
 AGAIN * * * *

          ALL   FV  V    S     L     D
Y          B          
Y7        B     B
G          B
PG        B            B    B      B     B
14         B            B     B      B     B 
MA       B            B     B      B     

[SCAN]        BLOCK/UNBLOCK

Содержание LC-3218P

Страница 1: ...LC 3218P LC 3218P LCD COLOR TELEVISION OPERATING INSTRUCTIONS Wide view angle display high contrast MTS HDMI 01 0090504969 ...

Страница 2: ...M REFER SERVICING TO QUALIFIED SERVICE PERSONNEL THERE IS A LIGHTNING ARROW SYMBOL IN THE TRIANGLE THIS SYMBOL INDICATES HIGH VOLTAGE IS PRESENT INSIDE IT IS DANGEROUS TO MAKE ANY KIND OF CONTACT WITH ANY INSIDE PART OF THIS PRODUCT THERE IS A EXCLAMATION MARK IN THE TRIANGLE THIS SYMBOL ALERTS YOU THAT IMPORTANT LITERATURE CONCERNING OPERATION AND MAINTENANCE HAS BEEN INCLUDED WITH THIS PRODUCT C...

Страница 3: ...orized service provider 2 Do not place the set near a heat source or in direct sunlight WARNING AND CAUTION 3 To prevent fire do not use or store any flammable materials near the unit To prevent fire do not place the unit near a damp wall To prevent electric shock ensure that any external antenna connected to the set is clear of contact with any power lines Do not plug unplug the unit while your h...

Страница 4: ...fied by the manufacturer or sold with the apparatus When a cart is used use caution when moving the cart apparatus combination to avoid injury from tip over 13 Unplug this apparatus during lightning storms or when unused for long periods of time 14 Refer all servcing to qualified service personnel Servicing is required when the apparatus has been damaged in any way such as power supply cord or plu...

Страница 5: ...ion turn the TV set to avoid the direct light source Do not put the remote control in direct heat or a damp place or potential damage to the remote may occur Please use two AAA 1 5V batteries Do not mix battery types Install the batteries as the correct polarities Do not use rechargeable batteries 3 2 1 7 REMOTE CONTROL PANEL 1 2 Shows the input source mode Display button Mono Stereo SAP switch bu...

Страница 6: ...LISH BLUE SCREEN OFF OSD SETTING IMAGE POSITION ADVANCE SAVE MODE AUTO CLOSED CAPTION OFF PARENT CONTROL FUNCTION LANGUAGE ENGLISH BLUE SCREEN OFF OSD SETTING IMAGE POSITION ADVANCE SAVE MODE AUTO CLOSED CAPTION OFF PARENT CONTROL SOUND SOUND STANDARD BALANCE 50 AVC ON EQUALIZER SURROUND ROOM DIGITAL BASS ON 9 SCREEN DISPLAY For your convenient operation and in order to know the TV set we offer th...

Страница 7: ...T PROGRAM Using this function you can rename skip delete copy and insert the channel 1 Press MENU button to make the main menu display 2 Press VOL button select TUNER menu press CH button to enter 3 Press CH button to select EDIT PROGRAM item press VOL button to enter the sub menu RENAME 1 Press DIS ZOOM button to select the channel you need operate press VOL button to enter rename mode 2 Press MT...

Страница 8: ...t is soft USER set the image effect you like BRIGHT suitable for sport image Note You can also press PICTURE button on the remote control to select the picture modes COLOR TEMPERATURE 1 Press MENU button to make the main menu display 2 Press VOL button to select PICTURE menu 3 Press CH button to select COLOR TEMP item 4 Press VOL button to select NORMAL COOL or WARM ZOOM 1 Press MENU button to mak...

Страница 9: ...TION ADVANCE SAVE MODE AUTO CLOSED CAPTION OFF PARENT CONTROL BLUE SCREEN 1 Press MENU button to make the main menu display 2 Press VOL button to select FUNCTION menu 3 Press CH button to select BLUE SCREEN item 4 Press VOL button to select ON or OFF OSD SETTING 1 Press MENU button to make the main menu display 2 Press VOL button to select FUNCTION menu 3 Press CH button to select OSD SETTING item...

Страница 10: ...ition press CH button to adjust the value After setting press MENU button to save and exit TIME OFF 1 Press MENU button to make the main menu display 2 Press VOL button to select TIMER menu 3 Press CH button to select TIME OFF item press VOL button to enter setting Press VOL button to select hour or minute position press CH button to adjust the value After setting press MENU button to save and exi...

Страница 11: ...D CAPTION OFF PARENT CONTROL FUNCTION LANGUAGE ENGLISH BLUE SCREEN OFF OSD SETTING IMAGE POSITION ADVANCE SAVE MODE AUTO CLOSED CAPTION OFF PARENT CONTROL FUNCTION LANGUAGE ENGLISH BLUE SCREEN OFF OSD SETTING IMAGE POSITION ADVANCE SAVE MODE AUTO CLOSED CAPTION OFF PARENT CONTROL AAA ON CTI ON LTI ON DLC ON SKIN ON DNR MEDIUM 17 PARENT CONTROL 1 Press MENU button to make the main menu display 2 Pr...

Страница 12: ...e device has an HDMI output no other audio connection is necessary because HDMI to HDMI connecting includes both video and audio How To Connect 1 Connect the source device to HDMI port of this TV with an HDMI cable not supplied with this product 2 No separated audio connection is necessary How To Use If the source device supports Auto HDMI function the output resolution of the source device will b...

Страница 13: ... button on the external device to start watching HDMI input 1 Connect HDMI signal source output to the HDMI input in this TV set 2 Press INPUT button to select HDMI1 or HDMI2 mode 3 Press PLAY button on the external device to start watching EXTERNAL AUDIO AND VIDEO EQUIPMENT CONNECTION 23 HDMI2 DVD USING YOUR TV AS A COMPUTER DISPLAY VGA AUDIO IN VGA VGA input 1 Connect the VGA output port in the ...

Страница 14: ...n be heard occasionally This is normal and is caused by temperature changes of the operating environment and does not affect the operation of the set TROUBLESHOOTING GUIDE BREAKDOWN PHENOMENON PICTURE SOUND CHECK FOR The direction and connection of the antenna Direction station and connection of the antenna Interference from electric appliance Automobile Motor Vehicle Fluorescence lamp etc Volume ...

Страница 15: ...34 ...

Отзывы: