background image

Before using your icemaker, it is strongly recommended that you clean the 

icemaker thoroughly.  Be sure to clean the icemaker regularly.
1.   When cleaning, please make sure the power has been turned off and the 

plug is disconnected from the outlet.  When plugging or unplugging the unit 

from the outlet, pull directly on the plug.  Never pull on the power cord. 

2.   Remove the ice storage basket. 
3.   Drain remaining water from unit. Remove the cap, then the  

rubber plug from the spout. When assembling back together,  

the rubber plug must be inserted first into the spout, and then  

capped. Otherwise, the icemaker will leak.

4.   Use a mild detergent diluted in warm water and wipe with a soft  

towel or sponge. 


   Solvents, detergents and abrasives must never be  

used for cleaning.

5.   Wipe the inner parts, such as the ice storage basket, 

water reservoir, water box, ice pusher, and evaporator rods. 

6.   The outside of the icemaker should be cleaned regularly with a 

mild detergent solution, warm water, and a soft cloth. 

7.   Dry the interior and exterior with a soft cloth. 
8.   To begin making ice once the unit has been cleaned, pour clean water into 

the water reservoir and fill up to the level line follow operating instructions.


   Never tilt or place the icemaker on its side, otherwise you must wait 

10 hours for compressor coolant to settle. 

9.   To ensure the cleanliness of the ice cubes, the water in the water storage tank 

should be replaced every 24 hours.

10.  When the machine is not in use or will not be used for an 

extended period of time, unscrew the drain cap, then remove the rubber 

plug behind the unit to empty the remaining water in the water reservoir 

completely. (Follow the instructions in number 4 above.)

10

English

 ClEANING AND MAINTENANCE

WARNING

WARNING

Drain Cap

Drain Spout

Rubber Plug

Drain Spout

Содержание HPIM26S

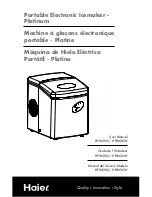
Страница 1: ...6W Manual del Usuario Modelo HPIM26S HPIM26W Portable Electronic Icemaker Platinum Machine à glaçons électronique portable Platine Máquina de Hielo Eléctrica Portátil Platino Quality ß Innovation ß Style LARGE MEDIUM SMALL SELECT SIZE POWER ON OFF ICE FULL ADD WATER ...

Страница 2: ...r the edge of a table or countertop or touch any hot surface 7 Do not operate any electrical appliance with a damaged cord or plug or after the appliance malfunctions or has been dropped or damaged in any manner If damage is suspected contact the nearest authorized service center for examination repair or electrical or mechanical adjustment 8 Unplug from power outlet when not in use before putting...

Страница 3: ...___________ Icemaker serial number __________________________ Date of purchase Staple your receipt to your manual You will need it to obtain warranty service Please register online at www prodregister com Haier UNPACKING YOUR ICE MAKER 1 Inspect and remove all packing materials This includes the foam and any adhesive tape both inside and outside of the unit 2 Inspect and remove any remains of pack...

Страница 4: ...n cord A Use only 3 wire extension cords with 3 blade grounding plug B The marked rating of an extension cord must be be equal to or greater than the rating of this appliance C It should be positioned such that it does not drape over the counter or tabletop where it can be pulled on by children intentionally SAFETY INSTRUCTIONS Attempting any maintenance or cleaning To minimize the possibility of ...

Страница 5: ...eaning and Maintenance 9 Troubleshooting Guide 10 Limited Warranty 11 table of contents English Specifications Model HPIM26S W Electrical Shock Protection Class 1 Power 115V 60Hz 2 7 A Ice Making Current 1 9 A Ice Compressor Current 2 7 Refrigerant R134a 2 3 Oz Design Pressure High Side 290 Psig Low Side 88 Psig Dimensions 11 7 x 14 5 x 14 9 Weight 30 lbs Enclosure ABS plastic ...

Страница 6: ...dow 2 Ice maker and pusher 3 Water reservoir Not shown 4 Control panel 5 Water drain cap For draining water from ice water 6 Compressor cooling fan Do not block air flow 7 Ice shovel 8 Ice basket 1 2 3 4 6 8 parts functions and features 5 7 ...

Страница 7: ...LED light indicator displaying SMALL MEDIUM and LARGE ice cubes to make E ADD WATER Alerts that there is no water in the water reservoir must add water F ICE FULL LED indicator a b c A B D E F Water Drain Do not any parts Failure to put rubber plug back will cause water to leak A Drain cap B Rubber plug C Drain spout Drain water to store or when not in use for long periods C ...

Страница 8: ...ad carefully 1 The incline angle of the icemaker cabinet should not exceed 45 during transportation or use Do not turn the icemaker upside down Doing so could cause the compressor or refrigerating system to operate incorrectly When the icemaker is moved or transported please allow time for the fluids in the compressor to settle Before using the icemaker for the first time please wait 2 hours after...

Страница 9: ...machine will automatically stop operating and the Add Water indicator will display on the LED 2 Plug the unit into a grounded outlet Push the ON OFF button on the control panel to turn on the machine 3 Select the desired size of ice cube by pressing the S M or L ice selector button S Small ice cubes Approx 6 minutes M Medium ice cubes Approx 9 minutes L Large ice cubes Approx 12 minutes The icemak...

Страница 10: ...begin 5 When the maximum capacity of ice cubes is collected and the ice reaches the temperature sensor the icemaker will automatically stop operating The ICE FULL LED indicator will light up If more ice is needed remove the ice from the ice storage basket then replace the basket into the machine making sure that the basket is placed back to its original position Note When replacing the basket ensu...

Страница 11: ...he ice storage basket water reservoir water box ice pusher and evaporator rods 6 The outside of the icemaker should be cleaned regularly with a mild detergent solution warm water and a soft cloth 7 Dry the interior and exterior with a soft cloth 8 To begin making ice once the unit has been cleaned pour clean water into the water reservoir and fill up to the level line follow operating instructions...

Страница 12: ... unit or Inspect relative parts remove the drain cap on the back of the unit and drain out a small amount of water Replace the drain cap and attempt to use the unit again or Check if ice is blocking the ice pusher Turn off the unit let the ice melt and restart Otherwise call Haier America Customer Service The Ice Full indicator light is on The ice basket is full Remove ice from the ice storage bas...

Страница 13: ...overed items during the initial 12 month period or as stated above 3 THIS WARRANTY COVERS APPLIANCES WITHIN THE CONTINENTAL UNITED STATES PUERTO RICO AND CANADA IT DOES NOT COVER THE FOLLOWING Damages from improper installation Damages incurred during shipping Defects other than manufacturing Damage from misuse abuse accident alteration lack of proper care and maintenance or incorrect current or v...

Отзывы: