refrigerant liquid line.
8. MAINTENANCE INSTRUCTIONS
21
pressure and temperature .
6.
7.
8.
accumulator.
repeats.
1.
2.
3.
indoor blower starts.
4.
5. The thermostat satisfies and ends the call for cooling.
6. This ends the 24 Voltage signal to the compressor start kit and the outdoor unit stops.
7. This ends the 24 voltage signal to the indoor blower relay and this indoor blower strips
8. The system is now off.
The cooling system is now in operation.
The liquid, under reduced pressure, then enters the indoor coil surface it expands and absorbs
heat from the indoor air passing over the finned surface. Heat from the indoor air, causes the low
pressure liquid to evaporate and cool the indoor air. The refrigerant has now been converted to cool vapor
Electrical .
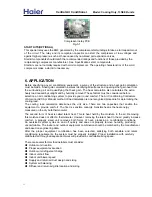
The operation cycle as follows:
The accumulator separates any liquid refrigerant and holds it. Only vapor refrigerant and
The thermostat calls for cooling when the space temperature is above the set point.
This sends a 24 voltage signal through the “Y” terminal to the outdoor unit PCB, after 3 minutes
the compressor contact in the outdoor unit are closed. The compressor and outdoor fan start.
At the same time, a 24 Voltage signal flows through the “G” Terminal to the air handler PCB and
5. At the end of the liquid line, the refrigerant passes through a fixed metering device, reducing
The cool refrigerant vapor travels through the larger, insulated vapor line to the accumulator.
refrigerant oil leave the accumulator. The oil is drawn out through a special port inside the
9. Refrigerant vapor flows through the suction line to the intake of the compressor. The cycle then
FILTERS
WARNING: DISCONNECT MAIN ELECTRICAL POWER TO THE UNIT BEFORE ATTEMPTING ANY
1.
attention until dust and fibers from the
construction is removed.
2. Replace glass fiber filters when dirty.
3. Clean semi-permanent plastic impregnated fiber filters :
Caution: Do not operate any system without filters
Note:
if an electronic air cleaner is installed, remove any mechanical filter from the air handler. Follow
the
installation and
maintenance instructions furnished with the electronic cleaner.
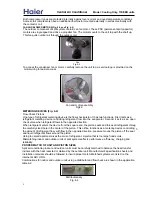
OUTDOOR COIL CLEANING
shrubs, or other obstructions at least 24” away from the coil air inlets.
B. Remove the top with the outdoor fan attached.
The air conditioning system operates must efficiently with clean air filters, check filters monthly to
determine how frequently your filters need be cleaned.
A new home require more frequent filter
Keep the outdoor coil clean for full air flow and proper operation .Do not allow leaves, grass
If the coil becomes obstructed or dirty, it may be necessary to clean the coil.
clippings or other material to obstruct the coil. Do not allow anything to block the coil. Keep fences,
A. Before cleaning coil,
TURN OFF ELECTRICAL POWER
to the outdoor unit.
SERVICE OR MAINTENANCE.
A. Vacuum clean; or B: Wash with detergent and water, air dry thoroughly and re-install.
C. Flush water through the coil from the inside out.
NOTE:
Avoid getting
water on any controls or other electrical devices. If electrical
components
get
wet, dry it thoroughly before energizing.
There are
many
commercial coil cleaning
materials developed to clean outddor coils
. Follow the
manufacturer's instructions when using these marterials.
Normally the solvent is sprayed onto the coil.
Allow several minutes for the solvent to dissolve any
organic matter .Wash away the solvent and
any
dissolved
matter with water from a garden hose.
Central Air Conditioner
Model: Cooling Only,
13
SEER
units

