background image

PREPARING THE WINDOW

ENGLISH

1. Measure the width of the window opening. (See Fig.14)
2.  Mark the center line on the inside of the windowsill  

with a pencil. (See Fig.15)

•  Do not block the air discharge or air intake areas on the front panel.
•   Do not block the louvers on the outside of the air conditioner.
3.  Center the air conditioner in the window sill.  

Make sure to place the unit so that it is resting on the 
windowsill with a ¼" to ½" downward tilt towards the 
outside. Lower the window sash behind the top channel 
to hold the unit in place. (See Fig.16) 

NOTE:  The appearance of your model may differ from the 

one shown.

4.  Loosen the screw located on the lower-right hand corner 

of the air conditioner.

5.  Slide the side bracket over the screw. The side bracket 

should be resting on the window sill. (See Fig.17)

6. Partially tighten the screw. Secure the unit before tightening completely. 
7.  Use 1/8" drill bit to drill a starter hole through the holes in the side 

bracket.

8.  Using two (2) 1" wood screws, attach the side bracket to the 

window sill.

9.  Repeat for side bracket installation on the left-hand side of the air 

conditioner.

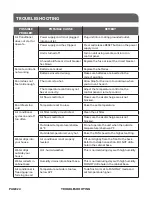
NOTES AND WARNINGS:

•  Be sure your air conditioner does not fall out of the window opening during installation  

or removal.

PAGE 12 

HOW TO INSTALL

WIDTH

LENGTH

HEIGHT

WIDTH

WIDTH

CENTER

WIDTH OF  
WINDOW OPENING

CENTER LINE

Fig. 14

Fig. 15

Fig. 16

Fig. 17

Содержание ESA405M

Страница 1: ...les commande lectronique de 5 000 BTU 5 200 BTU 6 000 BTU 8 000 BTU 10 000 BTU et 12 000 BTU Sur certains mod les le num ro de mod le peut tre suivi d une lettre Este manual del usuario es nicamente p...

Страница 2: ......

Страница 3: ...Precautions 2 3 Operational Safety Warnings 4 INSTALLATION REQUIREMENTS 5 Tools and Parts 5 Location Requirements 6 Electrical Requirements 7 9 HOW TO INSTALL 10 Unpacking the Air Conditioner 10 Prep...

Страница 4: ...cord that is cracked split cut or damaged anywhere along its length or either at the plug end or connector end 5 Turn off the air conditioner and unplug it from the wall outlet before performing any...

Страница 5: ...ment tools and safety standards that are approved for this refrigerant Use only equipment certified for R410a refrigerant In addition under federal law all refrigerant must be properly removed from th...

Страница 6: ...onditioner 4 DO NOT place fingers or objects in the air discharge or air intake in the front of the air conditioner 5 DO NOT operate the air conditioner with a protective cover on the outside section...

Страница 7: ...omer Service 1 877 337 3639 Phillips head screwdriver Scissors Level Tape measure Drill and 1 8 bit Pencil IMAGE PART 5 000 BTU 5 200 BTU 8 000 BTU 10 000 BTU 12 000 BTU Top channel 1 1 1 Foam seal 1...

Страница 8: ...itioner for models ESA410M ESA412M NOTE Do not use an extension cord plug adapter surge protector or multi outlet adapter Free movement of air in the room to be cooled A large enough opening for the a...

Страница 9: ...button does not trip or the RESET will not stay engaged do not use the air conditioner and contact a qualified service technician 5 Have the wall outlet and circuit inspected by a qualified electricia...

Страница 10: ...qualified electrician and ensure that a properly grounded 3 prong outlet is installed POWER SUPPLY CORD See Fig 5 NOTE Your air conditioner s plug may differ slightly in appearance from the one shown...

Страница 11: ...the air conditioner on or off at the control panel or by using the remote control A damaged power supply cord must be replaced with a new power supply cord obtained from the product manufacturer and i...

Страница 12: ...ning up the holes in the top channel with the holes in the top of the unit Make sure the channel is facing forward as indicated by the sticker See Fig 8 2 Using 7 16 self tapping screws attach the top...

Страница 13: ...ver the top of the side curtain then into the channel on the top of the air conditioner and into the track on the bottom of the air conditioner See Fig 13 4 Slide the side curtain frame as close to th...

Страница 14: ...ay differ from the one shown 4 Loosen the screw located on the lower right hand corner of the air conditioner 5 Slide the side bracket over the screw The side bracket should be resting on the window s...

Страница 15: ...e bottom hole of the left hand curtain and into the window frame See Fig 20 7 Repeat for the right hand curtain FINAL INSTALLATION 1 Uncoil the included foam seal See Fig 21 2 Insert the foam seal beh...

Страница 16: ...ompressor from overloading This 3 minute delay also applies when switching from cool mode to fan and back Do not operate your air conditioner in the Cool mode when the outside temperature is below 61...

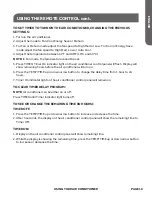
Страница 17: ...6 Reset the filter Refer to Filter Reset MODE 1 Press mode until you see the indicator light come on next to the desired setting 2 Choose Fan Cool Energy Save or Dehum FAN Only the fan runs Press SPE...

Страница 18: ...n indicator light will flash The display will show the remaining hours before the air conditioner will turn on 3 Press the TEMP TIME up or down arrow button to change the delay time from 1 hour to 24...

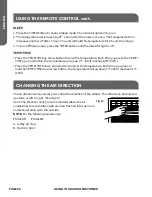
Страница 19: ...hour after the mode is chosen The temperature then increases another 2 F after 1 hour The unit will hold this temperature for 6 hours then stops 3 To turn off Sleep mode press the TIMER button until...

Страница 20: ...Save or Dehum Speed Press SPEED to choose High Med Low or Auto Cool TIMER To set the air conditioner to turn off after a set amount between 1 hour and 24 hours unit must be ON 1 Press TIMER Timer OFF...

Страница 21: ...ll turn on 6 Press the TEMP TIME up or down arrow button to change the delay time from 1 hour to 24 hours 7 Timer On indicator light on the air conditioner control panel will remain on TO CLEAR TIMER...

Страница 22: ...F until it reaches 86 F 30 C Press the TEMP TIME down arrow button to lower the temperature Each time you press or hold the TEMP TIME down arrow button the temperature will go down 1 F until it reach...

Страница 23: ...LISH USING YOUR AIR CONDITIONER PAGE 21 NORMAL SOUNDS OF AN AIR CONDITIONER SOUNDS REASON Air movement Air rotating around the fan Window vibration Installation not correct Refer to Install section Pi...

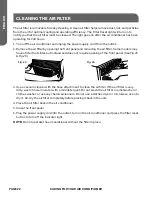
Страница 24: ...f the front panel See Fig 25 Fig 26 3 Use a vacuum cleaner with the hose attachment to clean the air filter If the air filter is very dirty wash it in warm water with a mild detergent Do not wash the...

Страница 25: ...Customer Satisfaction Center at 1 877 337 3639 DATED PROOF OF PURCHASE MODEL AND SERIAL REQUIRED FOR WARRANTY SERVICE CLEANING THE FRONT PANEL ANNUAL MAINTENANCE CUSTOMER SERVICE CARING FOR YOUR AIR...

Страница 26: ...ricted Make sure the air discharge area is not blocked Room feels too cold Temperature set too low Raise the set temperature Air conditioner cycles on and off too often Air filter is dirty or restrict...

Страница 27: ...improper installation 2 Damages in shipping 3 Defects other than manufacturing 4 Damages from misuse abuse accident alteration lack of proper care and maintenance or incorrect current or voltage 5 Da...

Страница 28: ......

Страница 29: ...tre 12 Ach vement de l installation 13 UTILISATION DE VOTRE CLIMATISEUR 14 D marrage du climatiseur 14 18 Utilisation de la t l commande 18 20 Changement du sens de circulation de l air 20 Bruits norm...

Страница 30: ...celui ci la fiche ou l embout du connecteur est fissur fendu ou endommag 5 teindre le climatiseur et le d brancher de la prise murale avant de proc der du nettoyage ou de l entretien 6 Ne pas entrepo...

Страница 31: ...n plus de suivre les normes de s curit appropri es ce fluide frigorig ne N utiliser que l quipement certifi pour les fluides frigorig nes R410a En plus en vertu des lois f d rales le climatiseur doit...

Страница 32: ...ou des objets dans les grilles de sortie ou d entr e d air l avant du climatiseur 5 NE PAS faire fonctionner le climatiseur si sa partie ressortant l ext rieur est recouverte d une b che protectrice...

Страница 33: ...AGE PI CE 5 000 BTU 5 200 BTU 8 000 BTU 10 000 BTU 12 000 BTU Glissi re sup rieure 1 1 1 Joint d tanch it en mousse 1 1 1 Ferrure lat rale Inutilis 2 2 Ferrure de blocage de fen tre 1 1 1 Vis m taux d...

Страница 34: ...0M ESA412M REMARQUE Ne pas utiliser de rallonge lectrique ou d adaptateur de limiteur de surtension ou d adaptateur prises multiples La libre circulation de l air dans la pi ce climatiser Une ouvertur...

Страница 35: ...este pas enfonc cesser d utiliser le climatiseur et communiquer avec un technicien en entretien et en r paration qualifi 5 Faire inspecter la prise murale et le circuit par un lectricien qualifi pour...

Страница 36: ...ent mise la terre soit install e par un lectricien qualifi CORDON D ALIMENTATION voir la figure 5 REMARQUE L apparence de votre climatiseur peut diff rer l g rement du mod le illustr A Bouton de r ini...

Страница 37: ...t l commande Un cordon d alimentation endommag ne doit pas tre r par il doit tre remplac par un cordon neuf obtenu aupr s du fabricant du produit et install par un professionnel de la r paration et de...

Страница 38: ...de la glissi re soient align s avec ceux perc s sur le dessus du climatiseur S assurer que la glissi re est orient e vers l avant ainsi que l indique l autocollant voir la figure 8 2 Au moyen des vis...

Страница 39: ...du panneau puis dans la glissi re du haut du caisson et dans le rail du bas du caisson du climatiseur voir la figure 13 4 Glisser le ch ssis du panneau lat ral jusqu ce qu il soit assez pr s du caiss...

Страница 40: ...ARQUE L apparence de votre mod le peut tre diff rente de celui montr 4 Desserrer les vis situ es du c t inf rieur droit du climatiseur 5 Faire passer la ferrure lat rale par dessus la vis La ferrure d...

Страница 41: ...a figure 20 7 R p ter l op ration pour le panneau droit INSTALLATION FINALE 1 D rouler le joint d tanch it en mousse inclus voir la figure 21 2 Ins rer le joint d tanch it en mousse l arri re du dessu...

Страница 42: ...d lai de 3 minutes s applique aussi pour le passage aux modes refroidissement et ventilateur Ne pas essayer de faire fonctionner le climatiseur en mode fra cheur Cool lorsque la temp rature ext rieur...

Страница 43: ...ection R initialisation du filtre MODE 1 Appuyer sur MODE jusqu ce que le voyant indicateur s illumine au r glage d sir 2 Choisir Fan ventilateur Cool rafra chir Energy Saver conomie d nergie ou Dehum...

Страница 44: ...voyant indicateur Timer On clignotera L cran affichera le nombre d heures restantes avant que le climatiseur ne s arr te 3 Appuyez sur les fl ches haut ou bas TEMP TIME pour r gler le temps de la minu...

Страница 45: ...ature augmente d un autre 2 F apr s une heure L appareil maintiendra cette temp rature pendant 6 heures puis s arr tera 3 Pour d sactiver le mode de veille appuyer sur TIMER et le maintenir enfonc jus...

Страница 46: ...ra chissement Energy Save conomie d nergie or Dehum d shumidificateur Vitesse Appuyez sur SPEED vitesse pour choisir la vitesse du ventilateur High Med Low Auto Cool MINUTERIE Pour configurer le clima...

Страница 47: ...s restant avant la mise en marche du climatiseur 6 Appuyez sur les fl ches haut ou bas TEMP TIME pour r gler le temps de la minuterie entre 1 et 24 heures 7 Le voyant indicateur Timer On du panneau de...

Страница 48: ...es fl ches haut ou bas TEMP TIME pour abaisser la temp rature Chaque fois que la fl che du bas TEMP TIME est enfonc e ou maintenue enfonc e la temp rature s abaisse de 1 F jusqu ce qu elle atteigne 61...

Страница 49: ...SEUR PAGE 21 SONS NORMAUX DU CLIMATISEUR SONS CAUSE D placement d air Le d placement d air du ventilateur Vibration de la fen tre Installation incorrecte Se rapporter la section Installation Cliquetis...

Страница 50: ...que le panneau avant soit ouvert voir les figures 25 et 26 3 Se servir d un aspirateur avec embout boyau pour nettoyer le filtre air Si le filtre est tr s sale le laver avec de l eau chaude et un savo...

Страница 51: ...e Haier Customer Satisfaction Center au 1 877 337 3639 UNE PREUVE D ACHAT DAT E LE NUM RO DE MOD LE ET LE NUM RO DE S RIE SONT REQUIS POUR OBTENIR DU SERVICE EN VERTU DE LA GARANTIE NETTOYAGE DU PANNE...

Страница 52: ...est pas obstru e Il semble faire trop froid dans la pi ce La temp rature a t r gl e trop bas Augmenter la temp rature r gl e Le climatiseur se met en marche et arr te trop fr quemment Filtre air sale...

Страница 53: ...n 3 Lesd fautsautresqueceuxissusdelafabrication 4 Lesdommagescaus sparl emploiincorrect ouabusif lesaccidents lesmodifications l entretien etlesoininad quatsdel appareil ouencoreun voltageincorrect 5...

Страница 54: ......

Страница 55: ...y advertencias 4 REQUISITOS DE INSTALACI N 5 Herramientas y partes 5 Requisitos de ubicaci n 6 Requisitos el ctricos 7 9 C MO INSTALAR 10 C mo desempacar el aire acondicionado 10 C mo preparar el air...

Страница 56: ...s o que tenga da os en alg n lugar a lo largo del cable mismo o bien en el extremo de la clavija o en el extremo conector 5 Apague el aire acondicionado y descon ctelo del tomacorriente en la pared an...

Страница 57: ...ridad adecuados aprobados para este refrigerante Utilice nicamente equipo certificado para el refrigerante R410a Adem s seg n las leyes federales todo refrigerante debe retirarse del aire acondicionad...

Страница 58: ...u objetos donde se descarga el aire o donde entra el aire en la parte delantera del aire acondicionado 5 NO ponga en funcionamiento el aire acondicionado con una cubierta protectora en la secci n ext...

Страница 59: ...7 3639 Destornillador Phillips Tijeras Nivel Cinta m trica Taladro y broca de 1 8 de pulg L piz IMAGEN PARTE 5 000 BTU 5 200 BTU 8 000 BTU 10 000 BTU 12 000 BTU Canaleta superior 1 1 1 Cinta de espuma...

Страница 60: ...a modelos ESA410M ESA412M NOTA No use un cable de extensi n adaptador para enchufe protector contra sobrecargas o adaptador de varias salidas Circulaci n libre de aire en la habitaci n que va a enfria...

Страница 61: ...pared Si el bot n TEST no se activa o el bot n RESET no se acopla no utilice el aire acondicionado y p ngase en contacto con un t cnico de servicio calificado 5 Pida a un electricista calificado que i...

Страница 62: ...que se instale un tomacorriente de 3 clavijas con conexi n a tierra adecuado CABLE DE SUMINISTRO EL CTRICO v ase la Figura 5 NOTA El enchufe del aire acondicionado puede ser ligeramente diferente en...

Страница 63: ...gue el aire acondicionado siempre en el panel control o con el control remoto Si el cable de suministro el ctrico est da ado debe sustituirse por uno nuevo que se obtenga del fabricante del producto y...

Страница 64: ...con los orificios de la parte superior de la unidad Aseg rese de que la canaleta quede viendo de frente como lo indica la etiqueta v ase la Figura 8 2 Utilice tornillos autorroscantes de 7 16 de pulg...

Страница 65: ...en la canaleta de la parte superior del aire acondicionado y dentro de la gu a de la parte inferior del aire acondicionado v ase la Figura 13 4 Deslice el marco de la cortina lateral lo m s cerca posi...

Страница 66: ...diferente a la que se muestra 4 Afloje el tornillo que se encuentra en la esquina inferior derecha del aire acondicionado 5 Deslice el soporte lateral sobre el tornillo El soporte lateral debe descan...

Страница 67: ...rtina izquierda y dentro del marco de la ventana v ase la Figura 20 7 Haga lo mismo para la cortina derecha INSTALACI N FINAL 1 Desenrolle la cinta de espuma que se incluye v ase la Figura 21 2 Introd...

Страница 68: ...i n aplica cuando se cambia de modo fr o a ventilador y viceversa No ponga en funcionamiento el aire acondicionado en el modo Cool enfriar cuando la temperatura exterior sea menor a los 61 F 16 C La b...

Страница 69: ...DO 1 OprimaMODEhastaqueveaquelaluzindicadoraseenciendeparalaconfiguraci ndeseada 2 ElijaFan ventilador Cool enfriar EnergySave ahorrodeenerg a oDehum deshumidificar FAN S lohacefuncionarelventilador O...

Страница 70: ...tesprevios 1 Enciendalaunidad 2 OprimaTIMER LaluzindicadoraTimerOn temporizadorencendido destellar Lapantallamostrar lashorasrestantesantesdequeelaireacondicionadoseencienda 3 Oprimaelbot nconlaflecha...

Страница 71: ...aturaaumentar 2 F 1horadespu sdehaberseleccionadoelmodo Posteriormente latemperaturaaumentar otros2 Fdespu sde1hora Launidadmantendr estatemperatura durante6horasydespu ssedetendr 3 ParaapagarelmodoSl...

Страница 72: ...aSPEEDparaelegirHigh Med LowoAutoCool TIMER Paraconfigurarelaireacondicionadoparaqueseapaguedespu sde1a24horasseleccionadas launidaddebeestarenON 1 OprimaTIMER LaluzindicadoraTimerOffdelpaneldecontrol...

Страница 73: ...arribaohaciaabajoTEMP TIMEparacambiareltiempo dedemorade1hasta24horas 7 LaluzindicadoraTimerOndelpaneldecontroldelaireacondicionadopermanecer encendida PARABORRARLAPROGRAMACI NDEDEMORADELTEMPORIZADOR...

Страница 74: ...aciaabajoTEMP TIMEparadisminuirlatemperatura Cadavezque oprimaomantengaoprimidoelbot nconlaflechahaciaabajoTEMP TIME latemperaturadisminuir 1 Fhastaquelleguealos61 F 16 C Lasrejillasdireccionalesdeair...

Страница 75: ...S NORMALES DE UN AIRE ACONDICIONADO SONIDOS MOTIVO Movimiento de aire Aire que gira alrededor del ventilador Vibraci n en la ventana Instalaci n incorrecta Consulte la secci n Instalaci n Sonido met l...

Страница 76: ...equierequeseabraelpanelfrontal v aselasFiguras25 y26 3 Utiliceunaaspiradoraconelaccesoriodemangueraparalimpiarelfiltrodeaire Sielfiltrodeaire est muysucio l veloconaguatibiayundetergentesuave Nolaveel...

Страница 77: ...iente al 1 877 337 3639 ES NECESARIO TENER EL COMPROBANTE DE COMPRA FECHADO EL N MERO DE MODELO Y EL N MERO DE SERIE PARA RECIBIR EL SERVICIO DE GARANT A LIMPIEZA DEL PANEL FRONTAL MANTENIMIENTO ANUAL...

Страница 78: ...el aire no est obstruida La habitaci n se siente demasiado fr a La configuraci n de la temperatura est demasiado baja Aumente la temperatura establecida El aire acondicionado inicia y finaliza el cic...

Страница 79: ...n inadecuada 2 Da os producidos en el env o 3 Defectos distintos a los de fabricaci n 4 Da os por uso incorrecto maltrato accidente alteraci n falta de cuidado y mantenimiento adecuados o corriente o...

Страница 80: ...Model HWR05CXM ESA405M ESA406M ESA408M ESA410M ESA412M Issued Date July 2012 Haier America New York NY 10018 2012 Haier America Trading LLC www HaierAmerica com...

Отзывы: