Preparation
Unpacking
Remove all packing materials.
Check attachments and materials
Checking should be conducted with reference to the Packing List. Contact the local
distributor if discrepancies are found.
Ensure proper location of the refrigerator.
Clean the refrigerator before use.
(See the following section “Cleaning”)
Idle time
After the refrigerator has been sited and cleaned, let it stand for more than 30 minutes
before connecting the power source.
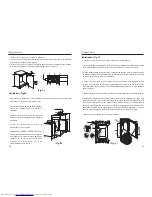
Left/Right Door Opening
(
(
(
(
(
Figure A
)
)
)
)
)
The door of the refrigerator can be opened both from the left or right as required. The
following are the steps required to position the door to open to the right.
1. Remove the door and place aside after removing the bracket (2) and the screw hole
cover (3).
2. Remove the upper bracket (6) and the pivot pin (1) and the spring washer and re-fix to
the corresponding position on the left. (Bracket cover (5) should also be moved to the
corresponding left position.
3. Carefully place the door on the upper bracket (6) and lower bracket (2). Tighten the
lower bracket screws to the refrigerator case.
4. Place the screw cover (3) over the original lower bracket hole on the right side.
5. Change the position of component (4) to the corresponding opposite position.
6. After installation open and close the door to ensure the door operates smoothly.
7. Move the components (7) and (8) with the special tool provided.
8. Remove the screw (9) from the refrigerator, open the door fully and replace screw (9) in
the corresponding opposite position.
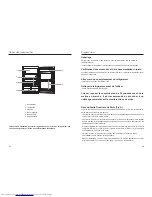
Refrigerator Diagram
This diagram may vary slightly with the layout of the refrigerator you have
just purchased due to technical improvements.
1.Freezing compartment 2.Temperature Controller
3.Shelves 4.Vegetable and fruit tray
5.Egg tray 6.Bottle racks
3
4
4
2
3
1
5
6


