background image

Serial Number:                                                    Version:00.00


Edition: 2005-7 


Dishwasher


        Model: DW12-CBE5/6 


Page  9  /  21 

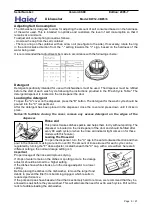
Adjusting Salt Consumption 

The dishwasher is designed to allow for adjusting the amount of salt consumed based on the hardness 
of  the water  used.  This  is  intended  to  optimize  and  customize  the  level  of  salt  consumption  so  that  it 
remains at a minimum. 
To adjust salt consumption,proceed as follows: 
- Unscrew the cap from the salt container; 
- There is a ring on the container with an arrow on it (see figure to the side), If necessary, rotate the ring 
in  the  anticlockwise  direction  from  the  "-"  setting  towards  the  "+"  sign,  based  on  the  hardness  of  the 
water being used. 
It is recommended that adjustments be made in accordance with the following scheme: 


Detergent 

Detergent specifically intended for use with dishwashers must be used. The dispenser must be refilled 
before the start of each wash cycle following the instructions provided in the "Wash Cycle Table." The 
detergent dispenser is located on the inside panel the door. 

Loading the detergent 

To open the "A" cover on the dispenser, press the "B" button. The detergent for the wash cycle should be 
poured into the "C" compartment. 
After the detergent has been placed in the dispenser, close the cover and press down until it clicks in 
place.


Notice:To  facilitate  closing  the  cover,  remove  any  excess  detergent  on  the  edges  of  the 

dispenser.


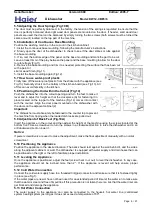
Rinse Aid 

This product makes dishes sparkle and helps them to dry without spotting. The 
dispenser is located on the inside panel of the door and should be filled after 
every 80 wash cycle (or when the rinse aid indicator light comes on for those 
models with this feature). 

Loading The Rinse Aid 

To open the dispenser, turn the "C" cap in the anti-clockwise direction and then 

pour in the rinse aid, making sure not to overfill. The amount of rinse aid used for each cycle can be 
regulated by turning the "F" dose adjustor, located beneath the "C" cap, with a screwdriver. here are 6 
different settings; the normal dosage setting is 3. 

Important


Proper dosage of the rinse aid improves drying. 
If drops of water remain on the dishes or spotting occurs, the dosage 
adjustor should be turned to a higher setting. 
If the dishes have white streaks, turn the dosage adjustor to a lower 
setting. 
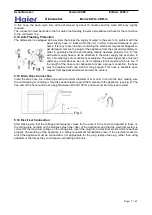
Before placing the dishes in the dishwasher, remove the larger food 
debris to prevent the filter from becoming clogged, which results in 
reduced performance. 
If the pots and pans have baked-on food that is extremely hard to remove, we recommend that they be 
allowed to soak before they are washed. This will eliminate the need for extra wash cycles. Pull out the 
rack to facilitate loading the dishwasher. 
 

Содержание DW12-CBE5

Страница 1: ...UAL Models DW12 CBE5 DW12 CBE6 l Features l A grade for energy consumption of European standard l Electronic control delay washing l Three spraying higher cleaning ratio l Water softener for descaling l Super capacity for 12 settings ...

Страница 2: ...ontents 1 Product Code Illumination and Series Introduction 3 2 Features 3 3 Safety Precaution 4 4 Net dimension 5 5 Installation and Accessory Parts 5 6 Parts and Functions 6 7 Function Schedule 6 8 Program Diagram 6 9 Maintenances Services and Trouble Shooting 6 10 Circuit Diagram 6 ...

Страница 3: ...echanical electronic F The second series of factory design G Code name described outer side material Examples DW12 CBE5 It represents automatic spraying electronic freestanding dishwasher the cavity capacity is 12 standard sets 2 Features 2 1 A grade for energy consumption of European standard 2 2 Electronic control delay washing 2 3 Half load washing Half loading fashtion which the upper rack onl...

Страница 4: ... of injury This appliance cannot be installed outdoors not even if the area in which it is installed is covered by a roof It is also very dangerous to leave it exposed to the rain and elements Do not touch the heating element during or after a wash cycle Do not lean or sit on the door when it is open as this could overturn the dishwasher If the appliance malfunctions turn off water supply to the a...

Страница 5: ...sing the tip of a drill or a pencil The three holes closest to the side should be used B Repeat this step on the other side of the panel using the corresponding side of the template 5 3 Fastening the Bracket to the Wooden Panel Fig 5 At the point marked drill holes 2 mm in diameter If the panel is made of chip board only drill through the veneer If the panel is made of solid wood the holes can be ...

Страница 6: ... 14 comes into contact with the counter Align the door panel mounted on the dishwasher with the doors on the adjacent cabinet 2 Important The dishwasher must absolutely be fastened to the counter top to prevent the machine from tipping when the loaded dish racks are pulled out 5 9 Adjustment of Back Feet Fig 10A Insert the appliance in the cutout and then adjust the height of the machine using the...

Страница 7: ...hich are live If the length of the hose is not adequate to make a proper connection the hose must be replaced with one which is long enough This hose is available upon request from specialized retailers and service centers 5 15 Drain Hose Connection Insert the drain hose into a drain pipe with a minimum diameter of 4cm or let it run into the sink making sure to avoid bending or crimping it Use the...

Страница 8: ...varies from place to place If hard water is used in the shwasher deposits will form on the dishes utensils The appliance is equipped with a special softener that uses a salt specifically designed to eliminate lime and minerals from the water Loading the Salt into the Softener Always use salt intended for use with dishwashers The salt container is located beneath the lower rack and should be filled...

Страница 9: ...ver and press down until it clicks in place Notice To facilitate closing the cover remove any excess detergent on the edges of the dispenser Rinse Aid This product makes dishes sparkle and helps them to dry without spotting The dispenser is located on the inside panel of the door and should be filled after every 80 wash cycle or when the rinse aid indicator light comes on for those models with thi...

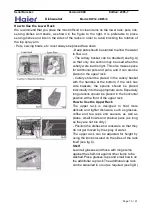
Страница 10: ...ry should be placed in the cutlery basket with the handles at the bottom if the rack has side baskets the spoons should be placed individually into the appropriate slots Especially long utensils should be placed in the horizontal position at the front of the upper rack How to Use the Upper Rack The upper rack is designed to hold more delicate and lighter dishware such as glasses coffee and tea cup...

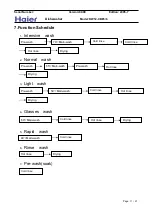
Страница 11: ...l wash 3 Light wash 4 Glasses wash 5 Rapid wash 6 Rinse wash 7 Pre wash soak Cold rinse Pre wash 50 Main wash Cold rinse Hot rinse Drying 60 Main wash Cold rinse Hot rinse Drying 40 Main wash Cold rinse Hot rinse Drying Pre wash 55 Main wash Drying Hot rinse Pre wash Pre wash 70 Main wash Cold rinse Cold rinse Hot rinse Drying ...

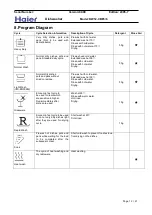
Страница 12: ...Wash IEC EN50242 Normal dirty dishes pots and pans without dried on residue Pre wash with cold water Extended wash at 50 Rinse with cold water Rinse with hot water Drying 30g Glassware Economic fast cycle to be used for items which are sensitive to higher Run immediately after dishes are used Wash at 60 Rinse with warm water Hot rinse Drying 15g Rapid Wash Economic fast cycle to be used to on not ...

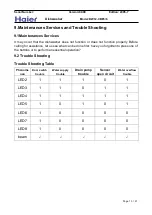
Страница 13: ... properly Before calling for assistance Iet us see what can be done first have you forgotten to press one of the buttons or to perform an essential operation 9 2 Trouble Shooting Trouble Shooting Table Phenome non Door switch trouble Water supply trouble Drain pump trouble Sensor open circuit Water overflow trouble LED2 1 1 1 0 1 LED3 1 1 0 1 1 LED4 1 1 1 1 1 LED5 1 0 1 0 1 LED6 1 0 0 0 0 LED7 1 0...

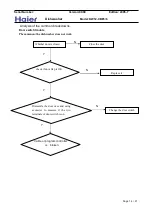
Страница 14: ...d using avometer to measure if the two terminals of door switch is on check if door flap is OK Analysis of the common breakdowns Door switch trouble Phenomenon the dishwasher does not work N Y N Y N Y Cable or program controller is broken Whether door is closed Close the door Replace it Change the door switch ...

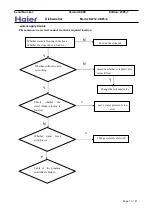
Страница 15: ...oid valve is working Cable or the program controller is broken water supply trouble Phenomenon water level cannot reach the required location N Y N Y Y Y N N Y measure whether solenoid valve is electrified Change the solenoid valve Whether water is flowing in the hose Whether the stopcock is turned on Turn on the stopcock Change water level switch user s water pressure is too slow ...

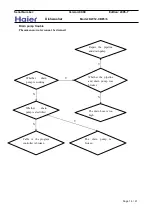
Страница 16: ...e program controller is broken The drain pump is broken Drain pump trouble Phenomenon water cannot be drained Repair the pipeline and drain pump Whether drain pump is working Y N Whether the pipeline and drain pump was blocked Whether drain pump is electrified N Y The drain hose is too high Y N ...

Страница 17: ... 6 Page 17 21 Program controller or circuit is broken Whether heater is OK Whether thermo limiter is OK Heating trouble Phenomenon program controller stop turnning N Y N Y N Y Connect it well change thermo limiter change heater Whether socket connector is connected well ...

Страница 18: ...g Y N Y N N N Y Y Whether the water overflow swich is ok Whether water is deposited is the bottom case Whether water flows out of the water overflow conduit Bottom case is leaking change water overflow switch Program controller is broken Check whether the water level switch is closed change the water level switch Program controller is broken ...

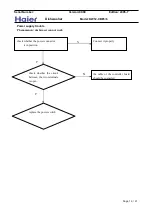
Страница 19: ... switch check whether the circuit between the two terminals is open Power supply trouble Phenomenon dashwaser cannot work check whether the power connector N is in position Y N Y Connect it properly check whether the power connector is in position the cable or the controller board should be suspected ...

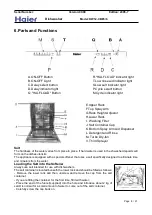
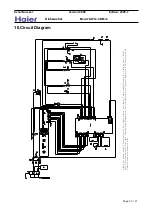
Страница 20: ... Wring box B Power switch C Power indicator D Door switch E Water lever switch F Drain pump G Dispenser H 1 2 washing valve I Softer valve J Overflow switch K Inlet valve L Washing pump M Temperature limiter N Heater O Relay P Sensoer temperature Q Salt missing switch R Rinsing agent missing switch S Fan ...

Страница 21: ...rial Number Version 00 00 Edition 2005 7 Dishwasher Model DW12 CBE5 6 Page 21 21 Sincere Forever Haier Group Haier Industry Park No 1 Qianwangang Road 266555 Ec Tech Zone Qingdao China http www haier com ...

Отзывы: