background image

11 

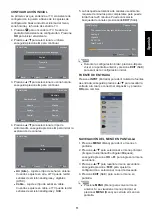
CONFIGURACIÓN INICIAL 

La primera vez que encienda el TV, el asistente de 
configuración lo guiará a través de los ajustes de 
configuración básica incluido el idioma del menú, 
zona horaria y la fuente de señal de TV. 

1. Presione 

  para encender el TV. Se abre la 

pantalla del asistente de configuración. Presione 

OK

 para iniciar el asistente. 

2. Presione 

/

 para seleccionar su idioma, 

enseguida presione 

 para continuar. 

Français

e

g

a

u

g

n

a

L

p

u

t

e

S

l

a

it

i

n

I

Please select your preferred language

English

Español

Back

Select

Next

Exit


3. Presione 

/

 para seleccionar su zona horaria, 

enseguida presione 

 para continuar. 

e

n

o

Z

e

m

i

T

p

u

t

e

S

l

a

it

i

n

I

Back

Select

Next

Exit

Newfoundland

Atlantic

Eastern

Central

Pacific

Alaska

Hawaii

Samoa

Mountain


4. Presione 

/

 para seleccionar el tipo de 

sintonizador, enseguida presione 

 para iniciar la 

exploración de canales. 

r

e

n

u

T

p

u

t

e

S

l

a

it

i

n

I

Air

Back

Select

Next

Exit

Cable


z


Air (Aire) 

– 

Ajuste el tipo de señal en antena. 

Cuando se ajuste en aire, el TV puede recibir 
señales de emisión analógicas y digitales 
(ATSC). 

z


Cable

– 

Ajuste el tipo de señal en cable. 

Cuando se ajuste en cable, el TV puede recibir 
señales de emisión analógicas y QAM. 


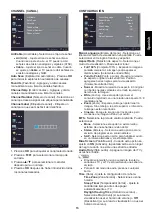
5. La búsqueda automática de canales usualmente 

requiere de minutos para completarse pero puede 
tardar hasta 20 minutos. Puede cancelar la 
búsqueda de canales presionando 

EXIT

 (Salir). 

n

a

c

S

l

e

n

n

a

h

C

p

u

t

e

S

l

a

it

i

n

I

Cancel

Exit

The channel scan may take a while to complete.

Analog: 0
Digital: 0
RF CH: 30
Total Found: 0

20%


NOTA 

z


Durante la configuración inicial, presione 

 para 

volver a la pantalla anterior y presione 

EXIT

 (Salir) 

para salir de la configuración inicial. 

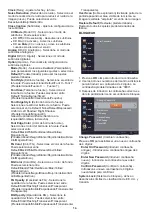
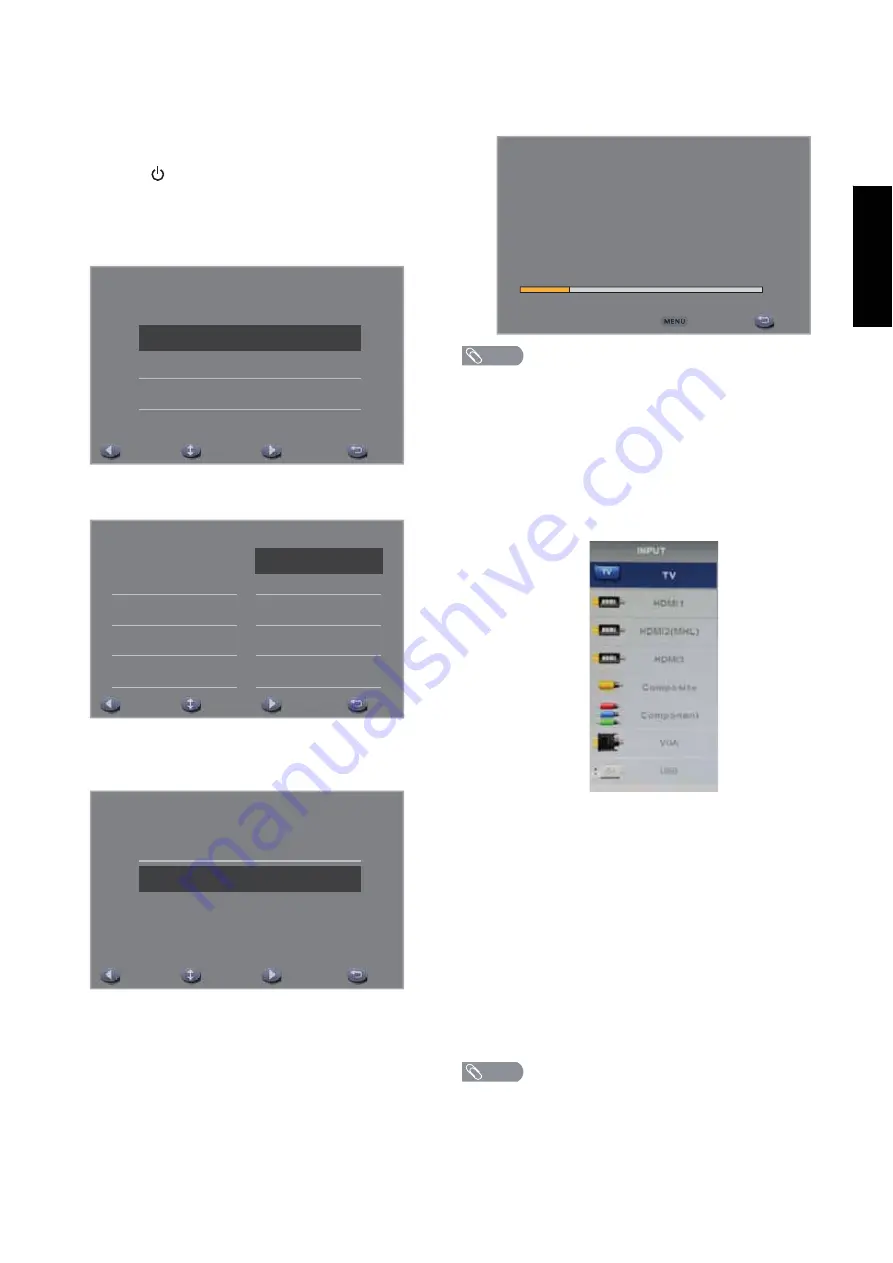
FUENTE DE ENTRADA 

Presione 

INPUT

 (Entrada) para abrir la lista de fuentes 

de entrada, enseguida presione 

/


para resaltar la 

entrada a la cual se conectó el dispositivo y presione 

OK

 para cambiar.


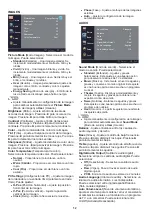
NAVEGACIÓN DEL MENÚ EN PANTALLA 

1. Presione 

MENU

 (Menú) para abrir el menú en 

pantalla. 

2. Presione 

/


para seleccionar el menú principal 

(Imagen/ Audio/Canal/Configurar/Bloquear), 
enseguida presione 

OK

 o 


para ingresar al menú 

secundario. 

3. Presione 

/


para resaltar el menú secundario, 

enseguida presione 

/


para ajustar la 

configuración o seleccionar la opción deseada. 

4. Presione 

EXIT

 (Salir) para cerrar el menú en 

pantalla. 

NOTA 

z


Presione 

MENU

 (Menú) para volver al menú 

anterior. Si se visualiza el menú principal, al 
presionar 

MENU

 (Menú) se cerrará el menú en 

pantalla. 

Sp

a

n

is

h


Содержание 50D3505B

Страница 1: ...50D3505 ...

Страница 2: ......

Страница 3: ...sted and found to comply with the limits for a Class B digital device pursuant to Part 15 of the FCC Rules These limits are designed to provide reasonable protection against harmful interference in a residential installation This equipment generates uses and can radiate radio frequency energy and if not installed and used in accordance with the instructions may cause harmful interference to radio ...

Страница 4: ...sunlight dusty humid and smoky areas Don t throw any object inside the TV box like metals or other flammable materials Remember to unplug the AC cord from the AC outlet before cleaning Do not use liquid cleaners or aerosol cleaners to clean the display Call service personnel to clean the internal part of the TV once a year Don t place the TV in confined spaces or in a box when using it Make sure t...

Страница 5: ...tance of at least three feet should be maintained between your TV and any heat source such as a radiator heater oven amplifier etc Do not install your TV close to smoke Operating your TV close to smoke or moisture may cause fire or electric shock Slots and openings in the back and bottom of the cabinet are provided for ventilation To ensure reliable operation of your TV and to protect it from over...

Страница 6: ...sed to rain or other moisture Your TV is dropped or damaged in any way The performance of your TV changes substantially This apparatus shall not be exposed to dripping or splashing and no objects filled with liquids such as vases shall be placed on the apparatus The mains plug or appliance coupler is used as the disconnect device the disconnect device shall remain readily operable CAUTION These se...

Страница 7: ...easy to use manual will guide you in getting the best use of your product Remember to record the model and serial number They are on the label on back of the unit Staple your receipt to your manual You will need it to obtain warranty service Model number Serial number Date of purchase ...

Страница 8: ... MAKING CONNECTIONS 9 CONNECTING TO AN ANTENNA CABLE WALL JACK 9 CONNECTING EXTERNAL AUDIO VIDEO DEVICE 9 CONNECTING PC 9 CONNECTING HEADPHONES 9 CONNECTING DIGITAL AUDIO DEVICE 9 OPERATING INSTRUCTIONS 10 USING THE REMOTE CONTROL 10 INITIAL SETUP 11 INPUT SOURCE 11 NAVIGATING THE ON SCREEN MENU 11 PICTURE 12 AUDIO 12 CHANNEL 13 SETUP 13 LOCK 14 MEDIA 16 TIPS 17 LEGAL NOTICES 17 PRODUCT SPECIFICAT...

Страница 9: ...nstructions of the user manual that came with the wall mount bracket to install TURNING ON THE TV 1 Install the stand and place the TV on a solid surface t Ensure that the TV is placed in a position to allow free back cover t To prevent any unsafe situations no naked sources such as lighted candles should be placed on or in the vicinity t Avoid heat direct sunlight and exposure to rain or water Th...

Страница 10: ...VGA Connect the video cable from a computer 7 HDMI1 HDMI2 MHL Connect HDMI devices to these jacks An HDMI cable carries both video and sound You do not need to make an audio connection for an HDMI device Note The HDMI2 port is MHL enabled 8 HDMI3 9 10 11 R L Connect the audio cables for a component or composite device 12 YPbPr Connect the video cables for a component device 13 LINE OUT HDMI2 MHL H...

Страница 11: ...oded jacks CONNECTING PC To play from the external device 1 Turn on the TV and the connected device 2 Press INPUT to open the input source list then press to highlight the input to which the device was connected and press OK to switch t Select TV to watch TV from the RF input t Select HDMI1 HDMI2 MHL or HDMI3 to play from a device connected to the HDMI1 HDMI2 MHL or HDMI3 input t Select Composite ...

Страница 12: ...L VOL Press VOL or VOL to adjust volume level EXIT Press to exit the menu or on screen display OSD RECALL Press to switch to last viewed channel DISPLAY Press to display the information window FAVORITE Press to display the Favorite List Use the arrow buttons to move around in menus Press to start playing the MEDIA or to pause playing Used for models with MEDIA function only Press to fast reverse M...

Страница 13: ...n input and press OK to switch NAVIGATING THE ON SCREEN MENU 1 Press MENU to open the on screen menu 2 Press to select the main menu Picture Audio Channel Setup Lock then press OK or to enter the sub menu 3 Press to highlight a sub menu item then press to adjust the setting or select the desired option 4 Press EXIT to close the on screen menu t Press MENU to return to the previous menu If the main...

Страница 14: ... images t Auto Automatically adjust the image settings Picture Audio Channel Setup Lock Picture Mode Brightness Contrast Color Tint Sharpness Color Temperature Energy Saving 50 50 50 50 50 Cool Select Exit NOTE AUDIO Sound Mode Select the sound mode You can select t Standard Balanced treble and bass This setting is good for watching standard TV broadcasts t Music Increase the treble and bass and p...

Страница 15: ...orted VGA input only t Point to Point Display the VGA signal s original aspect ratio Black bars might be added for display VGA input only t Normal Display the original 4 3 aspect ratio with vertical black bars on the left and right of the image t Wide Select this option if there is noise or static Use this option to view content recorded in a 16 9 wide screen aspect ratio t Zoom and bottom of the ...

Страница 16: ... Magenta Cyan BG Color Select background color You can select Default Black White Red Green Blue Yellow Magenta Cyan FG Opacity Select font opacity You can select Default Solid Flashing Translucent Transparent BG Opacity Select background opacity You can select Default Solid Flashing Translucent Transparent Over Scan Extend part of the display past the visible area of the screen The resulting pict...

Страница 17: ...V ratings age based TV Y All children TV Y7 Suitable for children 7 and older TV G General audiences TV PG Parental guidance suggested TV 14 Parental guidance strongly suggested TV MA Mature audiences only Picture Audio Channel Setup Lock TV Rating Press OK to Lock or Unlock ALL FV V S L D Select Exit L Picture Audio Channel Setup Lock Press OK to Lock or Unlock TV Y TV Y7 TV G TV PG TV 14 TV MA S...

Страница 18: ... size date and time Press OK to close the information screen t Select to rotate the photo 90 clockwise t Select to rotate the photo 90 counterclockwise t Select to zoom in on the photo t Select to zoom out on the photo t Select to view a zoomed photo Press on the remote control to move and view the photo in detail Press EXIT to exit Music 1 Press to highlight an option then press OK to execute t S...

Страница 19: ...Haier is committed to safely recycling electronic products and product materials Please check for a local recycling location in the United States at 1800RECYCLING COM LEGAL NOTICES Modifications The FCC requires the user to be notified that any changes or modifications made to this device that are not expressly approved by our company may void the user s authority to operate the equipment Cables C...

Страница 20: ...ith Stand 24 0 lbs Weight without Stand 23 1 lbs WALL MOUNTING Wall Mount Pattern H x V 400 x 200 mm 6 M e p y t w e r c S POWER Power Consumption 150W 1W y b d n a t S 100 240V 50 60Hz r e w o P s n i a M 10W 10W r e w o P o i d u A Ambient Temperature 41 F 95 F PACKAGE CONTENTS Package Contents TV unit x 1 TV stand x 1 Remote control x 1 Screws x 8 User manual x 1 Registration card x 1 Battery x...

Страница 21: ...s control Some TEXT modes could block the screen Good picture but no sound t Increase the volume level by pressing the VOL button on the remote control or on the TV side control panel t Press the MUTE Good sound but poor color t Adjust the contrast color and brightness settings Poor picture t Poor picture quality may occur when an activated S VHS camera or camcorder is connected to your TV and oth...

Страница 22: ...described herein or to extend the duration of any warranties beyond the time period described herein on behalf of Haier The warranties described herein shall be the sole and exclusive warranties granted by Haier and shall be the sole and exclusive remedy available to the purchaser Correction of defects in the manner and for the Haier to the purchaser with respect to the product and shall constitut...

Страница 23: ...w HaierAmerica com Model 50D3505 Issued Jan 2014 Made in China Fabriqué en Chine Hecho en China Printed China La Chine imprimée China impresa Haier America New York NY 10018 2014 Haier America Trading LLC ...

Страница 24: ...Manuel d utilisation MODÈLES 50D3505 ...

Страница 25: ......

Страница 26: ...rtie 15 des règles de la FCC Ces limites sont conçues pour assurer une protection raisonnable contre les perturbations nuisibles dans une installation résidentielle Cet équipement produit utilise et peut irradier de l énergie de fréquence radio et s il n est pas installé et utilisé conformément aux présentes instructions peut causer des interférences nuisibles des communications radio Toutefois il...

Страница 27: ...il les endroits poussiéreux humides et enfumés Ne jeter aucun objet à l intérieur du boîtier du téléviseur comme des métaux ou d autres Débrancher le cordon d alimentation c a de la prise c a avant le nettoyage Ne pas utiliser de nettoyants liquides ou en aérosol pour nettoyer Appeler le personnel d entretien pour nettoyer la partie interne du téléviseur une fois par an Ne pas placer le téléviseur...

Страница 28: ... à une zone de haute température de la condensation peut se former dans le boîtier Attendre avant d allumer votre téléviseur pour éviter de provoquer un incendie un choc électrique ou d endommager les composants Une distance d au moins trois pieds 0 9144 m doit être maintenue entre votre téléviseur et toute source votre téléviseur à proximité des zones où il y a de la fumée Le fonctionnement de vo...

Страница 29: ...midité Le fonctionnement de votre téléviseur dans des environnements à forte poussière ou à forte humidité peut provoquer un incendie ou un choc électrique Suivre les instructions pour déplacer votre téléviseur S assurer que le cordon d alimentation et tous les autres câbles sont débranchés avant de déplacer votre téléviseur Lors du débranchement de votre téléviseur tenir l adaptateur c a c c pas ...

Страница 30: ...ème CATV sur l article 820 40 du CNE qui détaille les directives de mise à la masse appropriée et d alimentation sur la prise murale après avoir connecté le téléviseur à l adaptateur UNITÉ DE DÉCHARGE DE L ANTENNE COLLIER DE MISE À LA MASSE ÉQUIPEMENT ÉLECTRIQUE COLLIERS DE MISE À LA MASSE CONDUCTEURS DE MISE À LA MASSE SYSTÈME D ÉLECTRODES DE MISE À LA MASSE DU SECTEUR ANTENNE 5 5 Français ...

Страница 31: ...oduit Haier Ce manuel facile à utiliser vous guidera à obtenir le meilleur usage de votre produit N oubliez pas de noter le modèle et le numéro de série Ils se trouvent sur l étiquette à l arrière de l appareil Numéro de modèle Numéro de série Date d achat W garantie 6 ...

Страница 32: ...EXIONS 10 CONNEXION À UNE PRISE MURALE D ANTENNE DE CÂBLE 10 CONNEXION DU PÉRIPHÉRIQUE AUDIO VIDÉO EXTERNE 10 CONNEXION D UN PC 10 CONNEXION DES ÉCOUTEURS 10 CONNEXION D UN PÉRIPHÉRIQUE AUDIO NUMÉRIQUE 10 INSTRUCTIONS D UTILISATION 11 UTILISATION DE LA TÉLÉCOMMANDE 11 CONFIGURATION INITIALE 12 SOURCE D ENTRÉE 12 UTILISATION DU MENU À L ÉCRAN 12 PICTURE IMAGE 13 AUDIO 13 CHAÎNE 14 CONFIGURATION 14 ...

Страница 33: ...ande latéral du téléviseur PRÉPARATION IMPORTANT Ne pas appliquer de pression du fabricant ne couvre pas les usages abusifs ou les installations inappropriées FIXATION DU SOCLE IMPORTANT Le socle du téléviseur doit être assemblé avant l utilisation 1 couverture mousse tissu etc pour éviter tout dommage au téléviseur 2 Alignez attentivement le socle à la partie inferieure du téléviseur 3 Fixez le s...

Страница 34: ...PC Connectez le câble audio à partir d un ordinateur 10 RF FR Connectez une antenne ou un câble TV à cette prise 11 VIDEO VIDÉO Connectez le câble vidéo pour un périphérique composite 12 R D L G Connectez les câbles audio pour un périphérique composant ou composite 13 YPbPr Connectez les câbles vidéo pour un périphérique composant COMMANDE LATÉRALE CONNEXION PÉRIPHÉRIQUE ET COMMANDES 9 3 Français ...

Страница 35: ...EURS CONNEXION D UN PÉRIPHÉRIQUE AUDIO NUMÉRIQUE REMARQUE Éteignez le téléviseur et les périphériques externes avant de procéder aux connexions Pour lire à partir du périphérique externe 1 Allumez le téléviseur et le périphérique connecté 2 Appuyez sur INPUT ENTRÉE pour ouvrir la liste pour mettre en surbrillance l entrée à laquelle le périphérique a été connecté et appuyez sur OK pour passer Choi...

Страница 36: ... ou fermer le menu à l écran CH CH Appuyez sur CH ou CH pour changer les chaînes de télévision BACK RETOUR Retourner au menu précédent Si le Streaming Stick de Roku est connecté appuyez sur ce bouton pour retourner à l écran précédent DISPLAY AFFICHAGE W EXIT QUITTER W l écran OSD SAP Appuyez sur pour changer de son SAP Stéréo et Mono pour la télévision analogique ou changer de langue audio pour l...

Страница 37: ...an précédent et appuyez sur EXIT initiale SOURCE D ENTRÉE Appuyez sur INPUT ENTRÉE pour ouvrir la liste des en surbrillance une entrée et appuyez sur OK pour passer UTILISATION DU MENU À L ÉCRAN 1 Appuyez sur MENU pour ouvrir le menu à l écran W principal Picture Audio Channel Setup W Verrouillage puis appuyez sur OK accéder au sous menu W ajuster le réglage ou sélectionner l option désirée 4 Appu...

Страница 38: ... Pos H Ajustez la position horizontale de l image V Pos Pos V Ajustez la position verticale de l image Clock Horloge Ajustez la fréquence d échantillonnage Phase Ajustez la focalisation des images stables Auto Ajustez automatiquement les paramètres de l image AUDIO Sound Mode Mode Audio Choisir le mode audio Vous pouvez choisir Standard Aigus et basses équilibrés Ce réglage est bon pour regarder d...

Страница 39: ...ull 100 Plein 100 Élargir l image pour remplir l écran L image peut être déformée Entrée VGA uniquement Point to Point W hauteur largeur original du signal VGA Des Entrée VGA uniquement Normal W original avec des barres verticales noires à gauche et à droite de l image Wide Large Utilisez cette option pour visualiser le contenu enregistré dans un rapport hauteur largeur 16 9 écran large Zoom Zoom ...

Страница 40: ...e Choisir la couleur de bordure de la police Vous pouvez choisir Default Black White Red Green Blue Yellow Magenta Cyan Par défaut Noir Blanc Rouge Vert Bleu Jaune Magenta Cyan FG Color Couleur avant plan Choisir la couleur de la police Vous pouvez choisir Default White Black Red Green Blue Yellow Magenta Cyan Par défaut Blanc Noir Rouge Vert Bleu Jaune Magenta Cyan BG Color Couleur arrière plan C...

Страница 41: ...ement Canada Rating Q Canada English Canada anglais Les C Convient à tous les enfants C8 Convient aux enfants de 8 ans et plus G Grand public PG Surveillance parentale recommandée 14 Convient aux enfants de 14 ans et plus 18 Adultes seulement Canada French Canada français Les 2 3 G Grand public 8 ans Convient aux enfants de 8 ans et plus 13 ans Convient aux enfants de 13 ans et plus 16 ans Convien...

Страница 42: ...d informations Sélectionnez pour faire pivoter la photo de 90 dans le sens horaire Sélectionnez pour faire pivoter la photo de 90 dans le sens antihoraire Sélectionnez pour le zoom avant sur la photo Sélectionnez pour le zoom arrière sur la photo Sélectionnez pour visualiser une photo zoomée déplacer et visualiser la photo en détail Appuyez sur EXIT QUITTER pour quitter Music Musique 1 option puis...

Страница 43: ... est engagé à recycler en toute sécurité les produits électroniques et les matériaux de produits Veuillez chercher un emplacement de recyclage local aux États Unis à l adresse 1800RECYCLING COM AVIS JURIDIQUES La FCC exige que l utilisateur soit informé que tout appareil et non expressément approuvés par notre société peuvent retirer à l utilisateur l autorisation de faire fonctionner ledit appare...

Страница 44: ...bPr POIDS ET DIMENSIONS Dimensions avec socle l x H x P 44 3 po x 27 0 po x 9 8 po Dimensions sans socle l x H x P 44 3 po x 25 7 po x 3 0 po Poids avec socle 24 0 lb Poids sans socle 23 1 lb MONTAGE MURAL Modèle de montage mural H x V 400 x 200 mm Type de vis M6 POWER MARCHE ARRÊT Consommation électrique 150 W Attente 1 W Alimentation secteur 100 240 V 50 60Hz Puissance audio 10 W 10 W Températur...

Страница 45: ...de latéral du téléviseur Appuyez sur le bouton MUTE SILENCE de la télécommande pour vous assurer que la fonction Silence est désactivée Bon son mais mauvaise qualité de la couleur Ajustez les paramètres de contraste de couleur et de luminosité Image de mauvaise qualité Une mauvaise qualité de l image peut se produire lorsqu un appareil photo S VHS activé ou un caméscope a été connecte à votre télé...

Страница 46: ...oute garantie au delà de la période de temps décrite dans ce document au nom de Haier Les garanties décrites dans ce document seront les seules et uniques garanties accordées par Haier et seront le seul et unique recours de l acheteur La correction des défauts dans la manière et pour la période de temps décrites dans de document constituera les accomplissements complets de toutes les capacités et ...

Страница 47: ...rAmerica com Modèle 50D3505 Délivré en Jan 2014 Fabriqué en Chine Fabriqué en Chine Imprimé en Chine Printed China La Chine imprimée China impresa Haier America New York NY 10018 2014 Haier America Trading LLC ...

Страница 48: ...Manual de usuario MODELOS 50D3505 ...

Страница 49: ......

Страница 50: ...uipo ha sido probado y se encuentra en conformidad con los límites establecidos para un dispositivo digital de Clase B conforme a la parte 15 de las normas de la FCC Estos límites están diseñados para proporcionar protección razonable contra la interferencia perjudicial en una instalación residencial Este equipo genera usa y puede irradiar energía de radio frecuencia y si no se instala y se usa en...

Страница 51: ... áreas con humo No arroje objetos al interior del TV como metales o material inflamable Recuerde desconectar el cable de CA de la toma de corriente de CA antes de limpiar No use limpiadores de líquido ni aerosoles para limpiar la pantalla Llave al personal de servicio para limpiar la parte interna del TV una vez al año No coloque el TV en espacios reducidos o en una caja cuando lo use 6 in Asegúre...

Страница 52: ...Espere antes de encender el TV para evitar incendios descargas eléctricas o daños al componente z Debe mantenerse una distancia de al menos tres pies entre su TV y cualquier fuente de calor tal como un radiador calefactor horno amplificador etc No instale su TV cerca de humo Operar su TV cerca de humo o humedad podría ocasionar incendios o descargas eléctricas z Las ranuras y aperturas en la parte...

Страница 53: ... en contacto con el distribuidor El cable de alimentación está roto o se cae Existen atomizaciones líquidas o han caído objetos en su TV Su TV está expuesto a lluvia o a otro tipo de humedad Su TV se ha caído o averiado en cualquier sentido El desempeño de su TV cambia sustancialmente z El aparato no debe estar expuesto a goteo o derrames de agua y a ningún objeto que contenga líquido como por eje...

Страница 54: ...á para obtener el máximo uso de su producto Recuerde y registre el modelo y el número de serie Se encuentran en la etiqueta pegada en la parte posterior de la unidad Número de modelo Número de serie Fecha de compra Engrape su recibo a su manual Lo necesitará en caso de obtener servicio de garantía Spanish ...

Страница 55: ...ES 9 CONEXIÓN A UNA TOMA DE PARED DE ANTENA CABLE 9 CONEXIÓN DE DISPOSITIVO DE AUDIO VÍDEO EXTERNO 9 CONEXIÓN DE PC 9 CONEXIÓN DE AUDÍFONOS 9 CONEXIÓN DE DISPOSITIVO DE AUDIO DIGITAL 9 INSTRUCCIONES DE OPERACIÓN 10 USO DEL MANDO A DISTANCIA 10 CONFIGURACIÓN INICIAL 11 FUENTE DE ENTRADA 11 NAVEGACIÓN DEL MENÚ EN PANTALLA 11 IMAGEN 12 AUDIO 12 CHANNEL CANAL 13 CONFIGURACIÓN 13 BLOQUEAR 14 MEDIA 16 M...

Страница 56: ...El soporte de montaje de la pared y los tornillos no están incluidos ENCENDIDO DE TV 1 Instale la base y coloque el TV sobre una superficie sólida NOTA z Asegúrese de colocar el TV en una posición que permita que fluya el aire No bloquee los orificios de ventilación en la cubierta trasera z Para evitar cualquier situación no segura no se deben usar flamas abiertas como velas encendidas en o sobre ...

Страница 57: ...eo de un ordenador 9 AUDIO DE PC Conecte el cable de vídeo de un ordenador 10 RF Conecte una antena o TV por cable en esta entrada 11 VÍDEO Conecte el cable de vídeo de un dispositivo compuesto 12 R L Conecte los cables de audio de un componente o dispositivo compuesto 13 YPbPr Conecte los cables de vídeo de un dispositivo compuesto LINE OUT HDMI2 MHL HDMI3 INPUT POWER MENU Elemento Descripción 1 ...

Страница 58: ...ITAL NOTA Apague el TV y los dispositivos externos antes de realizar conexiones Para reproducir dispositivos externos 1 Encienda el TV y el dispositivo conectado 2 Presione INPUT para abrir la lista de fuentes de entrada enseguida presione para resaltar la entrada a la cual se conectó el dispositivo y presione OK para cambiar z Seleccione TV para ver el TV de la entrada de RF z Seleccione HDMI1 HD...

Страница 59: ...reaming Stick presione este botón para regresar a la pantalla anterior DISPLAY VISUALIZAR Pulse para visualizar la ventana de información EXIT SALIR Presione para salir del menú o para ver el menú en la pantalla OSD SAP Presione para cambiar el sonido SAP Stereo y Mono para ATV o cambiar el idioma de audio para DTV SLEEP DORMIR Pulse para establecer el temporizador de dormir WIDE ANCHO Pulse este ...

Страница 60: ... Cuando se ajuste en cable el TV puede recibir señales de emisión analógicas y QAM 5 La búsqueda automática de canales usualmente requiere de minutos para completarse pero puede tardar hasta 20 minutos Puede cancelar la búsqueda de canales presionando EXIT Salir n a c S l e n n a h C p u t e S l a i t i n I Cancel Exit The channel scan may take a while to complete Analog 0 Digital 0 RF CH 30 Total...

Страница 61: ...ión vertical Ajuste la posición vertical de la imagen z Clock Reloj Ajuste la frecuencia de muestreo z Phase Fase Ajuste el enfoque de las imágenes estables z Auto Ajusta la configuración de la imagen automáticamente AUDIO Sound Mode Modo de sonido Seleccione el modo de sonido Puede seleccionar z Standard Estándar Agudos y graves balanceados Este ajuste es una buena opción para observar emisiones ...

Страница 62: ...riginal de la señal VGA Podrían agregarse barras negras para la visualización Solamente entrada VGA z Normal Muestra la relación de aspecto 4 3 original con barras negras verticales en el lado izquierdo y derecho de la imagen z Wide Ancha Use esta opción para ver el contenido registrado en una relación de aspecto 16 9 pantalla ancha z Zoom Zoom Expande la imagen para llenar la imagen Sin embargo l...

Страница 63: ...ar entre Default Black White Red Green Blue Yellow Magenta Cyan Predeterminado Negro Blanco Rojo Verde Azul Ama rillo Magenta Cian BG Color Color BG Seleccione el color de fondo Puede seleccionar entre Default Black White Red Green Blue Yellow Magenta Cyan Predeterminado Negro Blanco Rojo Verde Azul Am arillo Magenta Cian FG Opacity Opacidad de FG Seleccione la opacidad de la fuente Puede seleccio...

Страница 64: ...os padres para niños menores de 17 años NC 17 No recomendado para niños menores a 17 años X Sólo adultos Canada Rating Clasificación de Canadá Establece los límites de clasificación de Canadá Canada English Canadá Inglés La clasificación es para los programas que usan el sistema de clasificación de inglés Clasificación de Canadá Inglés Clasificación de Canadá Inglés C Adecuado para todos los niños...

Страница 65: ...chivos tal como el nombre de archivo resolución tamaño fecha y hora Presione OK para cerrar la pantalla de información z Seleccione para girar la foto 90 en sentido de las manecillas del reloj z Seleccione para girar la foto 90 en sentido contrario de las manecillas del reloj z Seleccione para ampliar la foto z Seleccione para reducir la foto z Seleccione para ver una foto ampliada Presione en el ...

Страница 66: ...roductos y materiales de productos electrónicos Consulte la ubicación de sitios de reciclados locales en los Estados Unidos en 1800RECYCLING COM AVISOS LEGALES Modificaciones La FCC requiere que el usuario sea notificado que cualquier cambio o modificaciones realizadas en este dispositivo que no estén expresamente aprobados por nuestra compañía podría invalidar la autoridad del usuario para operar...

Страница 67: ...ros AUDÍFONOS COAXIAL SALIDA DE LÍNEA USB Conectores laterales HDMI1 HDMI2 MHL HDMI3 VGA AUDIO DE PC RF VÍDEO R L YPbPr PESO Y DIMENSIONES Dimensiones con base An x Al x P Dimensiones con base An x Al x P e s a b n o c o s e P e s a b n i s o s e P MONTAJE EN LA PARED Patrón de montaje en pared H x V 400 x 200 mm 6 M o l l i n r o t e d o p i T ALIMENTACIÓN Consumo de energía 150 W W 1 a r e p s e...

Страница 68: ...n sonido z Incremente el nivel de volumen presionando el botón VOL en el mando a distancia o en el panel de control lateral del TV z Pulse el botón MUTE Silenciar en el mando a distancia para asegurarse de que está desactivada la función de silencio Calidad de sonido pero poco color z Ajuste el contraste color y el brillo Mala calidad de imagen z La mala calidad de imagen puede ocurrir cuando está...

Страница 69: ...ntas a la aquí descrita ni tampoco puede extender la duración de cualquier garantía superando el periodo descrito aquí a nombre de Haier Las garantías descritas aquí deben ser las únicas y exclusivas otorgadas por Haier y constituyen la única y exclusiva solución disponible para el comprador La corrección de los defectos de la forma y por el periodo de tiempo descrito aquí deben constituir el cump...

Страница 70: ...ierAmercia com Modelo 50D3505 Emitido Jan 2014 Hecho en China Fabriqué en Chine Impreso en China Printed China La Chine imprimée China impresa Haier America Nueva York NY 10018 2014 Haier America Trading LLC ...

Отзывы: