background image

15

10

Relay-8 Mode 

When the auxiliary port is used with a Relay-8 unit, this configuration 
allows for control of the eight relays on the Relay-8 through the 
use of a provided .dll.  The disk supplied with the KE-USB36FS 
has a section which includes examples of integrating code into a 
program which controls the Relay-8 output states.

Use the MTA100-8/5-36FF cable to attach from the KE-USB36FS 
Auxiliary  header  to  the  Relay-8.    The  supplied  KE-USB36FS 
configuration program is used to enable the Relay-8 functions on 
the auxiliary port.

To allow for Relay-8 control, the checkbox for “Relay-8 on Aux” 
must be checked.

Refer  to  the  Relay-8  manual  for  instructions  on  the  use  of  the 
Relay-8 terminal block outputs.

All Relay-8 control in this configuration is controlled through the 
user’s program and the supplied .dll on the enclosed disk.

Select the checkbox to enable the Relay-8 
functions in the KE-USB36FS configuration 
program. 

NOTE: It is permitted to use both a Relay-8 
and a Rotary-5 unit at the same time.  An 
MTA100-5-36-FF cable, in addition to the 
MTA100-8/5-36FF  cable,  is  required  to 
connect both a Rotary-5 and a Relay-8 unit 
to the KE-USB36FS Auxiliary port.

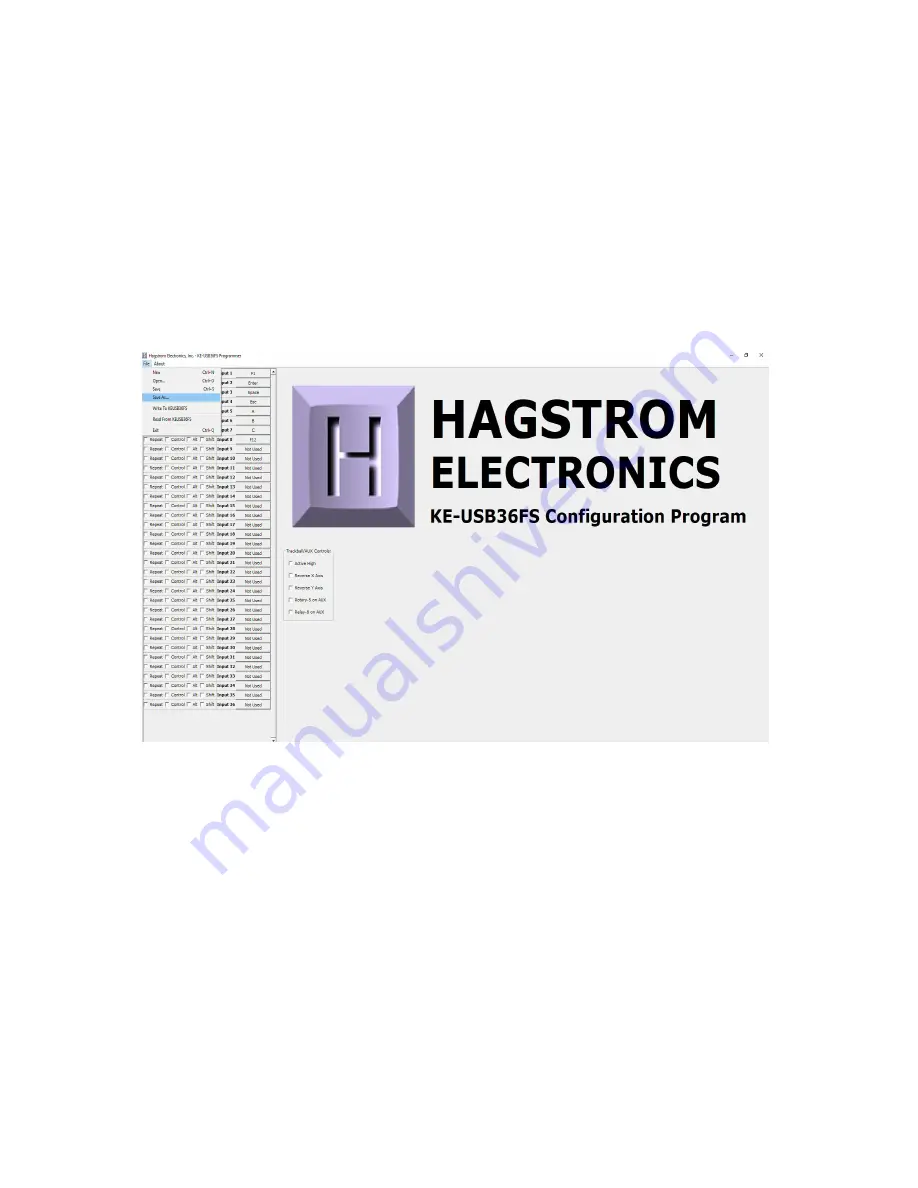
To save the configuration to disk, select 

File

, then 

Save As

, and 

specify a file name. Configurations saved at a prior time may be 
recalled by using the 

Open

 selection and choosing a file from the 

selection list.

To save the configuration to the KE-USB36FS, select 

File

, then 

Write to KEUSB36FS

. Be sure that the KE-USB36FS is connected to 

the computer prior to this step. Once loaded, the new configuration 
will take effect on the KE-USB36FS.

The  configuration  is  stored  on  the  KE-USB36FS  in  non-volatile 
memory.  Once  a  configuration  is  loaded  into  the  unit,  it  will 
remain set (even during power off) until changed by the user.

To retrieve an existing configuration from the KE-USB36FS, select 

File

, then 

Read from KE-USB36FS

. Be sure that the KE-USB36FS 

is connected to the computer prior to this step. Once loaded, the 
program window will display the device’s current configuration.

Note:

 Loading a configuration from the KE-USB36FS will overwrite 

any existing configuration settings in the program window.

Содержание KE-USB36FS

Страница 1: ...KE USB36FS USB Keyboard Encoder User Manual...

Страница 2: ...product is designed for use by technically oriented computer users When the KE USB36FS is in use your Computer s signals and voltages are present on the unit Prudent handling and packaging is necessar...

Страница 3: ...t Header Keyboard Status Light Signals Interfacing to the KE USB36FS Auxiliary Port Configuring the KE USB36FS Multiple KE USB36FS Units Appendix A Specifications Appendix B Operating Tips Appendix C...

Страница 4: ...unit The signals received on this port from the trackball are converted into mouse cursor movement on the computer The Auxiliary port may alternatively be used as a communication port to connect to ou...

Страница 5: ...puter or hub USB connector The KE USB36FS may be connected to the computer with power on or off If hot plugged the unit will generally take several seconds to become fully active on your system Note T...

Страница 6: ...ed to handle mechanical switch inputs and are debounced for that purpose Logic drivers may be attached to the inputs as well provided they are an active low logic level signal Refer to the Appendix A...

Страница 7: ...d near the 6 pin LED header As with the input header this LED header has 100 spaced pins which are suitable for a variety of connectors Soldering to the pins is also an acceptable way to attach wires...

Страница 8: ...ader mates with the Hagstrom Electronics KE TBH3 interface cable see Accessories page of this manual In addition the user may create their own cable using the pin assignments as shown below Figure 7 T...

Страница 9: ...KE USB36FS configuration program is used to enable the Rotary 5 function on the auxiliary port In this configuration the KE USB36FS delivers the required power to the Rotary 5 for operation Refer to t...

Страница 10: ...functions on the auxiliary port To allow for Relay 8 control the checkbox for Relay 8 on Aux must be checked Refer to the Relay 8 manual for instructions on the use of the Relay 8 terminal block outp...

Страница 11: ...nitially starts When inputs are defined the key definition box will then display the label for the key to which that particular input is assigned To define a keystroke for an input simply move to the...

Страница 12: ...t all times If no Trackball device is connected to the unit no cursor movement will be initiated from the KE USB36FS but the ability to emulate Left Middle or Right mouse buttons remains Any input def...

Страница 13: ...program an input as one of these modifiers keys Control Alt or Shift If the input is to produce a repeated keystroke when held active the check box for the repeat function may be selected When active...

Страница 14: ...djusted for different types of trackballs and mounting The trackball adjusment selections only apply when the Auxiliary input header is used for a trackball If either the Rotary 5 or Relay 8 checkboxe...

Страница 15: ...configuration will take effect on the KE USB36FS The configuration is stored on the KE USB36FS in non volatile memory Once a configuration is loaded into the unit it will remain set even during power...

Страница 16: ...when writing a configu ration to or reading a configuration from a device the program will display a list of the individual serial numbers of the units The program will show anywhere from two up to t...

Страница 17: ...Temperature 0 to 70 Degrees C Input Header 2x20 with 36 individual inputs and 4 Ground connections 025 square pins spaced at 100 Required Input Current 1 2 ma sink current typical Input Active Time D...

Страница 18: ...o not drive voltage above the USB 5V supply on the unit The logic signals must produce an active logic low signal for the appropriate amount of time as listed in Appendix A The recommended maximum cab...

Страница 19: ...ft and Right Shift Left and Right Alt Left and Right Control and Windows GUI keys can be used in addition to the six key limitation The KE USB36FS has the option of repeating an input that is held on...

Страница 20: ...We offer several accessories to connect to your KE USB36FS KE USBMM6 6 ft Male Male Type A to Type B USB Cable IOX36 Input Header to screw terminal breakout board This product connects to the KE USB3...

Страница 21: ...when using both with the KE USB35FS and an MTA100 8 5 36FF Provides the power and communication from the KE USB36FS when both a Relay 8 and Ro tary 5 are used 3 ft Standard Length MTA100 8 5 36FF 8 po...

Страница 22: ...ternative connectors just to name a few of the options Give us a call to discuss your custom requirements Matrix Scanning LCD Interface LED Interface Serial Communication Alternate Function Keys Custo...

Страница 23: ...y is applicable only to units sold in the United States Units sold outside the United States are covered by a similar warranty Depending on the state in which you live you may have additional rights G...

Страница 24: ...5 4677 Fax 540 465 4678 Monday through Friday 8 00 am to 5 00 pm EST sales hagstromelectronics com www hagstromelectronics com 1986 Junction Rd Strasburg VA 22657 Copyright 2017 HAGSTROM ELECTRONICS I...

Отзывы: