background image

H

D

E

 0

9

/2

015


732.

29.

49


ZN 6.

172.

090

0.

90a

12

5. Start-up

The product is supplied in so-called simple mode type "Construction site lock". 
These instructions only describe start-up in this mode. 

•  Details for the use of the product with software applications can be found in the 

relevant software documentation.

•  The "Construction site lock" mode will be permanently shut off once the product 

is configured for the first time using the Dialock MDU. After that, reactivating this 
mode is only possible after a reset.

5.1 Initial 

start-up

The work operations only need to be carried out once during initial start-up. The 
individual work operations must be carried out within a short time window. Therefore:

•  First study every work operation and have the keys that are needed at the ready 

before commencing with initial start-up.

•  Perform the work operations quickly and without interruptions.

6.  Allocating locking authorisations

Locking authorisations for user keys can be allocated in 3 different categories:

• 

Normal user keys


All doors to which the user key has locking authorisation can be opened with 
these user keys. The locks lock again automatically after 3 seconds. Doors with 
the "Do not disturb" function activated cannot be opened.

• 

Privileged user keys

Privileged user keys have the same rights as normal user keys, but can also open 
doors with the "Do not disturb" function activated.

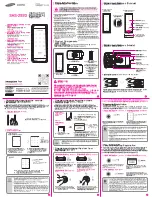
For step-by-step instructions "

Inbetriebnahme

" see illustrations 

starting on page 

42

.

NOTE

Warning of abuse!

Unauthorised persons can gain access to rooms using the programming and 
clearing keys.

>  Only personnel who are authorised by the operator may allocate locking 

authorisations!

>  Take care when allocating locking authorisations to avoid overlapping 

or mistakes.

>  Keep programming and clearing keys in a safe place and protect from 

abuse.

For step-by-step instructions "

Schließrechte zuweisen - normale 

Benutzerkeys

" see illustrations starting on page 

43

.

For step-by-step instructions "

Schließrechte zuweisen - 

privilegierte Benutzerkeys

" see illustrations starting on page 

44

.

BA_DT700_DT710.book  Seite 12  Donnerstag, 17. September 2015  11:34 11

Содержание DT 700

Страница 1: ...0 DT710 Betriebsanleitung Deutsch 2 Operating instructions English 10 Instructions d utilisation Fran ais 16 Instrucciones de funcionamiento espa ol 23 Istruzioni d uso italiano 30 BA_DT700_DT710 book...

Страница 2: ...be kept in a safe place since unauthorised persons can gain access to rooms with both keys 1 3 Personnel qualifications Installation and start up personnel Installation and initial start up may only...

Страница 3: ...r fitting for use in hotels hospitals and other buildings with frequent changes of room occupant The operator must equip the relevant doors with a single profile cylinder for emergency opening in the...

Страница 4: ...sible to open the door from the outside in the event of fault If emergencies occur in the room during the fault rescue work will be hindered The operator must ensure that doors to which this product i...

Страница 5: ...e allocated in 3 different categories Normal user keys All doors to which the user key has locking authorisation can be opened with these user keys The locks lock again automatically after 3 seconds D...

Страница 6: ...ened from the inside at any time using the lever handle From the outside An authorised user key is needed to open the door from the outside 8 2 Do not disturb function The Do not disturb function is u...

Страница 7: ...apart from having to change the batteries NOTE The product may be damaged if the single profile cylinder is used incorrectly Do not use the single profile cylinder for normal door locking unlocking K...

Страница 8: ...change and do not have to be reset NOTE Damage to product due to incorrect maintenance Do not use lubricants Do not carry out repairs Contact the manufacturer in the event of damage malfunctions If pa...

Страница 9: ...sent programming key 2 Acoustic signal is heard White LED comes on 1 Pr senter la cl de programmation 2 Un signal sonore retentit La LED blanche s allume 1 Presentar la llave de programaci n 2 Suena u...

Страница 10: ...senter la cl utilisateur dans les 5 sec Un signal sonore retentit La LED blanche s allume Droit d acc s attribu Antes de 5 seg presentar la llave de usuario Suena un tono de aviso Se enciende el LED...

Страница 11: ...el LED blanco Derecho de cierre asignado de en es Posizionare la chiave di programmazione Viene emesso il segnale acustico Il LED blanco lampeggia 5x sec Posizionare nuovamente la chiave di programmaz...

Страница 12: ...LED blanche clignote 2x sec Pr senter une nouvelle fois la cl de programmation Un signal sonore retentit La LED blanche clignote 1x sec Innerhalb von 5 Sek Benutzerkey vorhalten Signalton ert nt LED l...

Страница 13: ...etentit La LED rouge clignote pendant 5 sec maxi 1 2 Presentar la llave de cancelaci n Suena un tono de aviso El LED rojo parpadea m x 5 seg 1 2 Posizionare la chiave di cancellazione Viene emesso il...

Страница 14: ...presentar la llave de programaci n 4 Suena un tono de aviso Se enciende el LED rojo Derecho de cierre cancelado de en es 1 Posizionare la chiave di cancellazione 2 Viene emesso il segnale acustico Il...

Страница 15: ...n ert nt LED leuchtet rot auf Schlie recht entzogen Present programming key within 5 sec Acoustic signal is heard Red LED comes on Locking authorisation has been cleared Pr senter la cl de programmati...

Страница 16: ...ale acustico Il LED rosso lampeggia 5x sec 3 Posizionare nuovamente la chiave di cancellazione 4 Viene emesso il segnale acustico Il LED rosso lampeggia 2x sec 5 Posizionare nuovamente la chiave di ca...

Страница 17: ...ustico it fr 3 Rote LED erlischt LED blinkt wei 3 Red LED goes off White LED flashes 3 La LED rouge s teint La LED blanche clignote 3 Se apaga el LED rojo El LED blanco parpadea de en es 3 Il LED ross...

Страница 18: ...cylindre de fermeture 3 Tourner la cl dans le sens d ouverture 2 Introducir la llave correspondiente en el bombillo 3 Gira la llave en sentido de apertura de en es 2 Introdurre una chiave adatta nel c...

Страница 19: ...732 29 498 ZN 6 172 0900 90a 47 1 3 4 3 3 mm Batteriewechsel Battery change Remplacement de pile Cambiar las bater as Sostituzione delle batterie R6 BA_DT210_Bildteil fm Seite 47 Montag 21 September 2...

Страница 20: ...HDE 09 2015 732 29 498 ZN 6 172 0900 90a 2015 by H fele GmbH Co KG Adolf H fele Str 1 D 72202 Nagold www hafele com Subject to alterations BA_DT210_Bildteil fm Seite 48 Montag 21 September 2015 10 22...

Отзывы: