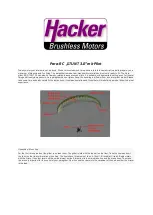
Settings and flying :
To get the correct brake adjustment, some walk tests against the wind are necessary. The best way is to do this test with two
persons. The canopy lies with a curved front at the ground. All lines, especially the brake lines, run without twists or tangles of
the risers from harness to the canopy and the brake lines were tied with a light knot at the hands of the pilot (correct length: see
picture above). The pilot figure is taken at the back, and the lines are hanging free to the canopy. Move the pilot up as far as to
tighten the line, then just check the wind and lift with a circular movement the canopy from the ground. The canopy will be set
up above you and you start to run. Now you can see exactly the setting adjusts the brake lines. In the neutral position the
canopy is not braked, that is OK when the trailing edge of the canopy is not pulled down. The profile "is flat-bottomed" in the
wind. Test now the Controls. Right movement of the aileron stick must have a clear reaction in the rear right of the canopy edge
and the canopy will move immediately to the right side. If you control both brakes on the "elevator stick" both sides of the rear
edge of the canopy will move down and the canopy will fall back. Then you have found the correct setting already. Control
inputs without any reactions showing a wrong brake line setting. The brake lines are too long and must be shortened.
Shortening occurs in steps of about 5mm and will be reviewed by a new test run.
NOTE: A clean setting of the brake line length is important and provides a fault-free and well-controlled flight. Never start flight
tests without perfect brake lines. An uncontrollable paraglider with appropriate risk potential would be the result.
-Brakes set?
-You are on a slight slope with open fields to front?
-The wind is not too strong and comes straight from the front?
-Transmitter and receiver battery / batteries are fully charged?
-the control functions are checked and have correct directions?
Then go for the first flight!
The canopy is, as with the run tests, on the ground. All lines, especially the brake lines, run without twists or tangles of the risers
from harness to the canopy. The pilot figure is taken at the back, and the lines are hanging free to the canopy. Move the pilot up
as far as to tighten the line, then just check the wind and lift with a circular movement the canopy from the ground. The canopy
will be set up above you and you start to run. After a few steps to release the pilot and the PARA-RC stunt 3.0 starts to glide.
IMPORTANT: release the pilot only when the canopy is directly above the pilot! If the canopy will swing to the right or left side,
please stop immediately and begin the start procedure for new!
Don’t push or throw the pilot to hard!
With careful control inputs check the brake line adjustment in flight and get used to the new feeling of control of an RC
paraglider. For the landing pull the "elevator stick" and slow down the paraglider gently (Flaring) just before the pilot touches the
ground. Not too early and too much brake! A deep stall could be the result.
If the first flight is to your complete satisfaction, you can safely perform the first real soaring flights. The best soaring site is one
with medium wind and good upwind component. As with normal slope gliders fly your RC-Paraglider in figure-eight in the slope
lift. Once you have reached some higher level and you find some thermal lifts, circling the STUNT 3.0 to higher altitudes.
Important: fly the RC paraglider always on the windward side
Tips:
-the best-glide and the longest flight distance can be achieved with brakes fully open (arms at the top)


