


2-18
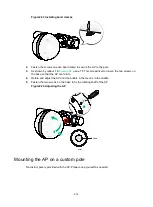
Figure2-31 Installing the AP on the wall
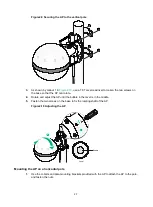
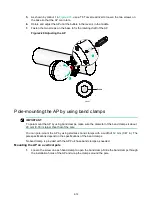
4.
As shown by callout 1 in
, use a T8 Torx screwdriver to loosen the two screws on
the base so that the AP can rotate.
5.
Rotate and adjust the AP until the bubble in the level is in the middle.
6.
Fasten the two screws on the base to fix the rotating shaft of the AP.
Figure2-32 Adjusting the AP
1
2
1
2
Level
Bubble
Содержание WA5320X
Страница 10: ...1 4 Figure1 3 Installation tools ...


