


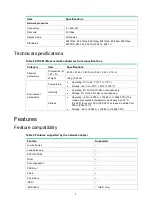
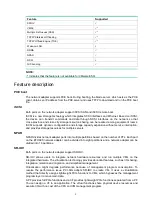

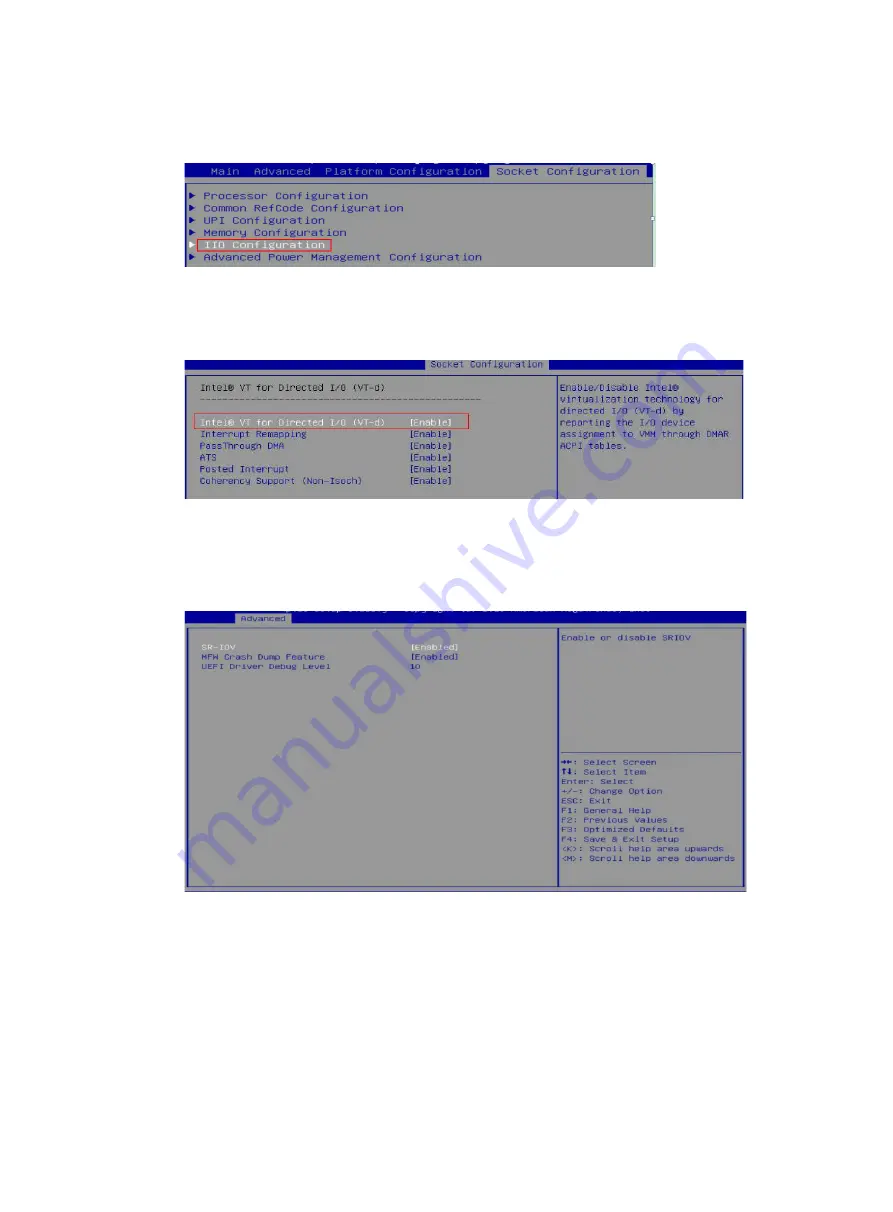
24
4.
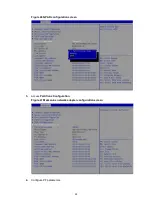
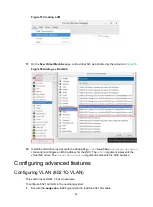
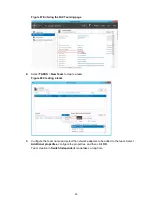
Select
Socket Configuration
>
IIO Configuration
>
Intel@ VT for Directed I/O (VT-d)
, and
then press
Enter
.
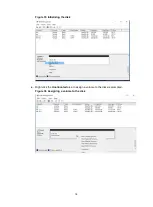
Figure 51 Socket Configuration screen
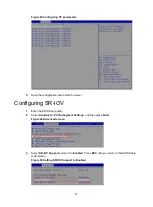
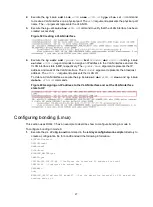
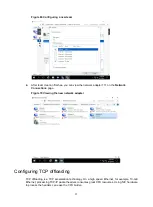
5.
Select
Intel@ VT for Directed I/O (VT-d)
and set it to
Enable
. Press
ESC
until you return to the
BIOS Setup main screen.
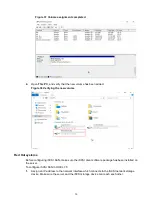
Figure 52 Intel@ VT for Directed I/O (VT-d) screen
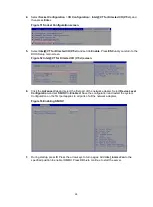
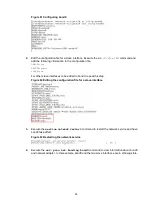
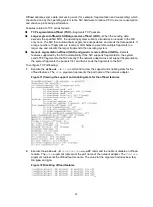
6.
Click the
Advanced
tab and select the first port of the network adapter. Select
Device Level
Configuration
and set
SR-IOV
to
Enabled
. Save the configuration and restart the system.
Configuration on the first port applies to all ports of all the network adapters.
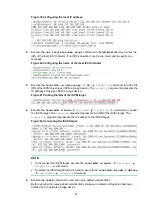
Figure 53 Enabling SR-IOV
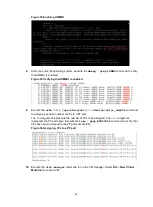
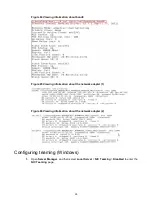
7.
During startup, press
E
. Press the arrow keys to turn pages. Add
intel_iommu=on
to the
specified position to enable IOMMU. Press
Ctrl-x
to continue to start the server.