GYS TIG 160 DC Lift Скачать руководство пользователя страница 8


8/20 


Thank you for choosing this machine. To get the best from your machine, please read the following carefully:


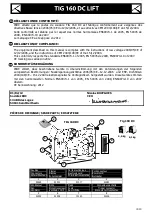
The TIG 160 DC LIFT is a portable Inverter welder, for electrode welding (MMA) and TIG Lift in DC. It allows 
welding with rutile,  basic,  stainless  steel  and  cast  iron  electrodes.  It works  on  a  single  phase  230V power 
supply.  In TIG, it will weld most of metals except aluminium and alloys. It is protected for a use on electric 
generators (230V /+- 15% or 400V/+-15 %). 
 

POWER SUPPLY – START UP 


This machine is delivered with a 230V socket /16A plug type EEC7/7. The TIG 160 DC must be connected 
to a 230 V socket (50-60Hz) 

EARTHED

 power supply.


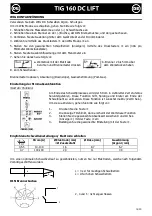
The absorbed effective current (I1eff) is indicated 

on the machine at maxiumum usage.


Check that the power supply and its protection (fuse and/or circuit-

breaker) are compatible with the necessary current needed for use. 

In some countries, it might be necessary 

to change the plug to allow maximum performance.


The welder must be  installed  so  that  the main plug  is 

always accessible. 


To turn on the machine press ON / STAND BY. 


The device will turn on in protection mode if the power supply voltage is over 265V. 

To  indicate  this  fault  the  screen  displays           .


Normal  operation  will  resume after

  thirty  seconds when  the 

voltage has returned to within its normal range. 


This class A device is designed to be used in an industrial or professional environment. This equipment is 
not  intended  for  use  in  residential  locations  where  the  electrical  power  is  provided  by  the  public  low-
voltage supply system. 

It can be difficult to ensure electromagnetic compatibility, due to conducted disturbances 

as well as radiation


This material does not comply with IEC 61000-3-12. If it is to be connected to a low-voltage mains supply, 
it is the responsibility of the user to ensure it can be connected. If necessary consult the operator of your 
electrical distribution system. 


ELECTRODE WELDING (MMA Mode) 


Connect  the  earth  and  electrode-holder  cables.  Respect  the  polarity  indicated  on  the  electrodes’ 
packaging. 


Apply the usual welding rules. 


Your machine is equipped with 3 specific functions : 

Hot Start


(adjustable mode, see below) increases the current at the beginning of the welding.  

Arc Force


increases the current in order to avoid sticking when the electrode enters the weld pool.  

Anti Sticking

   allows you to easily remove your electrode without damaging it in case of sticking. 


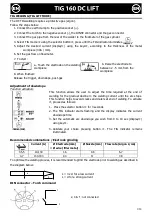
Selection of MMA Mode and intensity setting : 

- Select the MMA position 

 with the selector 

 until the MMA indicator illuminates  

 
- Adjust the desired current (display 

) using the key 


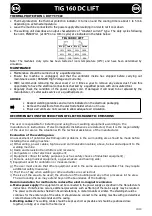
Hot Start adjustment  

Hot Start is adjustable from 0 to 60% within the limit of 160A. 
Advice: low Hot Start: for thin metal sheets – high Hot Start for metals that are difficult to weld (dirty or 
oxidized parts). 


To adjust the Hot Start follow these steps: 


Press the selector 

 briefly 


The  "MMA"  LED  starts  flashing  and  the  display  indicates  the  current 
Hot Start value. 


Set the required percentage  ( display 

) using keys 


Validate the required figure by pressing the selector button 


The "MMA" LED remains illuminated 


Содержание TIG 160 DC Lift

Страница 1: ...03042012 V1 P 02 07 18 20 P 08 12 18 20 P 13 17 18 20 ...

Страница 2: ...st destiné à être connecté à des réseaux privés raccordés au réseau public d alimentation seulement en moyenne et haute tension Il n est pas prévu pour être utilisé dans un site résidentiel où le courant électrique est fourni par le système public d alimentation basse tension Il peut y avoir des difficultés potentielles pour assurer la compatibilité électromagnétique dans ces sites à cause de pert...

Страница 3: ...mé 5 Régler l intensité souhaitée afficheur grâce aux touches selon l épaisseur à souder 30A mm 6 Régler le débit de gaz sur le manodétendeur de la bouteille de gaz 7 Pour amorcer b relever l électrode 2 à 5 mm de la pièce à souder 8 En fin de soudure Relachement gachette evanouissement post gaz Réglage de l évanouissement de l arc Activation de la fonction Cela correspond en fin de soudure au tem...

Страница 4: ...TIEN L entretien ne doit être effectué que par une personne qualifiée Couper l alimentation en débranchant la prise et attendre l arrêt du ventilateur avant de travailler sur l appareil A l intérieur les tensions et intensités sont élevées et dangereuses Il est conseillé 2 à 3 fois par an d enlever le capot et dépoussiérer à la soufflette En profiter pour faire vérifier la tenue des connexions éle...

Страница 5: ...tation conformément aux recommandations du fabricant En cas d interférences il peut s avérer utile de prendre des précautions supplémentaires en filtrant la tension d alimentation Il peut s avérer utile de blinder le câble d alimentation dans les installations fixes du poste de soudage sous goulottes métalliques ou dispositifs équivalents Le blindage devrait être électriquement continu sur toute l...

Страница 6: ...L appareil ne délivre pas de courant et le voyant jaune de défaut thermique est allumé La protection thermique du poste s est enclenchée Attendre la fin de la période de refroidissement environ 2 min Le voyant s éteint L afficheur est allumé mais l appareil ne délivre pas de courant Le câble de pince de masse ou porte électrode n est pas connecté au poste Vérifier les branchements Le poste est ali...

Страница 7: ...arie due au transport La garantie ne couvre pas l usure normale des pièces Ex câbles pinces etc En cas de panne retournez l appareil à la société JBDC port dû refusé en y joignant Le justificatif d achat daté facture tickets de caisse Une note explicative de la panne Après la garantie notre SAV assure les réparations après acceptation d un devis Contact SAV Société JBDC 134 Bd des Loges BP 4159 53...

Страница 8: ...ntial locations where the electrical power is provided by the public low voltage supply system It can be difficult to ensure electromagnetic compatibility due to conducted disturbances as well as radiation This material does not comply with IEC 61000 3 12 If it is to be connected to a low voltage mains supply it is the responsibility of the user to ensure it can be connected If necessary consult t...

Страница 9: ... to adjust the time required at the end of welding for the gradual decline in the welding current until the arc stops This function helps to avoid cracks and craters at end of welding To activate it proceed as follows 1 Press the selector button for 3 seconds 2 The TIG indicator starts flashing and the display indicates the current downslope time 3 Set the automatic arc downslope you wish from 0 t...

Страница 10: ...he user to resolve the situation with the technical assistance of the manufacturer Evaluation of the welding area An assessment of potential electromagnetic problems in the surrounding area should be made before installing the welding machine a Other wiring power cables tephone and communication cables above below and adjacent to the welding machine b Radio and television transmitters and receiver...

Страница 11: ...e power supply is suitable for this unit Moving Do not underestimate the weight of the apparatus Do not move the unit over people or objects Do not drop it Do not set the unit down heavily Burns Wear protective fire proof clothing cotton overalls or jeans Wear protective gloves and a fire proof apron Ensure other people keep a safe distance from the work area and do not look directly at the weldin...

Страница 12: ...s not weld correctly Polarity error Check the polarity advised on the electrode packaging When starting up the display indicates The voltage is not within the range 230V 15 Have the electrical installation checked Use a tungsten electrode with the correct size Fault originates from the tungsten electrode Use a well prepared tungsten electrode Unstable arc Gas flow rate is too high Reduce gas flow ...

Страница 13: ...ereitschaft Dieses Klasse A Gerät ist nicht für den Einsatz in Wohngebieten bestimmt in denen Stromversorgung vom öffentlichen Niederspannungsnetz geregelt wird Es kann sowohl zu leitungs als auch feldgebundenen elektromagnetischen Störungen kommen Dieses Gerät entspricht nicht mehr der Richtlinie CEI 61000 3 12 Es liegt in Ihrer Verantwortung zu überprüfen ob die Geräte für den Stromanschluss gee...

Страница 14: ...senkfunktion Start der Funktion Am Ende des Schweißprozesses wird der Strom in definierter Zeit stufenlos heruntergefahren Diese Funktion hilft Sprünge und Krater am Ende der Schweißnaht zu vermeiden Diese Funktion ist zunächst inaktiv Zeit 0 Sek Um sie zu aktivieren gehen Sie bitte wie folgt vor 1 Drücken Sie die Taste 2 Die Anzeige TIG blinkt dann erscheint der Wert dieser Funktion 3 Stellen Sie...

Страница 15: ...TISCHEN STÖRUNGEN Allgemein Es liegt in der Verantwortung des Anwenders dafür Sorge zu tragen dass die Schweißausrüstung nach den Vorgaben des Herstellers angeschlossen und verwendet wird Liegen elektromagnetische Störungen vor ist der Anwender dafür verantwortlich dieses Problem mithilfe des technischen Supports des Herstellers zu beheben Prüfung des Schweißbereiches Prüfen Sie vor Anschluss der ...

Страница 16: ...lleiter und Schutzleiter verwenden Keine Spannungsführenden Teile berühren Transport Unterschätzen Sie nicht das Gewicht der Anlage Bewegen Sie das Gerät nicht über Personen oder Sachen hinweg und lassen Sie es nicht herunterfallen oder hart aufsetzen Verbrennungsgefahr Schützen Sie sich durch geeignete trockene Schweißerkleidung Schürze Handschuhe Kopfbedeckung sowie feste Schuhe Tragen Sie auch ...

Страница 17: ... Ende des Schweißvorgangs dunkel Fehler wird durch Gasnachströmen oder defektes Gasventil verursacht Überprüfen Sie die Gasanschlüsse Die Elektrode glüht Polaritätsfehler Überprüfen Sie ob die Masseklemme an der Buchse angeschlossen ist GARANTIE Die Garantieleistung des Herstellers erfolgt ausschließlich bei Fabrikations oder Materialfehlern die binnen 12 Monate nach Kauf angezeigt werden Nachweis...

Страница 18: ...ss beschriebene Geräte in Übereinstimmung mit den Anforderungen der folgenden europäischen Bestimmungen Niederspannungsrichtlinie 2006 95 CE 12 12 2006 und EMV Richtlinien 2004 108 CE 15 12 2004 elektromagnetische Verträglichkeit hergestellt wurden Diese Geräte stimmen mit den harmonisierten Normen EN60974 1 von 2005 EN 50445 von 2008 EN60974 10 von 2007 überein CE Kennzeichnung 2012 01 02 12 Nico...

Страница 19: ...den die in 1 Stunde bei 20 C geschweißt werden können mit einer Pause von 20 s zwischen jeder Elektrode Nombre d électrodes normalisées soudables en 1 heure en continu avec 20 secondes entre chacune divisé par le nombre d électrodes soudables dans les mêmes conditions sans disjonction thermique Number of standardized electrodes weldable over 1 hour of continuous work divided by the number of elect...

Страница 20: ...hweißmodusanzeige WIG Kontaktzündung TIG Sélecteur valeur ou Select button or Wahl Drucktaster oder Bouton sélection validation Button selection validation Multifunktionstaste Auswahl Bestätigung Voyant de protection thermique Thermal protection indicator Gelbe Übertemperaturanzeige Bouton de mise en marche veille Button on stand by EIN AUS Taste TIG Connecteur gachette torche TIG torch trigger so...

Отзывы: