background image


b.


Visually check all hydraulic connections (cylinders, hoses, couplings, power pack) for hydraulic leakage. If you notice a slight 

leak, tighten the connection until there is no more leakage. If you see a large leak, immediately press "DN" (down) until the 

QUICK LIFT is lowered to the ground. Tighten the connection firmly and repeat the test until there is no more leakage. 


It is advisable to place a cardboard box between the floor and the QUICK LIFT 

and even at the level of the quick connections in order to identify possible leaks 

more easily during the first start-up. 

Be meticulous when applying a sealing tab or Teflon to hydraulic connections. Do 
not pollute or clog the hydraulic system.  There are filters that could become 

clogged and prevent the QUICK LIFT from working properly.  


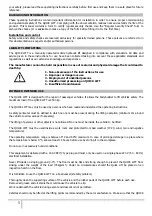
3/ CHECKING THE SAFETY SYSTEM AT HEIGHT 1:  

Press "UP" again and move a few centimetres higher than height 1 so that the safety devices of both ramps protrude 

a few centimetres above the locking block at height 1. 


When empty, there may be a greater offset in the height of the ramps in relation 

to each other and therefore in the passage of the locking bars on the blocks. This 

is normal. On load, the ramps will be synchronized and the offset will be 

corrected.  


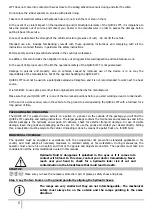
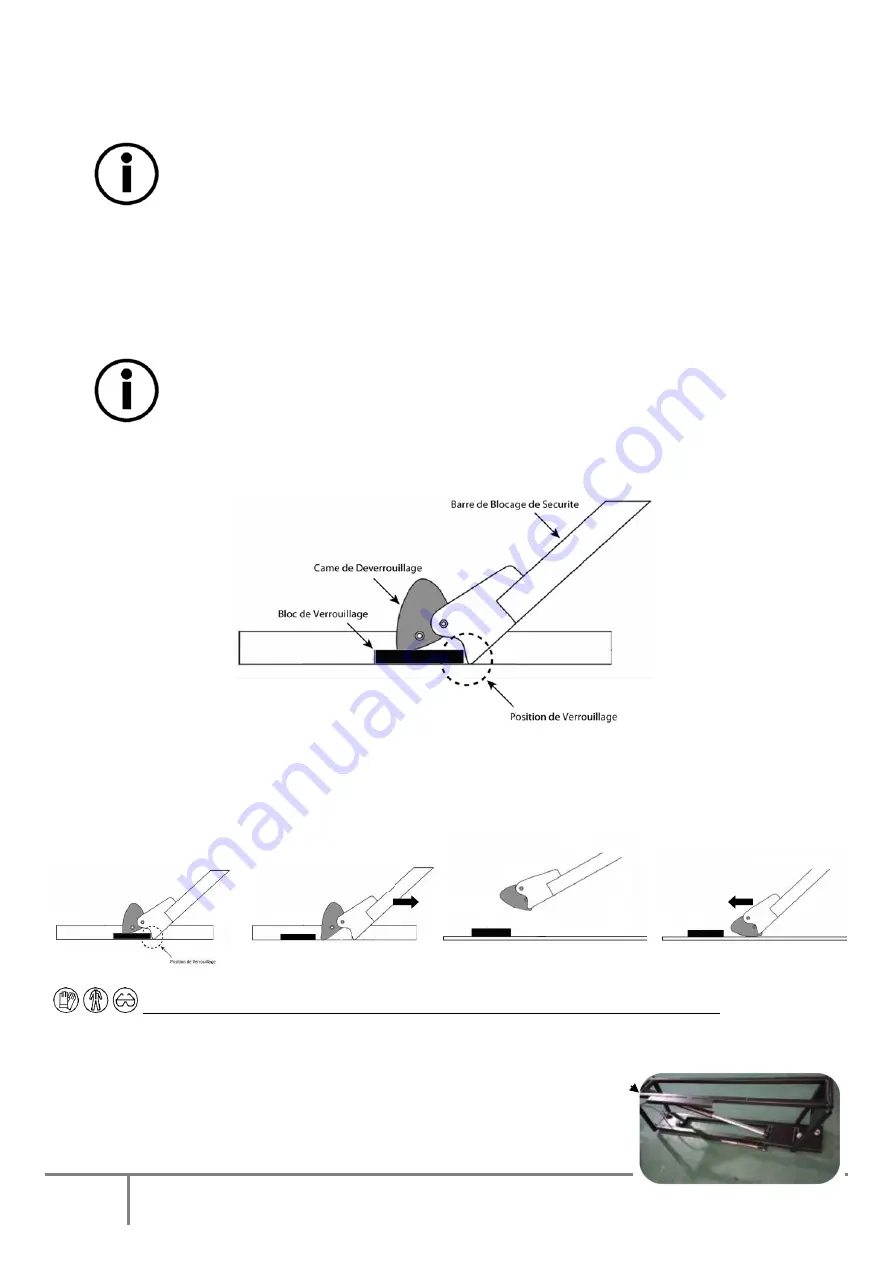
Pressing "DN" (down) will lower the ramps until both locking levers are in the locked position as shown in the diagram 

below. 


4/ DOWN THE RAMPS TO THE GROUND: 
 

a.


Press "UP" to raise the QUICK LIFT by 2-3cm and then raise the safety locking bars with your hand or foot so that the 

unlocking cam can come into contact with the ground when it is in its resting position. 

b.


Make sure both release cams are resting on the ground before pressing "DN" (down). 

c.


Press "DN" (down) until QUICK LIFT has returned to the initial position. 


5/ PURGE THE WORMS: 

 Make sure you have the necessary protection: pair of glasses, safety shoes and gloves. 

There may be air in the hoses or cylinders before first use. Unlike hydraulic oil, air is compressible. You might get the 
impression that the ramps work like a shock absorber. To expel the air, it is necessary to bleed the circuit through the 

cylinders. 
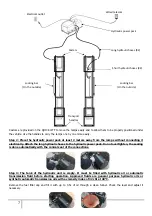
Turn over the 2 ramps of your QUICK LIFT as shown in the photo opposite, taking 
care  not  to  injure  yourself  or  get  your  fingers caught in the mechanical structure 

(carry out this operation with 2 people if necessary) and follow the procedure for 

Height 1 

« UP »  

« DW»  

Содержание LUXMAIN QUICK LIFT L520E

Страница 1: ...8 QUICK LIFT L520E EN Operating and control manual for a lifting platform User manual French version Made in China Yantai Tonghe Precision Industry Co Ltd www ytthjg com Imported by GYS FRANCE www gys...

Страница 2: ...th chock 460 mm E Width 315 mm FEATURES Maximum Load 2 500 kg 1250Kg ramp Safety in case of mechanical fall YES 2 positions Electrical installation 220 V AC 50 60Hz Hydraulic tank capacity 4L Noise le...

Страница 3: ...ycle Operation of the mechanical safety devices and the emergency stop button Controls automatically return to initial position No damage to the cylinders the power supply cable and the wired remote c...

Страница 4: ...EC Certificate of Conformity EN1493 2010 EN50581 2012 Report No 185226910101 NGBEC1802310202 Control body INSPECCO BELGELENDIRME VE GOZETIM HIZMETLERI A S ID number 2459 NINGBI QIAOPU ELECTRIC CO LTd...

Страница 5: ...f passenger vehicles It allows the bodybuilder to lift vehicles safely The maximum load of the QUICK LIFT is 2500 kg The QUICK LIFT may only be used by persons who have read and understood the operati...

Страница 6: ...start working around or underneath At the end of a work session return the vehicle to the ground to avoid operating the QUICK LIFT with a full load for a long period of time PACKAGING AND UNLOADING Th...

Страница 7: ...he conical seat of the connections Step 3 The tank of the hydraulic unit is empty It must be filled with hydraulic oil or automatic transmission fluid before starting operation Approved fluids are gen...

Страница 8: ...een removed from its packaging assembled and positioned on the ground perform a no load test to check the QUICK LIFT s general operation There are two positions for locking the height of the QUICK LIF...

Страница 9: ...other and therefore in the passage of the locking bars on the blocks This is normal On load the ramps will be synchronized and the offset will be corrected Pressing DN down will lower the ramps until...

Страница 10: ...tter to use a front underneath socket rather than a rear socket which will be lighter unless the engine is at the rear of the vehicle If in doubt seek specialist advice Do not lift any loads directly...

Страница 11: ...age pick up points manufacturer s recommendation f Press the UP button on the wired control When the vehicle leaves the ground do not stop the deployment of the ramps until the first locking position...

Страница 12: ...nly original spare parts must be used Spare parts The recommended maintenance intervals must be adhered to Maintenance table For maintenance work that is not shown or indicated in the operating instru...

Страница 13: ...r other debris from entering the hydraulic system The table below shows the anomalies that can be observed when using the QUICK LIFT If the problem is not listed in the table below stop using the tool...

Страница 14: ...rranty does not cover incidents due to misuse fall disassembly or other damage due to transportation The warranty does not cover normal wear and tear of parts if maintenance is not kept up to date Onl...

Страница 15: ...sent on hydraulic power pack Max load capacity 2500kg present on the 2 ramps Up UP and down DN signal present Operating instructions original present Tightening of nuts on all axes Condition of hydrau...

Страница 16: ...ion of the rubber chocks and 4x4 option Condition of the power cord of the hydraulic power pack General condition of the hydraulic power pack Functional test of the lifting platform with vehicle Contr...

Страница 17: ...17...

Страница 18: ...18 Importer France GYS FRANCE 1 rue de la Croix des Landes CS 54159 53941 SAINT BERTHEVIN Cedex France...

Отзывы: