GVA GVAD212 Скачать руководство пользователя страница 14

14 


Install Driver and Software 
 

The attached CD contains the digital camera driver and the presented application software MAGIX Video 
easy SE and MAGIX Photo Manager MX (which can be used to process videos and photos.) 
 

Installation interface 

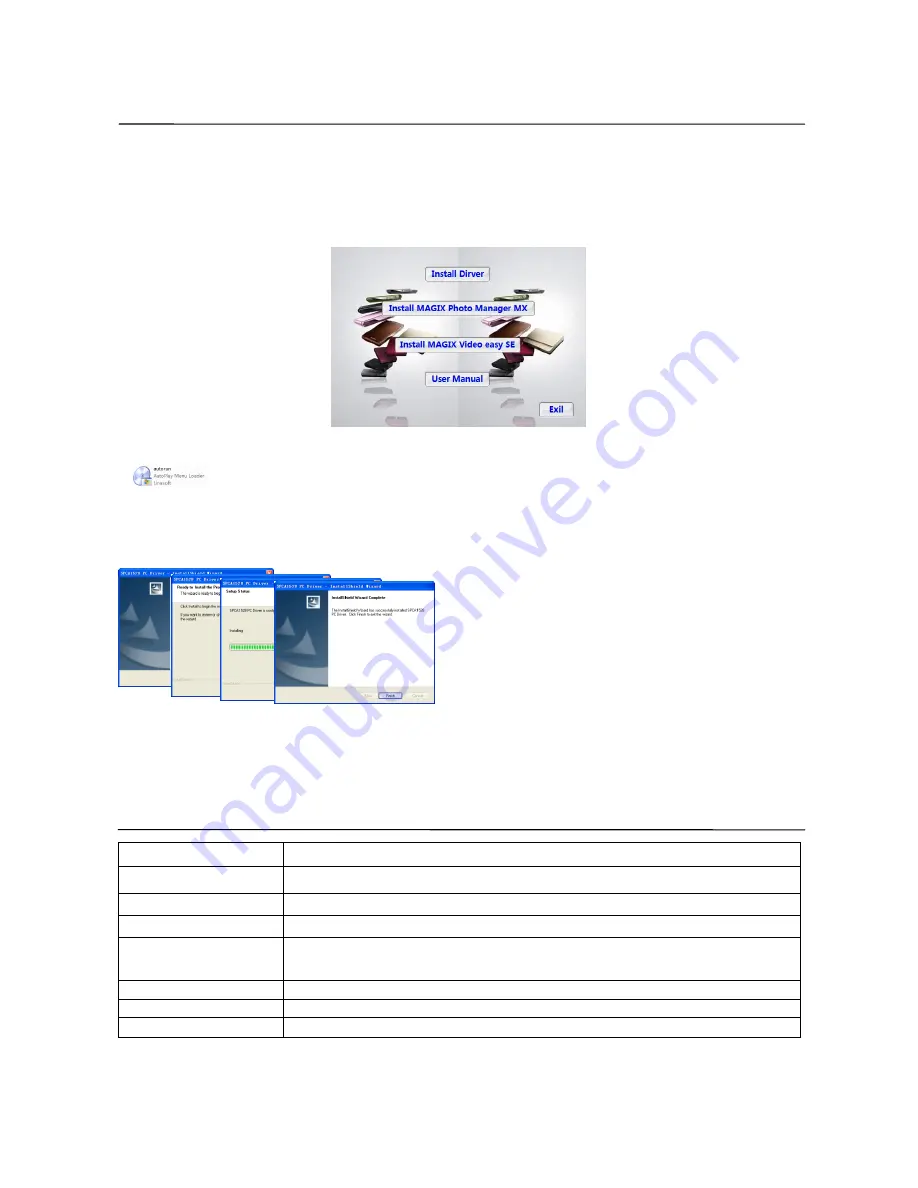
Insert  the  CD  into  the  CD  driver  of  the  computer,  the  system  will  automatically  run  the  installation 
programs in the CD and the following installation guide window will appear on the screen. 


(It  may  take  several  seconds  to  run  the  automatic  installation  program  depending  on  the  computer 
performance.  If  there  is  no  installation  window  appearing,  please  open  “My  Computer”  and  run  the 
“                        ” in the CD.) 


Install driver 

Click  the  “Install  Driver”  in  the  installation  guide  window,  and  complete  the  installation  step  by  step 
according to the instruction. 


Please re-start the computer after the driver is installed. 

After  the  corresponding  in  the  installation  guide  window  are  clicked,  the  application  software 
MAGIX Video easy SE and MAGIX Photo Manager MX can be installed step by step according to 
the instruction. 
For the use method, click the “User manual” in the installation guide window. 


Specifications 


Image sensor 

1.30 million-pixel CMOS sensor 

Photo resolution 

2592×1944, 2048×1536, 1280×960, 640x480 

Memory 

External Micro SD / Micro SDHC card (512 MB to 32 GB) (not included) 

File format 

JPEG, AVI 

Video resolution 

 
VGA 640×480 ,QVGA 320×240 

Self-timer delay 

2 sec / 10 sec 

Digital zoom 

4× 

White balance 

Automatic/ Daylight/ Cloudy/ Fluorescent lamp/ Tungsten lamp 

Содержание GVAD212

Страница 1: ...Instruction Manual Digital Camera GVAD212...

Страница 2: ...has been used previously with other devices cameras ore is brand new the card may require to be formatted Please ensure you have all valuable records before formatting 1 Micro SD Micro SDHC memory car...

Страница 3: ...0 x 480 30fps QVGA 320 x 240 30fps 4 digital zoom Accessories When unpacking the video camera you will see the following main accessories USB cable Installation CD User manual Getting to know your dig...

Страница 4: ...t press to close menu Shutter button Take a photo Start pause video recording Start stop playing Switch over to setup menu confirm menu T button Digital zoom in Select file rightwards Switch over to t...

Страница 5: ...the video recording mode and the playback mode in the playback mode you can press the mode button to switch over back to the photographing mode Video recording In the video recording mode you can pres...

Страница 6: ...mode as MSDC mobile disk or PC CAM pickup head mode and then connect the USB port to the video camera the video camera will accordingly enter the mobile disk or pickup head mode Advanced Operations Ph...

Страница 7: ...currently set exposure compensation value 5 Photo size Indicates the current photo resolution 6 9999 Number of photographabl e photos Indicates the number of remaining photographable photos 7 Card In...

Страница 8: ...g Multi spot metering Spot metering White balance Automatic Automatic white balance is suitable for most cases Daylight Suitable for daylight environment Cloudy Suitable for cloudy environment Fluores...

Страница 9: ...tion 5 00 00 1 Recording time Indicates the remaining recordable time in free state and the used recording time in recording state 6 Card Indicates that a memory card has been inserted and Indicates t...

Страница 10: ...button to exit the menu In menu selection the selected menu option will be highlighted Options in video recording menu Main menu Sub menu Description Movie size 640X480 High resolution format 320X240...

Страница 11: ...mat Language English Setting the menu language to English French Setting the menu language to French Spanish Setting the menu language to Spanish German Setting the menu language to German Italian Set...

Страница 12: ...a menu option and then press the shutter button to enter the sub menu In the sub menu press the shutter button to confirm and to return to the main menu or directly press the power button to return to...

Страница 13: ...nu option SPCA1528 PC Driver in the Start All programs menu where there will be a shortcut icon After the video camera is connected to a computer and enters the pickup head mode you can open the AMCAP...

Страница 14: ...driver Click the Install Driver in the installation guide window and complete the installation step by step according to the instruction Please re start the computer after the driver is installed Aft...

Страница 15: ...nstalled correctly No photographing and video recording can be conducted after the shutter button is pressed No memory card is inserted photographing or video recording can be conducted only after a m...

Страница 16: ...hat we have supplied to the Seller for that purpose and c provide a copy of a proof of purchase to the Seller to whom you are returning the products The best proof of purchase is a tax invoice or rece...

Страница 17: ...t have been paid to you on account of your claim of breach of the Warranty and by returning making the claim for breach of Warranty you agree to this proviso Subject to your rights under the Australia...

Отзывы: