


17
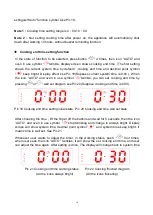
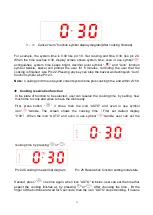
Selecting a cooking function and
temperature
When your appliance is connected to your mains supply for the first time, the power
indicator light will come on, after selecting the cooking function and setting a
temperature, the operating light will come on and the oven will start working, finally
setting the cooking time;(the cooking time is from 0min to 120mins, revolving the knob
in clockwise direction to the corresponding time on panel when setting the cooking time.
The oven function selector knob should be used to select the particular mode of cooking
that you require. The appliance will utilise different elements within the oven cavity,
depending on the oven function that you select. When a function is selected, the power
indicator light will come on.
Five functions digital-timer model & the function mode
You have 6 functions for choices. Select cooking function according to different food.
DEFROST:
The fan runs without heat to reduce the defrosting time of frozen
foods. The time required to defrost the food will depend on the room temperature,
the quantity and type of food.
CONVENTIONAL OVEN (top and lower element):
This method of cooking
provides traditional cooking, with heat from the top and lower elements. This
function is suitable for roasting and baking on one shelf only.
FAN AND TOP ELEMENT:
This method of cooking utilises the top element in
conjunction with the fan, which helps to circulate the heat. This function is suitable
for quick roast surface in order to lock the internal water of the food, such as
beefsteak, hamburger and vegetables.
FAN AND BOTTOM ELEMENT:
This method of cooking utilises the bottom
element in conjunction with the fan, which helps to circulate the heat.This function
is suitable for sterilizing and preserving jars.
FAN AND GRILL:
This method of cooking utilises the top element in conjunction
with the fan, which helps to provide a quick circulation of heat. This function is
suitable where quick browning is required and “sealing” the juices in, such as
steaks, hamburgers, some vegetables etc.
Energy saving GRILLing mode:
Heat is evenly distributed from top and bottom.
Thermostat control knob


