background image


Preparing to Charge Precautions 

Before charging a battery with the charger, read the following precautions: 
1.


Do 

NOT

 operate the charger if the cables or LED are damaged. 

2.


Make sure all external electrical loads are 

OFF

3.


If the battery or batteries must be removed from the equipment in which the charger is mounted, 
always remove the grounded terminal from the battery first. 

4.


Be sure the area around the battery is well ventilated while the battery is being charged.  Gas 
can  be  forcefully  blown  away  using  a  piece  of  cardboard  or  other  non-metallic  material  as  a 
“hand fan”. 

5.


Clean battery terminals, but keep corrosion particles out of your eyes. 

6.


Add  distilled  water  in  each  cell  until  battery  acid  reaches  levels  specified  by  the  battery 
manufacturer, if applicable.  Do not over fill. For all batteries, carefully follow the manufacturer’s 
recharging instructions. 

7.


Never allow the ring terminals to touch each other. 

8.


NEVER

 charge a frozen battery. 


Grounding Precaution 

DANGER 

Do not operate this charger with a two bladed ground adapter plug or extension 
cord.  Doing so can result in serious personal injury.


CAUTION:

  To reduce the risk of shock, connect only to a properly grounded outlet. 


3. INSTALLING THE CHARGER 


Choosing Mounting Location 

The  charger  should  have  at  least  eight  inches  of  unobstructed  area  on  all  sides  of  the  unit  for 
effective cooling.  The case of this charger will become warm during operation.  Do not install onto a 
carpeted, upholstered, or varnished surface.  Keep the DC wires between the charger and batteries 
as short as possible. 


Mounting the Charger 

1.


Use corrosion resistant #6 screws, backed by a flat washer, and secured to the mounting surface 
with a split-ring lock washer. 

2.


Hold the charger to the mounting surface and mark the holes. 

3.


Remove the charger and drill the mounting holes. 

4.


Align the charger and assemble the mounting hardware.  Secure. 


Making DC Connections 

DANGER 

Before working on electrical equipment, first determine there is no live AC power!


The output cable includes ring terminals for easy connection to common batteries. 
Carefully connect the DC output cable to your 12-volt battery as follows: 

Содержание 2602A-12

Страница 1: ...R A Valley Forge Company MODEL 2602A 12 3 STAGE AUTOMATIC BATTERY CHARGER OWNER S MANUAL SAVE THESE INSTRUCTIONS ...

Страница 2: ...THE VICINITY OF LEAD ACID BATTERIES IS DANGEROUS BATTERIES GENERATE EXPLOSIVE GASES DURING NORMAL OPERATION THEREFORE IT IS OF UTMOST IMPORTANCE THAT EACH TIME BEFORE USING YOUR CHARGER YOU READ THIS MANUAL AND FOLLOW THE INSTRUCTIONS EXACTLY Personal Safety Precautions Adhere to the following personal safety precautions when installing or working with the chargers 1 Someone should be within voice...

Страница 3: ...on DANGER Do not operate this charger with a two bladed ground adapter plug or extension cord Doing so can result in serious personal injury CAUTION To reduce the risk of shock connect only to a properly grounded outlet 3 INSTALLING THE CHARGER Choosing Mounting Location The charger should have at least eight inches of unobstructed area on all sides of the unit for effective cooling The case of th...

Страница 4: ...f the battery charging is accomplished The green LED will blink during this stage The charging current is limited to 2 Amps and the battery voltage rises to approximately 14 5 VDC During the second charging stage known as ABSORPTION charging the charger holds the battery voltage at approximately 14 5 VDC and then gradually reduces the amount of current Amps it delivers to the battery By doing this...

Страница 5: ...ll DC equipment while charging 4 Connect AC power or reset the AC breaker on the main panel 2 The green LED does not stay lit after 24 Hrs of charging 1 On board DC systems are drawing between 1 to 2A 2 One or more defective or damaged cells 3 Extremely low AC voltage at the battery charger 1 Turn off all DC equipment while charging 2 Load test the battery and replace if necessary 3 Apply a higher...

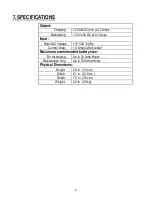
Страница 6: ... 0 1 Amps Input Rated AC Voltage 115 VAC 60 Hz Current Draw 1 0 Amps at full output Maximum recommended battery size For recharging Up to 30 Amp Hours Maintenance only Up to 100 Amp Hours Physical Dimensions Height 2 9 in 7 3 cm Width 5 1 in 12 9 cm Depth 1 5 in 3 8 cm Weight 2 0 lb 0 9 kg ...

Страница 7: ...r relocate the receiving antenna Increase the separation between the equipment and receiver Connect the equipment into an outlet on a circuit different from that to which the receiver is connected LIMITED WARRANTY For two 2 years from the date of original purchase The Guest Co will at its discretion repair or replace for the original consumer free of charge any parts found defective in material or...

Отзывы: