background image

1

8

Setting the 

T

imer

Please Note:

You need to use the remote control for this function.

The 

T

imer is used to switch the system ON and OFF at a specified

 time. It enables you to listen to 

the DAB/FM radio, CD or iPod device

 for a set amount of time

.

1

.

 In 

STANDBY

 mode press and hold the 

TIMER

 button.ON TIME will be displayed and 

the hour digits will begin to flash. Adjust the hour by p

ressing the 

 buttons.

2

.

Press the 

TIMER

 button to confirm and the minute digits will begin to flash. 

Adjust the minutes by p

ressing the  

 buttons.

3

.

Press the 

TIMER

 button to confirm and OFF TIME will be displayed. 

Follow the same procedure as in Steps 1 and 2 to set the OFF time. 

Then press the 

TIMER

 button to confirm.

4

.

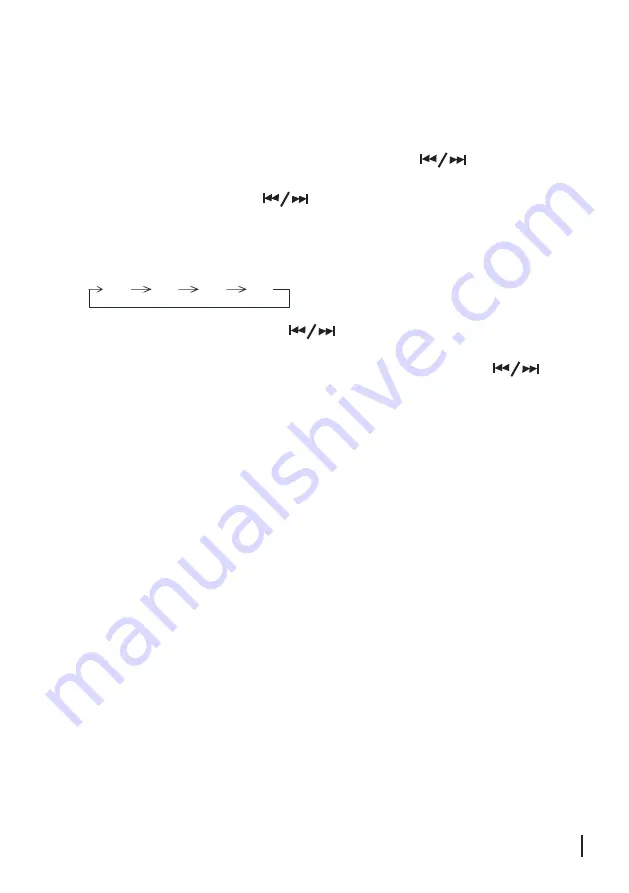
 The function mode will follow the cycle below:

DAB        FM        CD       iPod

Select the desired source by pressing the 

 buttons and pressing the 

TIMER

 button to 

confirm.

5

.

The volume level will be displayed. Select the level required by pressing the 

 buttons 

and pressing

 the TIMER button to confirm

Please note: Once a TIMER is set completely, all the settings will be re-presented for one time for 

y

our viewing.

Please note:You can turn OFF the Timer by pressing Timer button until Timer icon disappear

s

.

Содержание GMS558DABIP

Страница 1: ...The Gold Technical Support Line 1902 215 259 Personal Product Support Charges will apply at 2 95 per minute GMS558DABIP DAB Micro System with Dock for iPod ...

Страница 2: ... engineers Your safety and the safety of others is important Please therefore ensure you read the Safety Instructions before you operate this unit Safety is important Warranty Australia Grundig Warranty 1800 509 394 New Zealand Grundig Warranty 0800 450 259 You may already be familiar with using a similar unit but please take time to read these instructions They are designed to familiarise you wit...

Страница 3: ...s voltages Do not leave the equipment switched on when unattended for long preriod of time Do not obstruct the ventilation vents on the equipment e g with curtains or soft furnishings as this may can the unit to over heat Overheating will cause damage and shorten the life of the product Do not allow this unit to be exposed to rain moisture or any type of liquid Do not install this unit in a confin...

Страница 4: ...4 Contents Your Micro System 5 Quick Start 7 Using the DAB Radio 8 Using the FM Radio 11 Using the CD 13 Using the Clock and Timer 16 Other functions 18 Troubleshooting 19 Specifications 19 Warranty 20 ...

Страница 5: ...5 Your Micro System Front Rear 1 2 3 4 5 6 7 8 9 10 11 12 13 14 15 16 17 22 18 19 20 21 ...

Страница 6: ...ss the MEMORY CLOCK Button to slare a track into the uint memory or to set the clock 11 PLAY MODE Button Press the PLAY MODE Button to select the repeat mode 12 ENTER Button Press the ENTER Button to confirm the menu selections and settings 13 SKIP FORWARD Button Press the SKIP FORWARD Button 14 VOLUME Button Press the VOLUME Button to decrease the VOLUME Button Press the VOLUME Button to increase...

Страница 7: ...ess the PLAY MODE Button to select the repeat mode 10 FOLDER UP Button Press the FOLDER UP Button to folder up the MP3 files 11 FOLDER DN Button Press the FOLDER DN Button to folder down the MP3 files 12 EQ Button Press the EQ Button to select an equalizer mode 13 NUMBER Button Press the NUMBER Button to select a track in CD mode or iPod stations 14 SLEEP Button Press the SLEEP Button to set amout...

Страница 8: ...our Grundig DAB Micro System via the Headphone Jack you need Headphones not included with a 3 5mm stereo plug with 8 32 ohm impedance Plug your Headphones into the Headphone Socket on the back of your Micro System Be sure to have the volume low before putting on your Headphones then increase to the desired level once on When the Headphones are connected the speakers are automatically turn off ...

Страница 9: ...tton to switch on your DAB MICRO System Scanning for DAB Radio Stations To scan for DAB station available press the PLAY SCAN Button on the remote or unit The DAB radio will automatically scan and store all available stations in the memory When the scan is complete the DAB stations will be displayed in alphanumeric order The first station on the list will be selected Press the Buttons to scroll thr...

Страница 10: ...r tones easier to hear SW Version Prune Displays the software version of this DAB This MENU option allows to delete all the unavailable weak reception radio station radio Manual tune DAB DAB Full scan DAB DRC DAB DAB SW version System Prune Prune System DRC DRC DRC No Yes DRC off DRC Low DRC High Press the the Button ENTER Button Press the ENTER Button Press the ENTER Button Press the ENTER Button...

Страница 11: ...ime and Date This displays the time and date information provided by the broadcaster Channel and Frequency This displays the channel number and the transmission frequency Signal Information This shows the digital bit rate and the mode Signal Strength Thisdisplays the signal strength of a DAB station The LCD screen will show a bar graph indicating the strength of the signal the more squares the str...

Страница 12: ...CKbutton for 5 seconds FACTORY RESET will be displayed on the screen Then press the PLAY SCAN button to confirm Note Any previously stored preset stations or settings will be lost Basic operation 1 Press the STANDBY button to turn on the unit 2 e d o M M F t c e l e s o t t i n u e h t n o n o t t u b FUNCTION e h t s s e r P 3 Tune to the station you want by pressing the buttons To manually tune t...

Страница 13: ...tles or details of the program No Radio Text will be displayed if the FM station does not broadcast RDS Program Type This is a description of the type of program provided by the broadcaster NO PTY will be shown if the FM station does not broadcast RDS Time and Date This displays the time and date and is provided by the broadcaster NO CT will be shown if the FM station does not broadcast RDS Freque...

Страница 14: ...mage the unit 5 Press the OPEN CLOSE Button to close the tray 6 When the compartment is closed Press the play button to begin plays The total number of tracks on the CD will appear on the LCD display Playing CDs 1 Press the Button to play the CD from the first track 2 Press the Button to pause play of the CD The indicator will appear on the display 3 To stop play press the Button If you press play ...

Страница 15: ... compatible to play MP3 WMA files When playing a CD encoded with MP3 or WMA files the functions available and operations are similar to those of a standard CD Unit Memory Up to 64 tracks can be programmed to the internal memory in any order You can also store the same track more than once 1 2 Whilst play a track you wish to share Press the MEMORY CLOCKbutton and P 01 will be displayed 3 Select the ...

Страница 16: ...O button to select the desired track 1 Press the INFO Button to display the names of the song with initial letter A 2 Press the or Button to select the desired initial letter 3 Press the INFO Button repeatedly to select the desired folder 4 When the desired folder is displayed on the screen press and hold for 3 seconds to confirm the selection 5 Press the or Button to select the track you want to ...

Страница 17: ...onfirm 6 The unit s clock is synchronised when the unit is ON and in DAB mode Setting the Sleep Function Please Note You need to use the remote control for this function The Sleep Timer is a countdown timer for switching the system to Standby mode after a specified time The Sleep Timer can be set from 10 to 90 minutes 1 Press the SLEEP button to set the sleep time SLEEP icon is displayed The system...

Страница 18: ... minutes by pressing the buttons 3 Press the TIMER button to confirm and OFF TIME will be displayed Follow the same procedure as in Steps 1 and 2 to set the OFF time Then press theTIMER button to confirm 4 The function mode will follow the cycle below DAB FM CD iPod Select the desired source by pressing the buttons and pressing the TIMER button to confirm 5 The volume level will be displayed Select t...

Страница 19: ...any abnormal operation when using the Micro System follow the procedure below to perform a system reset 1 Remove the Mains Power lead from the wall socket 2 Leave the unit disconnected from the power supply for 1 minute then reconnect the power on the unit Please Note The clock time will be lost if the power supply is disconnected You will have to reset the time ID3 Tag Title Artist Album Function...

Страница 20: ... the iPod dock before attempting to connect your iPod 10 14 16 17 5th iPod iPod video 60GB 80GB iPod classic 160GB 1st iPod touch 8GB 16GB 2nd iPod touch 8GB 16 32GB 4th iPod nano 8GB 16GB Universal Dock Adapter Number iPod Description Capacity 20 Please Note If you connect an iPod without fitting the correct adaptor you may damage the iPod and your Music System Basic operation 1 To select iPod op...

Страница 21: ...disc not playing correctly Poor quality data wrong type of Try making a new copy file i e aac flac ogg m4a Check the file type is MP3 or WMA Title Artist Album ID3 Tag Data not correct on the CD Re record the disc or try another not working correctly MP3 on computer has correct ID3 Version of ID3 not supported Get ID3 data in ID3 Version 1 info but unit does not display it Aux In Sound is quiet Volum...

Страница 22: ...59 New Zealand and have your receipt of purchase on hand This warranty is subject to the following provisions It is only valid within boundar ies of the country of purchase The product must be correctly assembled and operated in accordance with the instructions contained in this manual This product must be used solely for domestic purposes The warranty does not co ver accidental damage The warrant...

Страница 23: ... Remark print below info onto bottom right hand corner of rear cover page PO BOX 6287 Silverwater NSW 1811 www grundig net au ...

Отзывы: