background image


- 33 - 


4.


In playing a MP3 disc you can program the order in which tracks play. Press 

the RED/PROG Button and a table will be displayed. Press the Navigation or 

Numeric Buttons to program the tracks in your favorite order.   

PROG   

        T        C 

      T        C 

      T        C 

      T        C 

1    _ _: _ _ 

5    _ _: _ _ 

9    _ _: _ _: 

13    _ _: _ _ 

2    _ _: _ _ 

6    _ _: _ _ 

10    _ _: _ _ 

14    _ _: _ _: 

3    _ _: _ _ 

7    _ _: _ _ 

11    _ _: _ _: 

15    _ _: _ _ 

4    _ _: _ _ 

8    _ _: _ _: 

12    _ _: _ _ 

16    _ _: _ _ 


PLAY 

CLAER 


5.


For the other operations, refer to the instructions of Remote Control.   


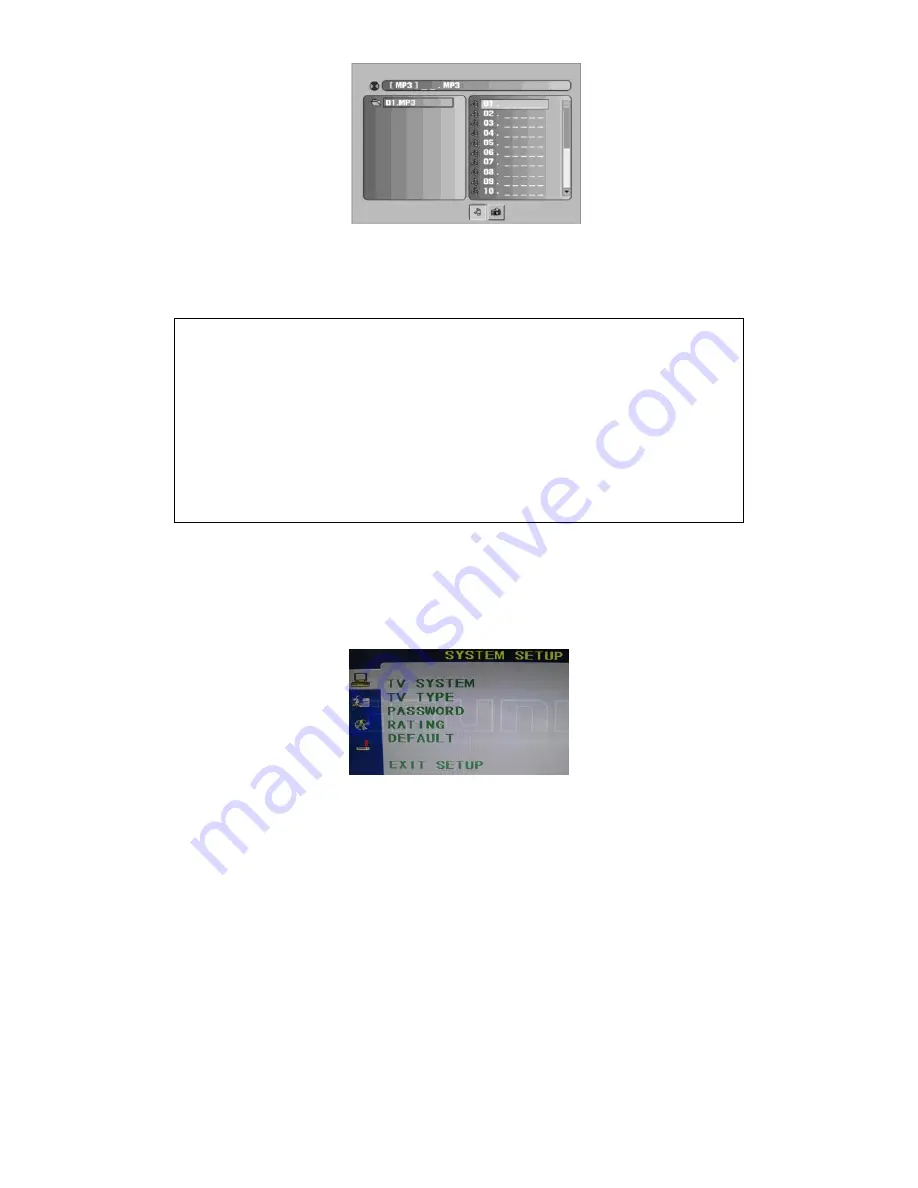
SYSTEM SETUP 


TV SYSTEM 

This Menu enables you to set the picture format for your TV/DVD between NTSC/ 

PAL/ AUTO according to your request and local TV system. 

TV TYPE 

This Menu enables you to select one of the three aspect ratios: 4:3 PS / 4:3LB / 16:9. 

It is depended on your disc.   

PASSWORD 

This  is  used  to  lock  and  unlock  the  RATING  setting.  The  default  setting  is  locked. 

Enter the default password “0000” by numeric Buttons. Then press the OK Button 

to unlock.   

Содержание GLED2211HDV Series

Страница 1: ...MEGLIO HD LED LCD TV GLED2211HDV Series Toll Free Service and Warranty 1800 509 394 The Gold Technical Support Line 1902 215 259 Charges will apply at 2 95 per minute for gold technical support only ...

Страница 2: ...ions Safety is important Your safety is very important Please therefore ensure you read the Safety Instructions before you operate this unit Warranty In the unlikely event that your product fails to work normally please call one of our qualified service engineers on either of the below toll free phone numbers to discuss any issues directly Australia GRUNDIG Warranty 1800 509 394 New Zealand GRUNDI...

Страница 3: ...sic Operations 13 Main Menu Operations 15 Channel Menu 16 Picture Menu 18 Sound Menu 20 Time Menu in TV mode only 21 Lock Menu 22 Setup Menu 23 EPG Menu 27 DTV Recording 29 Time Shift 30 Multi Media Operation 30 PC 31 DVD PLAYER OPERATION 32 Basic operation 32 SYSTEM SETUP 33 LANGUAGE SETUP 34 AUDIO SETUP 34 DIGITAL SETUP 35 Troubleshooting 36 Specifications 37 Display Modes only VGA 38 Warranty 4...

Страница 4: ...er supply cord or plug has been damaged liquid has been spilled or objects have fallen into the television the television has been exposed to rain or moisture does not operate normally or has been dropped 10 The television should not be exposed to dripping or splashing water and no objects filled with liquids such as vases should be placed on the television 11 Beware if the television is to be bui...

Страница 5: ... TV can be connected to AC 100 240 Volts 50 60 Hz power source Never connect straight to a DC supply or any other power supply then specified above Locate the TV in the room where light does not directly strike the screen Total darkness or a reflection on the picture screen can cause eyestrain Soft and indirect lighting is recommended for comfortable viewing Allow enough space between the TV and t...

Страница 6: ... that the following items are included with your LED LCD TV If any item is missing please contact the warranty line LED LCD TV Remote Control Operation Manual DC Adaptor Power Cord RCA Cable RF Input Adaptor Lead Cigarette Adapter ...

Страница 7: ...an now remove the stand as shown in the last picture To re attach the stand please follow the attached directions in reverse Wall Mount Bracket Installation This TV is VESA standard wall mountable Please see above an image of the 4 VESA standard holes 100mm x 100mm The wall mount bracket and screws are not included with your TV However to attach your bracket use the 4 holes provided to screw your ...

Страница 8: ... 6 View of the TV and Functions Front View Back View ...

Страница 9: ...s 12 HDMI1 Input The HDMI Input allows you to connect your HDMI Cable for greater definition 13 HDMI2 Input The HDMI Input allows you to connect your HDMI Cable for greater definition 14 Y Input The Y Input must be connected for a component connection 15 Pb Input The Pb Input must be connected for a component connection 16 Pr Input The Pr Input must be connected for a component connection 17 PC Au...

Страница 10: ... 8 Remote Control ...

Страница 11: ...he Red Button to enter program setting in DTV mode display red subject in Teletext mode and sub Menus 10 VOL Button Press the VOL Button to increase the volume level 11 VOL Button Press the VOL Button to decrease the volume level 12 Teletext Button Press the Text Button to enter the Teletext Menu 13 DVD M Button Press the DVD M to display the DVD Disc Menu 14 Rewind Button Press the Rewind Button ...

Страница 12: ...Ch Button to scroll upwards through the channel list 31 Mute Button Press the Mute Button to turn off and on the sound only 32 Ch Button Press the Ch Button to scroll downwards through the channel list 33 DVD Setup Button Press the DVD Setup Button to display the Set Up Menu in DVD mode 34 SUB Button Press the Sub Button to switch the dialogue at the bottom of the screen 35 Goto Button Press the G...

Страница 13: ...ys replace both batteries at the same time Never mix new and old batteries or batteries of a different type 4 If you don t intend to use the remote control for an extended period remove the batteries to prevent possible leakage and corrosion Notes Do not drop shake or step on the remote control Do not spill water on the remote control Aim the remote control directly at the remote sensor for best u...

Страница 14: ... DVD VCR or Camcorder you must connect them to the Video Input via the RCA Cable 4 YPbPr Component Video Input should be connected with the YPbPr Video Output of your DVD VCR or Camcorder 5 HDMI Input should be connected with the HDMI Output of your DVD VCR or Camcorder This TV has two HDMI Inputs Mixer Input terminal of antenna UHF Antenna 75ΩCo axis cable VHF Antenna Antenna Input ...

Страница 15: ...mode CVBS and YPbPR are sharing the same Right Left audio Input Basic Operations 1 Touch POWER on the unit or press the STANDBY Button on the remote control to turn the TV on or off The GRUNDIG brand logo light will be turned off when the unit has been powered on When the unit is in Standby mode the Grundig brand will be illuminated You can change the logo light setting in the Setup Menu 2 If you ...

Страница 16: ... Navigation Buttons OK Button find and confirm the channel you want to watch You can press Numeric Buttons on remote to select the channel directly To go back to the last channel you where watching you can press the PRE CH Button on the remote control 6 To adjust the volume press the VOL to increase or decrease the sound level 7 Press the MUTE Button to turn off the sound only and press it again t...

Страница 17: ... must be watching or in DTV mode The Teletext Menu will provide you with further detailed information about the program you are watching To enter the Teletext Menu press the TELETEXT Button Press the CH or Numeric Buttons to select the page you wish to view Note When using the Numeric Buttons the first number should not be 0 or 9 To exit just press the TELETEXT Button again Main Menu Operations Pr...

Страница 18: ...r Press the OK Button to enter Press the or Buttons to select a below sub Menu and then press the OK Button to confirm To exit the Channel Menu press the Menu Button Auto Tuning Once Auto Tuning is selected you will see an OSD below Tune Type is highlighted above Press the Navigation Buttons to select DTV ATV or ATV DTV tuning type Country Australia is the default Then press the OK to confirm and ...

Страница 19: ...clear you can use the Arrow Buttons to highlight the Fine Tune option and select Fine Tune Notes You need to set the Color System and Sound System before manual tuning For Australia color system is PAL and sound system is BG DTV Manual Tuning Use the or Buttons to select DTV Manual Tuning in the Channel Menu Then press the or Buttons to select the individual DTV channel you wish to store and press...

Страница 20: ...o exit Program Edit Menu and then press the FAV Button Signal Information Only for DTV Press the Buttons to select the Signal Information in the Channel Menu Then press the OK Button to show the related information of the current channel Picture Menu To enter the Picture Menu press the MENU Button and then press the or Buttons to select the Picture Menu Press the OK Button to enter Once in the Pic...

Страница 21: ...s the or Button to adjust the contrast Brightness Press the or Button to adjust the brightness Colour Press the or Button to adjust the colour Tint Press the or Button to adjust the tint this option only works in VGA mode and when the VGA input is connected Sharpness Press the or Button to adjust the sharpness Colour Temperature Press the or Button to scroll through the colour temperature Cold nor...

Страница 22: ... press the OK Button to enter the submenu and then press the or Buttons to scroll through the sounds modes Press the OK Button to confirm Treble Press the or Button to adjust the treble Bass Press the or Button to adjust the bass Balance Press the or Button to adjust the balance of left and right audio outputs Auto Volume Press the or Button to select Auto Volume to on or off When it s set to on t...

Страница 23: ...the Time Menu Press the OK button to enter the sub menu To return to the Main Menu press the MENU button or press the EXIT button to exit Time Zone You can set the Time Zone here The default is New South Wales GMT 10 Sleep Timer You can set the Sleep Timer to OFF 10mins 20min 30min 60mins 90mins 120mins 180mins or 240mins press the or button to scroll through and select the available time The TV w...

Страница 24: ...er the Lock Menu press the MENU Button then press the or Button to select the Lock Menu and press the OK Button to enter Press the or Buttons to scroll through the options in the Lock Menu Press the OK Button to enter the sub Menu To return to the Main Menu press the MENU Button or press the EXIT Button to exit Lock System Select Lock System in the Lock Menu and press the Right or Left Navigation ...

Страница 25: ...ock The block icon will appear behind the blocked channel To un lock the channel select the blocked channel and press the Green Button again the lock icon will disappear Parental Guidance Select Parental Guidance and then press the OK Button to enter the sub Menu to set the program rating and to block the selected rating programs Setup Menu To enter the Setup Menu press the MENU Button then press ...

Страница 26: ...or the program at the bottom of the screen if applicable which is designed for those who have weak hearing PVR File System only for DTV Press the or Buttons to select PVR File System then press the OK Button to enter sub Menu and then use the or Buttons to scroll through the options Select Check PVR File System and then press the OK Button to enter This function will check the USB speed Select Dis...

Страница 27: ...ot compatible you will see FAIL on the screen You will then need to format the device If it is compatible then SUCCESS will be displayed Note You will ONLY be able to perform program recording when your Hard Disc Drive or USB device is shown as compatible Format There are two types of format FAT32 and Hi Speed Format Press the Right or Left Navigation Buttons to select your type of recording forma...

Страница 28: ...ompatible with this TV and FAIL will be displayed on the screen You will not be able to record Free Record Limit After formatting is complete the unit will internally calculate the approximate number of hours your Hard Disc Drive or USB device can use for recording You can check this in this menu Aspect Ratio Press the or Buttons to select Aspect Ratio then press the OK Button to enter the sub Men...

Страница 29: ...ight will be ON when your TV is in Standby mode it will be off when your TV is in Power on mode Software Updated USB Press the or Buttons to select Software Update USB Then press the OK Button to update software by using a USB Follow the software upgrade instructions provided with the software Note We recommend you perform Factory Reset to ensure the unit is successfully upgraded EPG Menu The EPG ...

Страница 30: ...ecording There are four different recording modes Auto Once Everyday and Weekly You can press the Right or Left Buttons select one of the options When the recoding has been set to Auto the start time and end time of recording are depended on the broadcasting program When the recording has been set to Once Everyday or Weekly you will be able to set the start time and end time for recording Notes Pl...

Страница 31: ... the YELLOW Button to view the schedule list of booked programs for watching or recording There are two different icons shown in the schedule list for identifying booked programs for watching or recording If you want to delete a program set for viewing or recording you may press the UP or DOWN Button to highlight it and then press the RED Button to delete Prev Day Next Day Press the I or I Button ...

Страница 32: ... Press the II Button again to resume play Press the Button to stop play or press the or Button to fast forward or rewind play the program you are watching You can also use the Right Left Up or Down Navigation Buttons to move the cursor to select the options Play FB FF Prev Next Pause or Stop in the on screen menu Notes Ensure the storage device used for recording is inserted into the USB Input on ...

Страница 33: ...o select the PC mode Press the MENU Button to display the Main Menu and the below Screen Menu will appear Only available when Inputting PC RGB signal Press the Button to select the option that you want to adjust in the Screen Menu and press the Button to adjust After finishing your adjustment press the MENU Button to save and return to the previous Menu Auto Adjust Press the Button to select Auto ...

Страница 34: ...s of Rovi Corporation Reverse engineering and disassembly are prohibited Basic operation 1 Press the SOURCE Button on the remote control to select the DVD mode Insert a disc DVD CD or MP3 into the slot of DVD player from the right side It will start to read the disc automatically Press the EJECT Button on the remote control the disc will automatically eject Note Insert the disc with reflective dat...

Страница 35: ..._ _ _ 8 _ _ _ _ 12 _ _ _ _ 16 _ _ _ _ PLAY CLAER 5 For the other operations refer to the instructions of Remote Control SYSTEM SETUP TV SYSTEM This Menu enables you to set the picture format for your TV DVD between NTSC PAL AUTO according to your request and local TV system TV TYPE This Menu enables you to select one of the three aspect ratios 4 3 PS 4 3LB 16 9 It is depended on your disc PASSWORD...

Страница 36: ...setup icon press OK Button to confirm SPDIF OFF No Output is sent to the coaxial Output Use this option if you have not connected the coaxial Output to any decoder or amplifier SPDIF RAW When selected the raw audio contained on the disc is passed directly to the Coaxial Output Use this setting when connecting the coaxial Output to a multi channel decoder amplifier SPDIF PCM When selected the audio...

Страница 37: ...just the compression ratio for different audio effect When you select FULL the peak signal value is smallest and when you select OFF the peak signal value is biggest DUAL MONO Press the or Buttons to select 4 different audio output modes STEREO MONO L MONO R MIX MONO ...

Страница 38: ...y incorrect settings No sound Check that your audio cables have been connected firmly Check that the Mute setting is not on and that your Audio Settings are correct Conduct a restore setting to return settings back to the factory default and clear any incorrect setting Color distortion Ensure that the equipment is connected properly Ensure that the AV video signal Input is connected properly Remot...

Страница 39: ...udio MPEG2 Audio Layer I II Video MPEG2 Transport MP HL MPEG4 H 264 supported DTV de mod Demodulator COFDM OFDM Mod 2K 8K FFT SFN and MFN Packed Carries 2K 8K Guard Interval 1 4 1 8 1 16 1 32 Tuner Integrated and frequency synthesis USB Compatible with DivX MPEG4 MPEG2 MPEG1 BMP JPEG MP3 MP4 WMA MOV AVI MKV WMV AC3 AAC Terminals DC 12V X 1 USB X 1 HDMI X 2 PC VGA X 1 PC audio in X 1 AV Input X 1 E...

Страница 40: ...X870 68 681 75 062 VESA CVT 720X576 35 910 59 950 1152X864 53 783 59 959 1280X720 56 456 74 777 1280X960 75 231 74 857 VESA DMT 640X480 31 469 59 940 640X480 37 861 72 809 640X480 37 500 75 000 800X600 37 879 60 317 800X600 48 077 72 188 800X600 46 875 75 000 1024X768 48 363 60 004 1024X768 56 476 70 069 1024X768 60 023 75 029 1152X864 67 500 75 000 1280X1024 63 981 60 020 1280X1024 79 976 75 025 ...

Страница 41: ...mage disruption in PC mode This can occur as result of a signal from the VGA card which does not correspond with the usual standard This is not however an error You can improve this situation by altering any automatic setting or by manually changing the phase setting and the pixel frequency Menu 4 If you switch off the TV interference lines can occur on your screen This is not however an error 5 T...

Страница 42: ...le quality and the failure does not amount to a major failure In the unlikely event that your product fails to work normally please contact Grundig Warranty on 1800 509 394 Australia or 0800 450 259 New Zealand and have your receipt of purchase on hand This guarantee is subject to the following provisions It is only valid within boundaries of the country of purchase The product must be correctly a...

Отзывы: