background image

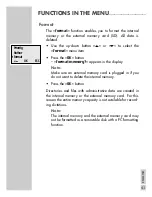
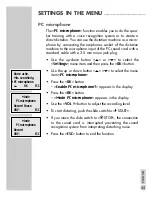
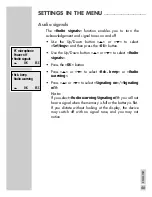
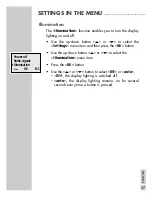
Illumination

The »

Illumination

« function enables you to turn the display

lighting on and off.

• Use the up-down button »

ļ

« or »

Ļ

« to select the 

»

Settings

« menu item and then press the »

OK

« button.

• Use the up-down button »

ļ

« or »

Ļ

« to select the 

»

Illumination

« menu item. 

• Press the »

OK

« button.

• Use the »

ļ

« or »

Ļ

« button to select »

Off

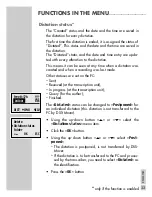
« or »

auto

«.

– »

Off

«, the display lighting is switched off.

– »

auto

«, the display lighting remains on for several

seconds every time a button is pressed.

SETTINGS IN THE MENU

________________________

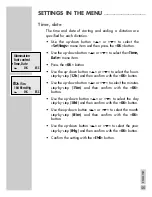
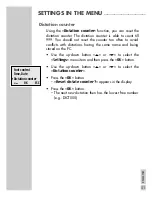
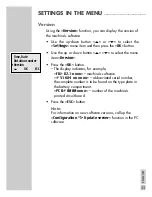
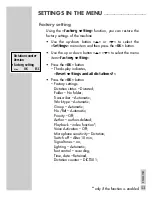
Power off
Audio signals

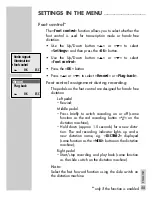
Ł

Illumination

Ļļ

OK

ESC

47

ENGLISH

Содержание Digta 4015 DS

Страница 1: ...Digta 4015 DS ENGLISH www grundig gbs com ...

Страница 2: ... switching on 16 Subsequent switching on 16 Switching off 16 Safety lock 17 Recording 17 Saving dictation 17 Dictation 18 New dictation 18 Recording pause 19 Ending recording 20 Editing a dictation 21 The Info function and the Index function 21 Inserting info 22 Inserting a section of dicta tion 22 Adding an index during a pause in the recording 23 Adding an index during a recording 23 Adding an i...

Страница 3: ...re 56 Connecting and separating the dictation machine and PC 57 Connecting via the Digta Station to the PC 58 Firmware update 58 Carrying out a firmware update 59 Enabling optional functions 60 DigtaScan 404 Barcode reader 60 Using barcodes 61 Plugging in 62 Unplugging 63 Switching the DigtaScan on and off 64 Scanning a barcode for a new dictation 65 Displaying a barcode for a dictation 66 Scannin...

Страница 4: ...lace the dictation machine close to the heating or in direct sunshine You may not open the dictation machine under any circumstances Opening the device invalidates the guarantee Open only the cover of the battery compartment Use only a dry cloth for cleaning Never use chemical cleaning agents Electronic devices such as a digital dictation machine can suffer malfunctions due to electrical discharge...

Страница 5: ...ference microphone DigtaDirectMic 941 unidirectional microphone Digta 951 earphone The volume is limited to 80 dB A DigtaCard memory card DigtaStation 441 USB charging unit You can see the latest accessories on our website www grundig gbs com The features indicated by Grundig apply only when using origi nal Grundig accessories Defects due to the use of accessories which are not original Grundig ac...

Страница 6: ...rding on off Slide switch for recording play back stop fast forward and rewind Safety lock Button for new dictation escape DigtaStation 441 Green indicator for USB connection Yellow indicator for battery charging Microphone Recording indicator Display Function buttons labeled in the bottom display line Up down button Menu OK button Accessories ...

Страница 7: ...7 ENGLISH THE CONTROL ELEMENTS_______________________ EAR Earphone connection impedance min 32 Ω Card ejection switch Battery compartment cover PC USB Interface EAR HOLD Power connection DC IN 3 V ...

Страница 8: ...on number Current function status line Current button function Selected folder Operation with Battery Rechargeable battery Power supply Indication for voice activation va and microphone sensitivity for conferences c Dictation position total length Free 0 37h vac DICTOO1 O O6 Record Pause INS NEW A ...

Страница 9: ...itches off Mains operation If the dictation machine has been switched on and is connected to a charging unit the unit will supply the dictation machine with power Inserted batteries or rechargeable batteries will be neither used nor charged Display for mains operation Safety hints for mains charging units 473 Accessories A temperature rise in the housing during operation is normal and no cause for...

Страница 10: ...for battery operation Inserting rechargeable batteries Only Grundig rechargeable batteries 462 may be charged inside the dictation machine using mains charging unit 473 Switch off the dictation machine Open the battery compartment Insert the rechargeable batteries making certain that polarity and position are correct Insert the rechargeable battery with the removed sheathing into the compartment w...

Страница 11: ... possi ble that part or all of the dictation could be lost if original Grundig rechargeable batteries are not used Rechargeable batteries from other manufacturers are identified by the dictation machine as non rechargeable batteries and shown in the display by the symbol Charging the rechargeable battery Switch off the dictation machine Plug the power supply into a wall outlet Plug the power suppl...

Страница 12: ...ins socket The yellow indicator on the DigtaStation 441 lights up Press the ON OFF button to switch off the dictation machine With the dictation machine switched off plug it into the DigtaStation 441 After a while the charging indicator appears on the device display Flat batteries are recharged after approximately 3 hours the charging indicators then go out Accessories COM 1 Line Out Mic In USB D ...

Страница 13: ...ng time During recording mode operation will automatically switch over to play mode The rechargeable battery symbol will flash on the dis play You will still be able to dictate for a few minutes before the dictation machine automatically switches off We recom mend either starting the charging process after the warning beep or to use the power supply to operate the dictation machine The rechargeabl...

Страница 14: ...ory card e g with over 300 dictations is inserted into the dictation machine with factory default settings or with a reset dictation counter it takes up to 20 seconds to create a new dictation This time is required for the dictation machine to search for the first free dicta tion number starting from dictation number 1 This time also varies depending on the manufacturer of the memory card If you u...

Страница 15: ...edge this with the OK button The Format memory and Formatting successful displays should also be acknowledged with the OK button The memory card may not be formatted as a removable disk using a PC formatting function New memory cards may only be formatted using the Formatting menu function It is essential that the notes in the MENU FUNCTIONS Format memory chapter be obser ved We recommend reformat...

Страница 16: ...tons making sure to confirm each entry with OK Conclude the setting procedure with the END button The device is ready for operation Subsequent switching on Press the ON OFF button until the red recording indi cator glows and then goes off again Switching off Briefly press the ON OFF button Safety lock Push the ļ HOLD slide switch up Note If the safety lock is activated the message Keys locked appe...

Страница 17: ...opy between the internal memory and the memory card Brief display in the status line for the external memory EXT Short display for this internal memory in the status line INT Dictation Speak over the dictation machine The figure shows the optimum position of the dictation machine The high quality microphone allows also for recordings over greater distances RECORDING _______________________________...

Страница 18: ...e Typist Dictation type Group No Ref or Priority functions are activated the appropriate selection lists appear please refer to the FUNCTIONS IN THE MENU chapter Use the up down button ļ or Ļ to select the entry you want and confirm with OK Push the slide switch to Ł START The recording indicator illuminates Record appears in the display and the device begins to record Recording pause Set the slid...

Страница 19: ...eady switched on the device some times switches off to prevent further damage If a record ing was in process check that the current dictation is com plete You may have to re record a few seconds of text Note on dictations that are longer than 5 hours Once the dictation limit of 5 hours is reached a new dictation will be created automatically with the following name Original dictation name letter s...

Страница 20: ... recording button ļ DICT at the point where the dictation is to be changed and start dictation Record appears in the display At the end of dictation push the slide switch to STOP Press the red recording button ļ DICT or push the slide switch to ĵĵ REW or ŁŁ FFWD Dictation is switched off Note If the dictation machine is switched off using the ON OFF button you will skip to the end of the dictation...

Страница 21: ... red recording button ļ DICT Recording Pause appears in the display Note You can also add info while a recording is in progress Press the Up button i Ń Insert Pause appears in the display Push the slide switch to Ł START and record the text to be inserted Insert appears in the display At the end of the message push slide switch to STOP Press the red recording button ļ DICT or press the i o button ...

Страница 22: ...play back Press the red recording button ļ DICT Recording Pause appears in the display Press the Down button iĽ i and the index number briefly appear in the display Finish the recording see Ending recording or push the slide switch to Ł START after the signal tone then dictate the new text The old text at this position is erased See also Editing a dictation RECORDING ______________________________...

Страница 23: ... index during play back In the Settings Play back menu set the middle but ton to i Index See the setting in Settings in the menu play back Note The default setting when the function is activated is Insert index Press the iĽ button during play back i and the index number briefly appear in the display RECORDING __________________________________________ Free 0 37h va c i 02 O 14 Play back VOL END Ł ...

Страница 24: ...ree dictation Left pedal Rewind Middle pedal Press briefly to switch recording on or off same function as the red recording button ļ DICT on the dictation machine Hold down approx 1 5 seconds for a new dicta tion The red recording indicator lights up and a new dictation name e g DICT002 displayed same function as the NEW button on the dictation machine Right pedal Start stop recording and play bac...

Страница 25: ...witching the machine on again with the ON OFF button Skip to the start or end of a dictation or to info or to the index Push the slide switch to Ł START Briefly touch the right function button to skip to the next info to the next index or to the start and end of the dictation Note The right button has the i function if an info or index follows the current position After all infos and indexes the b...

Страница 26: ...fast for ward Rewind appears for rewind Searching for an info or index Push the slide switch to ĵĵ REW or ŁŁ FFWD At an index and at the beginning of every message you will hear one signal at the end you will hear two signals The message is shown in the display e g i 02 If an index is found you will hear a signal Note It is easier to find short messages and indexes in play back mode HEARING A DICT...

Страница 27: ...the PC software When all dictations are deleted there is still administration data in the internal memory or on the external memory card Not all of the memory capacity of the internal memory memory card is available for recording dictations Deleting a part of a dictation Use the up down DICT _ button to select the desired dictation Press the MENU button The Delete menu function appears in the menu...

Страница 28: ... or index to be deleted appears in the display Note It is easier to find short messages or indexes in the play back mode Push the slide switch to STOP Press the MENU button The Delete menu function appears in the menu Press the OK button and then the INFO or INDEX button depending on whether there is a message or an index at this point The display shows for example Delete i 02 Press the OK button ...

Страница 29: ...s Typist TP Selects a typist for new dictations Dictation type DT Selects a form such as a letter or log Group GR Selects a group or department No Ref NR Allows you to enter the file referen ces or patient numbers for new dictations Priority PR Selects the priority for new dictations Author Select the author for new dictations Format Format the internal memory or inserted memory card Note This del...

Страница 30: ...the dictation machine as a microphone without recording when it is connected to a PC sound card This function is used for spea ker training and direct dictation with a speech recognition system Power off Selects manual or automatic shutdown Audio signals Switch signal tones on or off Illumination Switches the display lighting on off Foot control Selects the functions of the foot con trol for recor...

Страница 31: ...plays the version of the device software firmware Factory stting Completely resets the device restores the factory settings Note All existing dictations and settings are lost Language Selects a language for the menu guidance THE MENU_____________________________________________ ...

Страница 32: ... OK The current function setting appears on a dark background Use the up down button ļ or Ļ to select a function setting Press OK to confirm the function setting You can exit the function setting with ESC your changes will not be saved FUNCTIONS IN THE MENU_____________________ Ł Delete Dictation status Folder Ļļ OK ESC ...

Страница 33: ...ion unit In progress at the transcription unit Query for the author Finished The Dictated status can be changed to Postponed for an individual dictation this dictation is not transferred to the PC by DSS Mover Using the up down button ļ or Ļ select the Dictation status menu item Click the OK button Using the up down button ļ or Ļ select Post poned The dictation is postponed is not transferred by D...

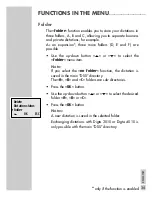
Страница 34: ...ou select the no Folder function the dictation is saved in the main DSS directory The A B and C folders are sub directories Press the OK button Use the up down button ļ or Ļ to select the desired folder A B or C Press the OK button Notes A new dictation is saved in the selected folder Exchanging dictations with Digta 3010 or Digta 4010 is only possible with the main DSS directory FUNCTIONS IN THE ...

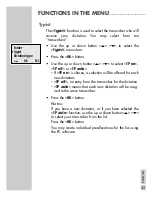
Страница 35: ...ll be offered for each new dictation TP off no entry from the transcriber for the dictation TP auto means that each new dictation will be assig ned to the same transcriber Press the OK button Notes If you have a new dictation or if you have selected the TP auto function use the up or down button ļ Ļ to select your transcriber from the list Press the OK button You may create individual preallocatio...

Страница 36: ...tion of formats will be offe red for each new dictation DT off no work type selected DT auto means that each new dictation will be of the same type Press the OK button Notes If you have a new dictation or if you have selected the DT auto function use the up or down button ļ Ļ to select your dictation type from the list Press the OK button You may create individual preallocations for the list using...

Страница 37: ...group may be selected for each new dictation GR off no group selected GR auto means that each new dictation has the same group Press the OK button Notes If you have a new dictation or if you have selected the GR auto function use the up or down button ļ Ļ to select your group from the list Press the OK button You may create individual preallocations for the list using the PC software FUNCTIONS IN ...

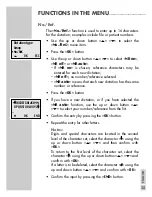
Страница 38: ...the NR auto function use the up or down button ļ Ļ to select your number reference from the list Confirm the entry by pressing the OK button Repeat the entry for other letters Notes Digits and special characters are located in the second level of the character set select the character using the up or down button ļ Ļ and then confirm with OK To return to the first level of the character set select ...

Страница 39: ...button Notes The single workstation installation of the PC software evaluates no priority with level 16 and high priority with the maximum author priority which you set The optional network installation of the PC software evaluates no priority with level 16 If high priority is set the level is set to the maximum author priority assigned to the author by the system administrator On a dictation with...

Страница 40: ...ew author Note Press the ESC button if no change is to be made to the author Press the OK button Notes All prior settings of the author e g transcriber work type group microphone sensitivity lighting etc are adopted The dictation counter increases the dictation number regardless of the author set You may preallocate the list of authors using the PC software FUNCTIONS IN THE MENU___________________...

Страница 41: ...ard is plugged in if you do not want to delete the internal memory Press the OK button Directories and files with administrative data are created in the internal memory or the external memory card For this reason the entire memory capacity is not available for record ing dictations Note The internal memory and the external memory card may not be formatted as a removable disk with a PC formatting f...

Страница 42: ...Down button ļ or Ļ to select Settings and then press the OK button Use the Up Down button ļ or Ļ to select Play back Press the OK button Use the Up Down button ļ or Ļ to select 1 0 1 5 times or i Index Press the OK button SETTINGS IN THE MENU ________________________ 42 ENGLISH Ł Play back Voiceactiv Mic sensitivity Ļļ OK ESC Ł 1 0 1 5 times Ł i Index Ļļ OK ESC only if the function is enabled ...

Страница 43: ...ress the OK button Microfone sensitivity If the Mic sensitivity function is switched to conference the microfone will record already at low voice levels e g when it is placed on the conference table Use the up down button ļ or Ļ to select the Settings menu item and then press the OK button Use the up or down button ļ Ļ to select the menu item Mic sensitivity Press the OK button Use the up or down ...

Страница 44: ... up or down button ļ Ļ to select the menu item PC microphone Press the OK button Enable PC microphone appears in the display Press the OK button Mode PC microphone appears in the display Use the VOL _ button to adjust the recording level To start dictating push the slide switch to Ł START If you move the slide switch to STOP the connection to the sound card is interrupted preventing the sound reco...

Страница 45: ...se the up down button ļ or Ļ to select the Settings menu item and then press the OK button Use the up or down button ļ Ļ to select the menu item Power off Press the OK button Use the up or down button ļ Ļ to select manual ly after 10 min or after 30 min Press the OK button SETTINGS IN THE MENU ________________________ Mic sensitivity PC microphone Ł Power off Ļļ OK ESC ...

Страница 46: ... or Ļ to select Ack beep or Audio warning Press ļ or Ļ to select Signaling on Signaling off Note If you select Audio warning Signaling off you will not hear a signal when the memory is full or the battery is flat If you dictate without looking at the display the device may switch off with no signal tone and you may not notice SETTINGS IN THE MENU ________________________ 46 ENGLISH PC microphone P...

Страница 47: ...OK button Use the up down button ļ or Ļ to select the Illumination menu item Press the OK button Use the ļ or Ļ button to select Off or auto Off the display lighting is switched off auto the display lighting remains on for several seconds every time a button is pressed SETTINGS IN THE MENU ________________________ Power off Audio signals Ł Illumination Ļļ OK ESC 47 ENGLISH ...

Страница 48: ...dal Press briefly to switch recording on or off same function as the red recording button ļ DICT on the dictation machine Hold down approx 1 5 seconds for a new dicta tion The red recording indicator lights up and a new dictation name e g DICT002 displayed same function as the NEW button on the dictation machine Right pedal Start stop recording and play back same function as the slide switch on th...

Страница 49: ...taStation With the dictation machine switched on plug it into the DigtaStation Notes If the dictation machine is switched on or off in the Digta Station and the DigtaStation is connected via USB cable to the PC the dictation machine is switched to PC mode For technical reasons the red recording button now has the fast forward function Push the slide switch to STOP Press the foot control SETTINGS I...

Страница 50: ...button Use the up down button ļ or Ļ to select the minutes step by step 15m and then confirm with the OK button Use the up down button ļ or Ļ to select the day step by step 10d and then confirm with the OK button Use the up down button ļ or Ļ to select the month step by step 01m and then confirm with the OK button Use the up down button ļ or Ļ to select the year step by step 04y and then confirm w...

Страница 51: ...same name and being stored on the PC Use the up down button ļ or Ļ to select the Settings menu item and then press the OK button Use the up down button ļ or Ļ to select the Dictation counter Press the OK button Reset dictate counter appears in the display Press the OK button The next new dictation then has the lowest free number e g DICT005 SETTINGS IN THE MENU ________________________ Foot contro...

Страница 52: ...n The display indicates for example FW V2 1 xxxx machine s software 51684 xxxxxx abbreviated serial number the complete number is to be found on the type plate in the battery compartment PCB 0000xxxx number of the machine s printed circuit board Press the ESC button Note For information on new software versions call up the Configuration Update server function in the PC software SETTINGS IN THE MEN...

Страница 53: ...l dictations Press the OK button Factory settings Dictation status Dictated Folder No folder Transcriber Automatic Work type Automatic Group Automatic No Ref Automatic Priority Off Author authors deleted Play back index function Voice Activation Off Microphone sensitivity Dictation Switch off After 10 min Signal tones on Lighting Automatic foot control recording Time date Retained Dictation counte...

Страница 54: ...e Using the Language function you can select the language for all display functions Use the up down button ļ or Ļ to select the Settings menu item and then press the OK button Use the up or down button ļ Ļ to select the menu item Language Press the OK button Use the up or down button ļ Ļ to select a language e g English Press the OK button SETTINGS IN THE MENU ________________________ Version Fact...

Страница 55: ...ional network license All addresses of your authors and typists are available for sending your dictations You mark your dictations for example with the dictation type deadline and priority in order to perfectly organize your transcription service If all dictations have the same priority you simply plug the USB cable into the Digta With the simple pres sure of a button all dictations are sent to th...

Страница 56: ...e PC The red recording indicator flashes rapidly while data is transferred After the data transfer is completed log the dictation machine off using the task bar the Remove or eject hardware icon i e stop the USB mass memory drive Unlock the USB plug on the Digta push the narrow sides together and pull it out The dictation machine switches off Warning Disconnect the USB interface via the task bar a...

Страница 57: ...indicator on the DigtaStation 441 lights up Press the ON OFF button to switch off the dictation machine With the dictation machine switched off plug it into the DigtaStation 441 Press the ON OFF button to switch on the dictation machine After a while PC operation appears on the device display The dictation machine is identified by the PC as a removable disk The red recording indicator on the dic t...

Страница 58: ... gh4020 hex and updatelo hex at www grundig gbs com under Service Download Firm ware fw4020 zip as well as in the Firmware Digta4020 folder on the CD provided Copy these two files to the SYSTEM folder in the dictation machine drive removable disk The dictation machine s recording LED flashes fast during transfer Wait until data transfer is complete Then from the task bar select the function for re...

Страница 59: ... button simultaneously after switching the Digta on LOAD UPDATE appears in the display confirm this with the OK button Enabling optional functions An individual code is available for enabling optional func tions Ask your specialist dealer When the dictation machine is connected to the PC you can enter the enabling key in the PC software under Configuration Dictation machine MMC SD Firmware activat...

Страница 60: ... that analyzes the DSS header e g a database system The detected codes are displayed by the PC software supplied with the portable dictation machine and by the desktop soft ware in the overview of the accompanying note for the dictation see also Dictation accompanying note in the program help in the dictation list if the Topic field is enabled see Sorting in the program help Note We offer a softwa...

Страница 61: ...ard Note Only plug in or unplug the DigtaScan when the portable dictation machine is switched off Plug the DigtaScan into your dictation machine as depicted below Note Make sure that the latch on the back of the DigtaScan snaps securely in DIGTASCAN 404 BARCODE READER _____ EAR HOLD 3 V 0 35 A EAR HOLD 3 V 0 35 A KLICK KLICK ...

Страница 62: ...The DigtaScan is latched securely to the housing Do not attempt to remove the DigtaScan by pressing the card EJECT button since that could damage the dictation machine or the DigtaScan Instead press the latch on the rear of the DigtaScan slightly in while pulling the Digta Scan out of the card slot See the illustration on page 61 DIGTASCAN 404 BARCODE READER _____ 62 ENGLISH ...

Страница 63: ...t BC on or BC off and then press OK BC on when you create dictations with the NEW button you are prompted to scan You can now scan in a barcode and store it in the dictation accompanying note BC off when you create dictations with the NEW button you are not prompted to scan even though the DigtaScan is plugged in You can still program the DigtaScan in the Barcode reader Programming menu Note The s...

Страница 64: ...arcode reader at the barcode as pictured and press the SCAN button The device now scans the code with a red laser beam The machine acknowledges the successful reading of the code with a single signal tone and the laser beam shuts off The scanned barcode appears in the display If you want to include the barcode as displayed in the dictation press the OK button If you want to re scan the code press ...

Страница 65: ...in the Topic field in the new dictation s accompanying note Displaying a barcode for a dictation Push the slide switch to STOP Use the Up Down button DICT _ to select the dictation If the dictation has a barcode ID is displayed Press the MENU button Use the Up Down button ļ or Ļ to select Barcode reader and then press the OK button Use the Up Down button ļ or Ļ to select Dis play read and then pre...

Страница 66: ...ictation Point the reader at the barcode and press the SCAN button The device now scans the code with a red laser beam The machine acknowledges the successful reading of the code with a single signal tone and the laser beam shuts off The scanned barcode appears in the display If you want to include the barcode as displayed in the dictation press the OK button ID is shown in the status bar under th...

Страница 67: ...h and then press the OK button Point the reader at the barcode and press the SCAN button The scanned barcode appears in the display Press OK to confirm the barcode The number of the dictation is shown under the barcode To listen to the dictation press OK again and push the slide switch to Ł START DIGTASCAN 404 BARCODE READER _____ Display read Ł Search Delete Ļļ OK ESC Delete Ł Barcode reader Dict...

Страница 68: ...n ļ or Ļ to select Barcode reader and then press the OK button Use the Up Down button ļ or Ļ to select Delete and then press the OK button The barcode and the dictation number are displayed Press OK to delete the barcode DIGTASCAN 404 BARCODE READER _____ 68 ENGLISH Display read Search Ł Delete Ļļ OK ESC Delete Ł Barcode reader Dictation status Ļļ OK ESC Delete 0350144007000 in DICT 005 OK ESC ...

Страница 69: ...he recognition accuracy Programming code table We provide a table with programming codes in barcode format You can open this PDF table with Acrobat Reader You can print the required programming codes and then use them to configure the barcode reader If the table is not supplied with your DigtaScan or you need codes it does not contain please visit our Internet download centre http www grundig gbs ...

Страница 70: ...programming codes from the programming code table There are usually two programming codes displayed for the usable barcode symbologies the upper for activa tion ENABLE and the lower for deactivation DISABLE Use a laser printer for example in order to obtain a legible printout DIGTASCAN 404 BARCODE READER _____ 70 ENGLISH ...

Страница 71: ...ction appears in the display Note RESET see also Restoring the default settings Scan in the programming code with the SCAN button The machine acknowledges the successful reading of the code with a single signal tone and the laser beam shuts off You can scan any number of programming codes consecutively with the SCAN button Note If the machine cannot read a code it emits a double signal and display...

Страница 72: ...tton ļ or Ļ to select Barcode reader and then press the OK button Use the Up Down button ļ or Ļ to select Programming The Programming Barcode reader menu function appears in the display Press the RESET button Disable all barcodes appears in the display Press the OK button to leave only symbology EAN 13 enabled Press the ESC button if you would like to keep the other symbologies enabled Once you ha...

Страница 73: ... according to the scanned codes The detected codes are displayed by the PC software inclu ded with the portable dictation machine and by the desk top software in the overview of the accompanying note for the dicta tion see also Dictation accompanying note in the pro gram help in the dictation list if the Subject field is enabled see Sorting in the program help Connecting and removing the RFID read...

Страница 74: ...r Ļ to select RFID on or RFID off and then press OK RFID on when you create a dictation with the NEW button you will be prompted to SCAN it You can now scan a RFID code and store it in the dictation accompanying note RFID off when you create a dictation with the NEW button you will not be prompted to scan it although the RFID Reader is connected Note The selected setting is retained even if the RF...

Страница 75: ... successfully scanned the device will acknowledge this by emitting a single tone The RFID code appears in the display If you want to include the RFID code as displayed in the dictation press the OK button If you want to re scan the RFID code press the SCAN button If you do not want to include the RFID code in the dicta tion press the ESC button and continue with your dicta tion as usual Note If th...

Страница 76: ...the same functions as the barcode reader See the chapters on the barcode reader for further informa tion on operation The menu is located under RFID Reader View the RFID code of a dictation see page 65 Scan the RFID code for an existing dictation see page 66 Search the dictation for a RFID code see page 67 Delete the RFID code of a dictation see page 68 RFID READER DIGTARFID 414 ______________ 76 ...

Отзывы: