11
GROWSPAN
™
GOTHIC PREMIUM HIGH TUNNELS
Revision date: 01.08.21 108185_86_87_88_89H
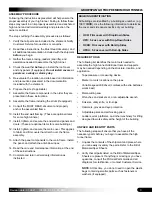
ASSEMBLE THE FRAME
After all ground posts are driven in place and rafters are
assembled, assemble the frame.
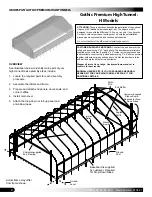
Gather the parts:
• All rafter assemblies and purlin pipe: See Side Profile
diagram for your building in the Quick Start section for
pipe identification and quantities.
• Band clamps (QH1402)
• Cross connector (102548)
• 5/16" x 2-1/2" (FAG336B) bolts and 5/16" nuts
(FALB02B)
• Lifts, ladders, and assistants
• Rope or cable
(supplied by customer)
Complete these steps:
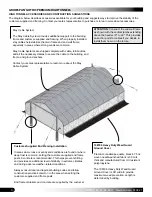
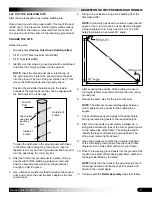
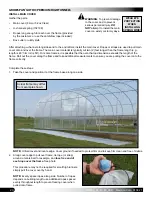
1. Carefully lift the
first end rafter
, slide a band clamp onto
each rafter leg, and place the leg pipes into the first set
of ground posts.
Secure to top hole in ground post.
Brace the rafter in place to keep it straight. Depending
on the frame size, a lift and additional assistants may
be needed. Consult Quick Start section for details.
Rafter shown differs in design.
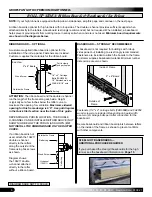
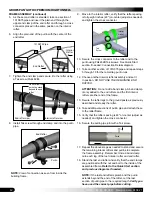
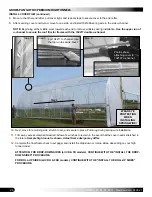
ATTENTION:
Stand the rafter so the end clamp nuts
and bolts are to the inside of the frame. Consult the
diagrams on the following page and below.
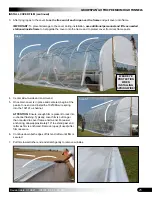
2. Secure the leg pipes to the ground posts using the
5/16" x 2 1/2" bolts (FAG336B) and FALB02B nuts.
Secure using the top hole in the ground post.
Rafter shown differs in design from actual rafter.
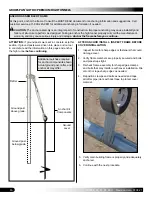
3. Use rope or cable to brace the rafter in position.
4. Carefully lift the first interior rafter, slide a band clamp
onto each rafter leg, position in place, and secure the
leg pipes to the ground posts.
Rafter shown differs in design from actual rafter.
1st Interior Rafter
End Rafter
Position end clamp as
shown when setting the
rafter into place.
Outside
Inside of
Frame
Outside of
Frame
Insert bolt
through the
top hole in the
ground post.
Rafter
Ground
Post
Band
Clamp


