background image

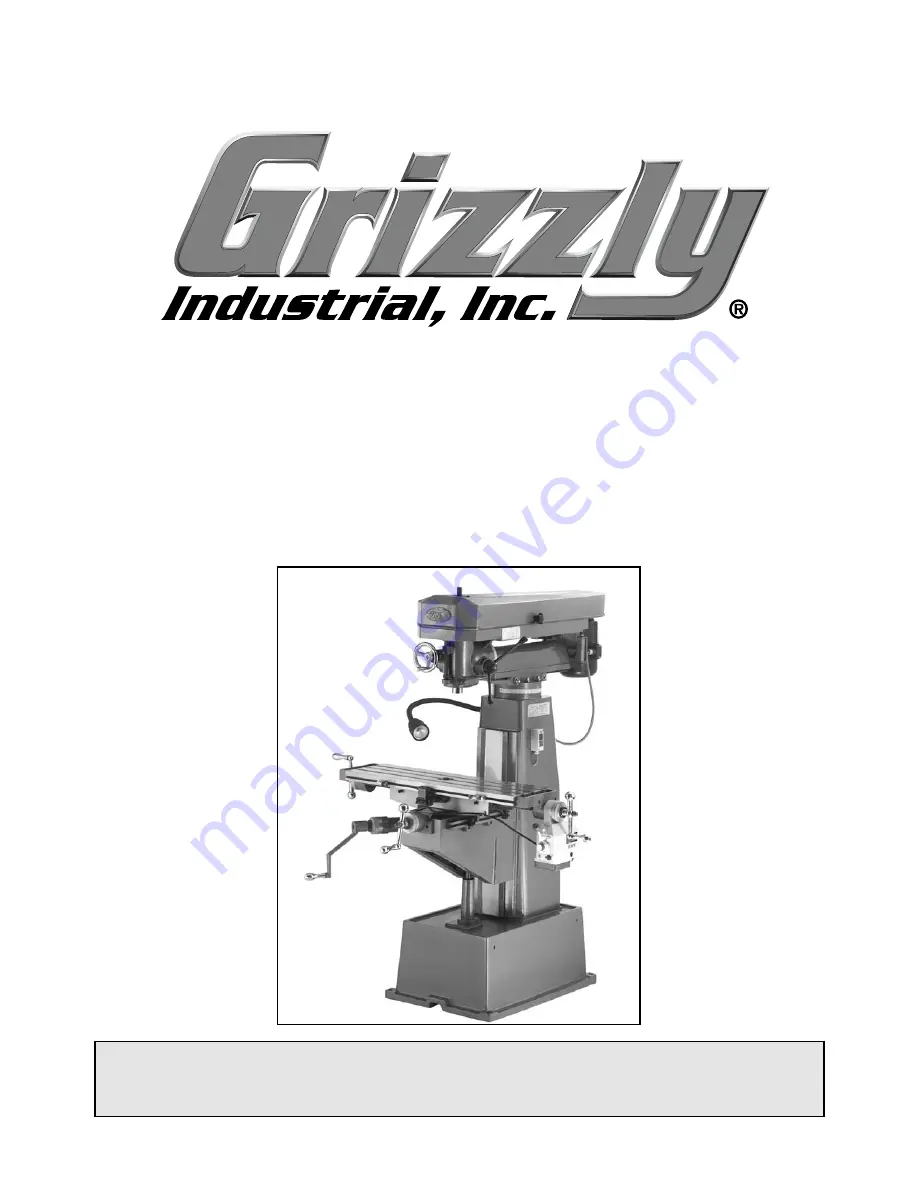
WOOD MILL™

MODEL G9959/G9977

Instruction Manual

COPYRIGHT © SEPTEMBER, 2001 BY GRIZZLY INDUSTRIAL, INC.

Warning: No portion of this manual may be reproduced in any shape

or form without the written approval of Grizzly Industrial, Inc.

PRINTED IN CHINA.

Содержание WOOD MILL G9959

Страница 1: ...9 G9977 Instruction Manual COPYRIGHT SEPTEMBER 2001 BY GRIZZLY INDUSTRIAL INC Warning No portion of this manual may be reproduced in any shape or form without the written approval of Grizzly Industrial Inc PRINTED IN CHINA ...

Страница 2: ...icals are Lead from lead based paints Crystalline silica from bricks cement and other masonry products Arsenic and chromium from chemically treated lumber Your risk from these exposures varies depending on how often you do this type of work To reduce your exposure to these chemicals work in a well ventilated area and work with approved safety equipment such as those dust masks that are specially d...

Страница 3: ...12 MOUNTING HANDLES 12 COLLET OR ARBOR INSTALLATION 13 14 KNEE CRANK HANDLE 14 MILLING VISE 15 7 ADJUSTMENTS GRADUATED DIALS 16 SPINDLE HEIGHT 16 QUILL LOCK 17 DEPTH STOP 17 HEAD TILT 18 TRUING HEAD 19 TURRET SWIVEL 20 TABLE STOPS 21 SADDLE STOPS 21 6 OPERATIONS SPEED CHANGES 22 SPEED CHART 22 POWER FEED 23 24 SPEEDS AND FEEDS 24 TEST RUN 25 SECURING WORKPIECE 25 26 FACING PLANING 27 28 DRILLING 2...

Страница 4: ... mable or noxious fumes may exist Keep work area well lighted For Your Own Safety Read Instruction Manual Before Operating This Equipment Indicates an imminently hazardous situation which if not avoided WILL result in death or serious injury Indicates a potentially hazardous situation which if not avoided COULD result in death or serious injury Indicates a potentially hazardous situation which if ...

Страница 5: ...18 16 16 7 10 18 16 14 11 12 16 16 14 13 16 14 12 12 17 20 12 12 10 21 30 10 10 No Safety Instructions For Power Tools 16 REDUCE THE RISK OF UNINTENTION AL STARTING On machines with mag netic contact starting switches there is a risk of starting if the machine is bumped or jarred Always disconnect from power source before adjusting or servicing Make sure switch is in OFF position before recon nect...

Страница 6: ...has been secured in a holder or collet Ensure that all wrenches and adjust ing keys have been removed before starting machine 4 ALWAYS USE THE RECOMMENDED SPEEDS and feeds with milling cutters and router bits 5 ADJUST TABLE OR DEPTH STOP to pre vent drilling into table work surface 6 KEEP FLOOR AREA around the mill free from oil tools and chips 7 NEVER USE YOUR HANDS TO HOLD WORKPIECE during milli...

Страница 7: ...g wire See Figure 1 SECTION 2 CIRCUIT REQUIREMENTS Grounding In the event of a malfunction or breakdown grounding reduces the risk of electric shock by providing electric current a path of least resis tance This tool must be equipped with an electric cord having an equipment grounding conductor which must be properly connected to a grounding plug The plug must be plugged into a matching outlet tha...

Страница 8: ...era tions and cover general operating procedures It represents our effort to produce the best docu mentation possible If you have any comments regarding this manual please write to us at the address below Grizzly Industrial Inc C O Technical Documentation P O Box 2069 Bellingham WA 98227 2069 Most importantly we stand behind our machines If you have any service questions or parts requests please c...

Страница 9: ...pletely satisfied with the con dition of your shipment you should inventory its parts Unpacking Piece Inventory NOTICE A full parts list and breakdown can be found toward the end of this manual For easier assembly or to identify missing parts please refer to the detailed illustrations After all the parts have been removed from the crate you should have Wood Mill Tool Box Oil Bottle 1 Screwdriver 1...

Страница 10: ...e desired location Do Not lift machine from any other point than that pictured in Figure 3 The model G9959 G9977 is a heavy machine 1 350 lbs shipping weight DO NOT over exert yourself while unpacking or moving your machine you will need assistance and power equipment Serious personal injury may occur if safe moving methods are not fol lowed If moving this machine up or down stairs the machine mus...

Страница 11: ...s can be thought of as the dis tances between machines and obstacles that allow safe operation of every machine without limitation Consider existing and anticipated machine needs size of material to be processed through each machine and space for auxiliary stands and or work tables Also consider the rel ative position of each machine to one another for efficient material handling LIGHTING Lighting...

Страница 12: ...ill aid in compre hension later in the manual 1 Knee Height Lever 2 Knee 3 Longitudinal Control Lever 4 Table 5 Depth Stop 6 Fine Down Feed 7 Belt Guard 8 Spindle Control Lever 9 On Off Switch 10 Base 11 Column 12 Turret 13 Ram 14 Down Feed Clutch 15 Draw Bar 16 Head Casting 17 Spindle 18 Work Light 19 Power Feeder G9977 only 20 Cross Feed Control 21 Saddle 22 Table Saddle Stops 4 3 2 11 12 13 15 ...

Страница 13: ...hand crank creates this motion Z Axis The direction of motion when the table or spindle moves up or down Turning the knee hand crank or the spindle handles creates this motion Zero the Dial Having positioned the table to a desired location the dial on the hand crank is rotated to zero while maintaining the hand crank position Glossary Fraction Decimal Fraction Decimal Fraction Decimal 1 64 0 01562...

Страница 14: ...lace a leveling pad under each screw 3 Place a precision level on the table top and check for level across the table and along the table 4 Adjust the leveling screws until the table is level SECTION 5 ASSEMBLY Three handles are supplied with the Model G9959 G9977 They are installed in an inverted fashion on each end of the work table and on the front of the knee Remove the acorn nut on the end of ...

Страница 15: ...Be careful when installing removing or handling all cutting tools Hold with shop towel or gloves to avoid severe cut or injury Disconnect the power before changing collets or a r b o r s on the Model G9959 G9977 Serious personal injury may occur Collet or Arbor Installation The Model G9959 G9977 feature an R 8 spindle which accepts any collets and arbors with the R 8 designation To install a colle...

Страница 16: ...n cutter Figure 5A Knee handle properly installed To remove a collet or an arbor 1 Loosen the hex head at the top of the draw bar 2 or 3 turns 2 Tap on the top of the drawbar with a soft faced mallet to loosen the collet from the spindle Hold the collet cutter as in Figure 5 with a shop towel from the bot tom to prevent it from dropping com pletely out of the machine 3 Continue to turn the drawbar...

Страница 17: ...indicator lever con tacts the stationary vise jaw or a parallel mounted into the vise as in Figure 6 on the right hand end 6 Move the apron to the left on the bed ways and watch the dial 7 If the needle on the indicator moves along the larger numbers pivot the vise one half the difference while watching the needle motion on the dial 8 Move the apron to the right and note the dif ference on the dia...

Страница 18: ...rtion of the head The fine downfeed handwheel is to the left To operate the feed lever Pull the lever toward you The spindle will go down until you stop pulling or until it hits the depth stop The orientation of the handle may also be repositioned 1 Pull the handle hub away from the head casting 2 Note there is a pin behind the hub Rotate the handle to a new location and push the hub towards the h...

Страница 19: ...ish to depth using the fine downfeed handwheel with its graduated dial and use the procedure laid out in the previous section titled Graduated Dials Depth Stop Quill Lock Figure 8 Secure quill with this lever To operate the fine down feed handwheel 1 Tighten the knurled locking knob located on the left side of the headstock and just behind the fine down feed handwheel 2 Rotate the handwheel to adj...

Страница 20: ... casting until Head Tilt Figure 10 Loosen rear bolt before tilting head Figure 9 Loosen bolts to tilt head the pointer is over the desired angle Snug up one nut so the head will not shift from your setting More accurate angle set up may be done with a precision protractor such as the G9900 Dial Protractor in the current Grizzly catalog Other tools such as angle gauges sine bars and spac ers may be...

Страница 21: ...moved at least 1 2 revolution 5 Turn the spindle by hand until the dial is positioned on the right hand side and turn the dial until the 0 on its face is under the indicator needle 6 Carefully rotate the spindle until the dial is positioned on the left hand side of the spin dle Read the dial 7 If the dial does not read the same when positioned from one side to the next loosen the hex nuts that sec...

Страница 22: ...ser to the column thus allowing another dimension in the setup for machining larger or odd shaped workpieces The ram is supported by dovetail ways and is locked in place by bolts 1 Loosen the locking bolts indicated in Figure 13 2 Push or pull the head casting to the desired position 3 Tighten the locking bolts If the ram does not move freely make sure the two square head bolts are loose and tap o...

Страница 23: ...xis is restricted to a specific dis tance This is beneficial for repetitive cuts or hole placement Table Stops The saddle stops Figure 15 are used in the same way as the table stops except that they restrict the distance of motion in the table along the Y axis Saddle Stops Figure 14 Upper table stops on the G9977 Figure 15 Saddle stops G9959 G9977 Wood Mill ...

Страница 24: ...e The B pulley and C pulley are con nected by V belt at the 1 sheave Following this progression along the chart above will show that the machine is now set to run at 3100 R P M Speed Changes A1 B1 B4 C3 B3 C2 B2 C1 B4 C3 B3 C2 B4 C3 B2 C1 B3 C2 B2 C1 A2 B2 A3 B3 A4 B4 420 650 850 1300 2000 1600 3100 3900 5000 1 1 2 2 3 3 3 4 MOTOR PULLEY IDLER PULLEY SPINDLE PULLEY A B C 2 4 1 SECTION 7 OPERATIONS...

Страница 25: ...ore running your power feed be sure there is enough running clearance between the table spindle vise clamps and or parts Be aware that all of these can become pinch points G9959 G9977 Wood Mill 23 The following is a list of components for the power feed on the Model G9977 Wood Mill Refer to Figure 17 above while reading the descrip tions below 1 Stop Switch Causes the power feed to stop when eithe...

Страница 26: ...ake a few dry runs with out running the Wood Mill Reset the stops until the table motion ends in a satisfactory location The Model G9959 77 is supplied with speeds that can be used for many types of work in both metal and wood Care must be taken to use the correct speed for a given situation The following guide line should be considered when planning a job for the wood mill However if you have que...

Страница 27: ... the intended path Obstructions could lead to a crash creating an unsafe condition and resulting in serious personal injury See Figure 21 Securing Workpiece Secure workpiece with clamps or in a vise before starting machine Failure to observe this may result in serious personal injury Once the assembly is complete and the adjust ments are done to your satisfaction you are ready to test the machine ...

Страница 28: ...r these important safety guidelines Make sure the interlocking components of the step clamps engage fully and that the step clamp lays evenly on the work piece See Figures 18 and 19 Always have a minimum of 3 clamping devices when securing the workpiece to the table as in Figure 20 Check clearance by moving the table with the machine unplugged along the intended path Obstructions could lead to a c...

Страница 29: ...cess With the machine still unplugged check clearance by moving table along the intended path If not checked this could lead to a crash This unsafe condition can cause damage to the machine or workpiece and may result in personal injury 2 Install the facing mill fly cutter or end mill into the spindle and secure with the draw bolt as described in section titled Collet or Arbor Installation 3 Lift ...

Страница 30: ...ar move the knee so the cutter no longer contacts the surface Move the table along the intended path and try again Once the cutter is just touching the workpiece you have established the zero setting 7 The graduated dial on the knee may be set to zero Hold the handle with one hand to maintain the position and with the other hand rotate the graduated dial until it reads zero 8 Move the table on the...

Страница 31: ...gh degree of accuracy Spacing can be as accurate as 0 001 one thousandth of an inch A clear understanding of dovetail setup use of cutters and spacing technique is neces sary to realize the full potential of this feature Please consult with the local library technical col lege or training seminars for more information about producing dovetails should you have fur ther questions Dovetails Figure 23...

Страница 32: ...e procedure for the saddle and knee gib adjustments Table and Apron Lead Screws Lubricate every day with SAE 20 oil A few drops applied on each side of each nut Lead Screw Bearings Lubricate the bearings located at the ends of the table and just in front of the Y axis hand crank You will find oil ports with a ball stopper Lubricate daily Apply small amount of SAE 20 using an oil can with a pointed...

Страница 33: ...rmation relating to this machine or if you need general assistance or replacement parts please contact the appropri ate regional Service Department listed in the introduction Additional information sources are necessary to realize the full potential of this machine Trade journals metalworking magazines and the shelves of your local library are good places to start Knowledge and caution are vital c...

Страница 34: ... 32 G9959 G9977 Wood Mill Your Notes ...

Страница 35: ... Speeds 420 5000 R P M Knee Movement 153 4 Vertical Head Tilt 90 Right and Left Column Swivel 90 Right and Left Construction Table Surface Ground Cast Iron Base Cast Iron Head Cast Iron Motor Type TEFC Capacitor Start Induction Horsepower 11 2 H P Phase Voltage Single Phase 110 220V Prewired 220V Switch Forward Reverse Barrel Switch Amps 16 8 Cycle and R P M 60 Hertz 3450 R P M Power Transfer V Be...

Страница 36: ...2A 604 603 602 607 607A 605 606 609 120 136 612 611 610 608 145A 145B 145C 147 147A 146B 146A 129B 146 144 115 104 119 119B 110 109 107 105 103 A1 B 1 A B C A2 B 2 A3 B 3 A4 B 4 B4 C 3 42 0 65 0 R m in R m in R m in R m in 85 0 13 00 20 00 31 00 16 00 39 00 50 00 B3 C 2 B2 C 1 B4 C 3 B3 C 2 B4 C 3 B2 C 1 B3 C 2 B2 C 1 1 2 3 4 1 2 3 4 1 2 3 0 10 10 20 20 30 30 40 40 50 50 60 60 70 70 80 80 ...

Страница 37: ... CHUNK O RUBBER 120 P9959120 SPEED LABEL 121 P9959121 LOWER BELT COVER 129 P9959129 V BELT 129B P9959129B V BELT REF PART DESCRIPTION 136 P9959136 CAP SCREW 139 P9959139 TENSION PIN 140 P9959140 SPRING 141 P9959141 BRACKET 142 P9959142 PIVOT 144 P9959144 MOUNTING PLATE 145A P9959145A WASHER 145B P9959145B LOCK WASHER 145C P9959145C HEX BOLT 146 P9959146 PULLEY 146A P9959146A CAP SCREW 146B P995914...

Страница 38: ... 0 8 O p e n 0 1 2 3 4 1 2 1 2 1 2 1 2 122 124 127 126 133 132 125 135 201 203 208 202 207 204 205 206 199 198 215 213 211 219 218 209 220 223 225 222 226 224 198 197 299 298 297 232 236A 294 246 242 245 293 244 243 241 240 295 239 198 296 601 238 230 291 227 290 228 289 230A 231 234 233 235 235A 236 134 128 214 216 210 ...

Страница 39: ...P9959218 HANDLE 219 P9959219 STEPPED SLEEVE 220 P9959220 SLEEVE 222 P9959222 CAP SCREW 223 P9959223 BLOCK 224 P9959224 SCREW 225 P9959225 HEIGHT NUT REF PART DESCRIPTION 226 P9959226 LOCK NUT 227 P9959227 LOCK KNOB SHAFT 228 P9959228 LOCK BLOCK 230 P9959230 NUT 230A P9959230A SETSCREW 231 P9959231 BEARING 232 P9959232 SPINDLE QUILL 233 P9959233 BEARING WASHER 234 P9959234 BEARING WASHER 235 P99592...

Страница 40: ...308 408 413 414 415 416 408A 414A 318 316 328 315 419 406 410 PO W ER 9 8 7 6 5 4 3 2 1 0 TO RQ UE 13 5 IN L B 11 0V AC 2A M P 50 6 0H z P O W E R F E E D TU BE FU SE CA UT IO N 1 Rap id trav ers e trav ers ing are a mu st be kep t cle ar 2 Kee p dir t and for eig n ma ter ial out of the pow erfe ed 3 Pac k shi mm ed bev el gea r wit h gra phi te bas ed gre ase Do not use silic on typ e gre ase 4 ...

Страница 41: ... P9959404 WIPER 405 P9959405 WIPER GUARD 406 P9959406 SCREW 407 P9959407 CAP SCREW REF PART DESCRIPTION 408 P9959408 SCREW 408A P9959408A SETSCREW 409 P9959409 LIMIT SEAT 410 P9959410 CROSS ADJ NUT 411 P9959411 CROSS NUT 412 P9959412 GIB 413 P9959413 LONG ADJ NUT 414 P9959414 LONGITUDINAL NUT 414A P9959414A CAP SCREW 415 P9959415 CAP SCREW 416 P9959416 SPACER 417 P9959417 CROSS CARRIAGE 418 P99594...

Страница 42: ...B A S B E A R I N G C O 6204 2R S 04 05 06 07 03 02 01 04 05 06 0 7 0 3 0 2 01 530 533 534 538 536 538 537 535 509 508 506 528 527 522 526 521 524 525 523 520 303 302 507 518 506 516 515 514 505 505A 530 511 504 531 531A 532 541 519 318B 318A 503 504A 510 502A 502 513 G9959 G9977 Wood Mill ...

Страница 43: ... 511 P9959511 DIAL 513 P9959513 HANDLE 514 P9959514 KEY 515 P9959515 SHAFT 516 P9959516 KEY REF PART DESCRIPTION 518 P9959518 FLANGE 519 P9959519 CAP SCREW 520 P9959520 NUT 521 P9959521 SHAFT SLEEVE 522 P9959522 BALL BEARING 204 523 P9959523 DIAL 524 P9959524 CAP SCREW 525 P9959525 SPACER 526 P9959526 BEARING HOUSING 527 P9959527 KEY 528 P9959528 LEAD SCREW 530 P9959530 SCREW 531 P9959531 GIB 531A...

Страница 44: ... C O 6 2 0 4 2 R S 635 638 639 622 619 623 618 620 617 615 614 613 645 644 646 647 648 626 640 641 642 643 630 629 628 634 650 649 651 652 653 654 633 621 637 636 632 90 80 70 60 50 30 20 627 627A 625 624 G9959 G9977 Wood Mill ...

Страница 45: ... LABEL 630 P9959630 COLUMN COVER 632 P9959632 COLUMN 633 P9959633 SCREW REF PART DESCRIPTION 634 P9959634 COVER 635 P9959635 MACHINE BASE 636 P9959636 WASHER 637 P9959637 HEX BOLT 638 P9959638 LEVELING BOLT 639 P9959639 LEVELING PAD 640 P9959640 SWITCH 641 P9959641 SCREW 642 P9959642 STRAIN RELIEF 643 P9959643 FLEXIBLE CONDUIT 644 P9959644 SCREW 645 P9959645 LAMP ASSEMBLY 646 P9959646 LIGHT BULB 6...

Страница 46: ...1 4T2 6T3 14 22 32 44 1L1 3L2 5L3 13 21 32 43 10 12 14 16 56 H A2 A 52 98 96 2 T1 4 T2 6 T3 NC NO NC NO FATO JBK FATO 100V 32A RT14 32 100V 32A R T14 32 32 A 701 703 704 707 705 706 708 709 710 711 702 712 G9959 G9977 Wood Mill ...

Страница 47: ...SE HOLDER 704 P9959704 WIRE LOOM 705 P9959705 WIRE LOOM COVER 706 P9959706 MAGNETIC CONTACTOR REF PART DESCRIPTION 707 P9959707 BUS BAR 708 P9959708 CLEAR COVER 709 P9959709 TRANSFORMER 710 P9959710 SHEET METAL SCREW 711 P9959711 MOUNTING TRACK 712 P9959712 CAP SCREW G9959 G9977 Wood Mill ...

Страница 48: ...of Washington County of Whatcom We shall in no event be liable for death injuries to persons or property or for incidental contingent spe cial or consequential damages arising from the use of our products To take advantage of this warranty contact us by mail or phone and give us all the details We will then issue you a Return Number which must be clearly posted on the outside as well as the inside...

Страница 49: ..._Modeltec __Precision Shooter __Live Steam __RC Modeler __Shotgun News __Model Airplane News 5 What is your annual household income __ 20 000 30 000 __ 50 001 60 000 __ 80 000 90 000 __ 30 001 40 000 __ 60 001 70 000 __ 90 000 __ 40 001 50 000 __ 70 001 80 000 6 To which age group do you belong __20 30 __41 50__61 70 __31 40 __51 60__ 70 7 Which of the following machines or accessories do you own ...

Страница 50: ...INDUSTRIAL INC P O BOX 2069 BELLINGHAM WA 98227 2069 Place Stamp Here TAPE ALONG EDGES PLEASE DO NOT STAPLE Name_______________________________ Street_______________________________ City______________State______Zip______ Send a Grizzly Catalog to a friend ...

Страница 51: ......

Страница 52: ......

Отзывы: