Model T10157 (Mfd. Since 07/19)
-7-
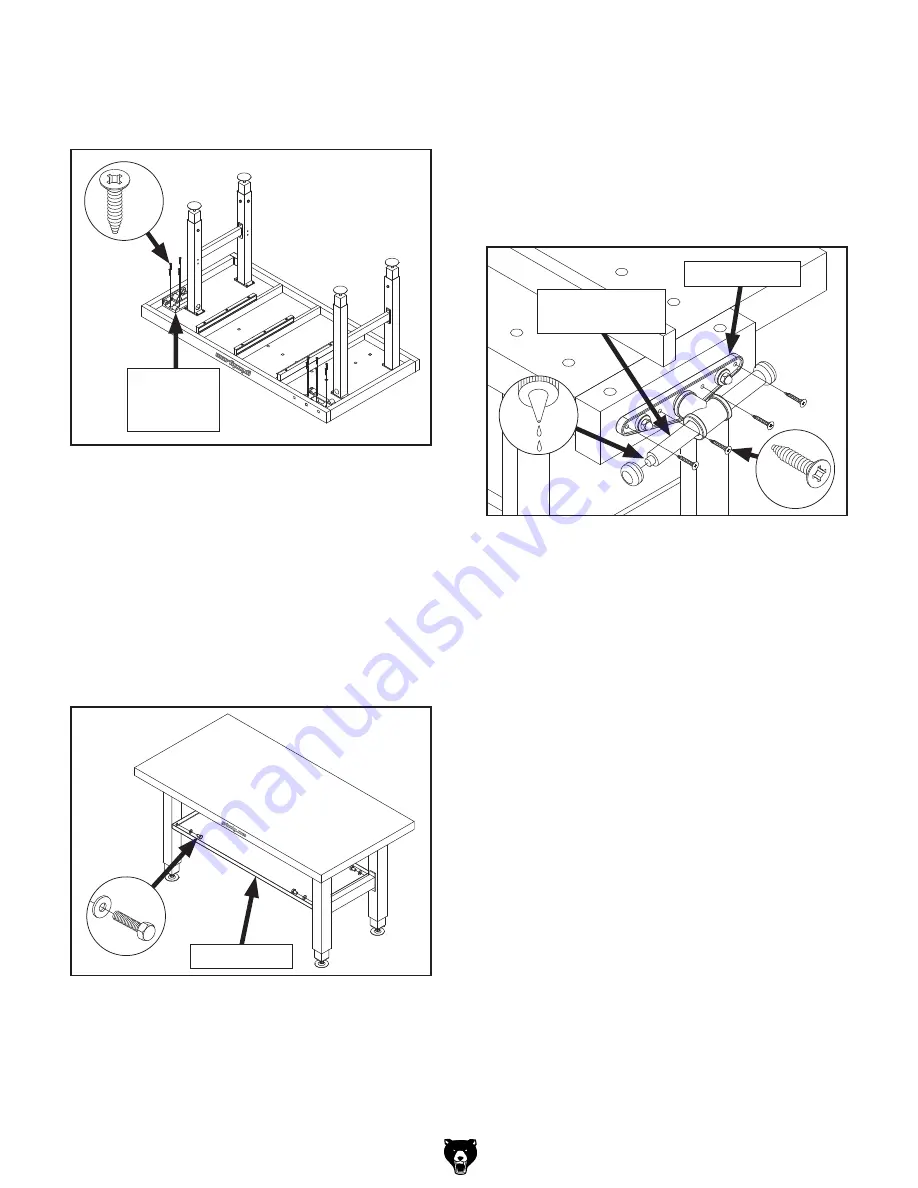
17. Secure leadscrew plates (see Figure 15) to
underside of workbench top with (12) #8 x 1"
wood screws.
Figure 15. Installing leadscrew plates.
Leadscrew
Plate
(1 of 2)
x 12
18. With assistance, flip workbench right side up,
move it to its final location, then adjust foot
pads to make workbench level and stable.
19. Attach bottom shelf to legs with (4)
5
⁄
16
"-18 x
3
⁄
4
" hex bolts and
5
⁄
16
" flat washers, as shown
in
Figure 16.
Note: You can install shelf with lip facing up
or down.
22. Install drawers, then insert bench stop bar
and bench dogs into workbench top to finish
assembly.
Note:
Left and right drawers are different. If
they do not fit, switch their positions.
Figure 16. Bottom shelf installed.
x 4
Bottom Shelf
20. Remove caps from wooden handles, insert
handles through ends of vise assemblies,
then glue caps back on handles, as shown in
Figure 17.
21. Slide each vise assembly into vise faces, as
shown in
Figure 17, then secure with (8) #8
x 1" wood screws.
Figure 17. Vise assembly installed.
Wooden Handle
& Cap
Vise Assembly
x 4


