model g8994z (mfg. 6/01+)
-8
-
6. to remove the blade, reverse the pro-
cess described above.
tip: To reduce tearout on the top of
the workpiece being cut, place the anti-
tearout insert included with the jig saw
into the blade opening of the footplate.
basic cutting
to cut a workpiece with the jig saw:
1. make sure the workpiece is secured to
a flat, stable surface.
2. mark the location of the desired cut.
3. place the footplate on the the workpiece,
press the trigger to turn the jig saw
ON,
then feed the blade into the workpiece
using steady pressure.
note: Do not
force the blade into the workpiece.
When cutting metal, use cutting fluid to
prolong the life of the blade.
4. release pressure on the trigger to turn
it
Off.
2. place the orbit selector switch in posi-
tion iii.
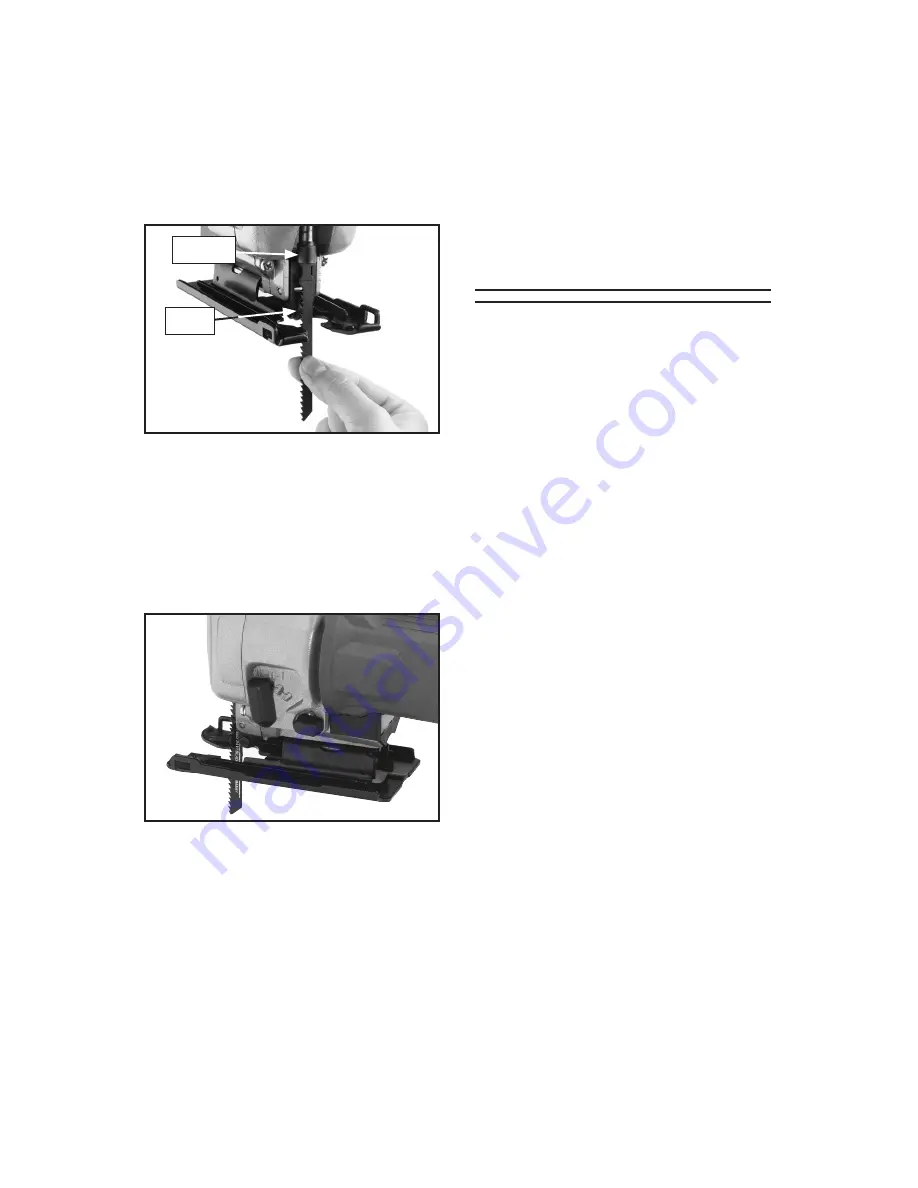
figure 5. inserting blade into plunger.
3. take the blade and turn it so the teeth
are facing the side of the footplate, then
insert the t-shank end into the plunger,
as shown in
figure 5.
4. twist the blade so the teeth are now
pointing forward (see
figure 6), then
pull it down slightly, to ensure it will
not come out. make sure the blade is
positioned in the groove of the roller
that backs up the blade.
figure 6. Blade teeth facing forward.
5. insert the screwdriver into the hole at
the top front of the saw, then tighten
the screw while making sure the blade
stays in the roller groove.
plunger
roller


