background image

Version 01.18

7

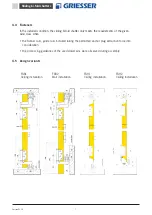
4.4 Fasteners

In the installed condition, the 

sliding bi-fold

 shutter only meets the requirements of the given 

wind class when

• the Runner rails, guide rails installed taking the permitted anchor plug extraction force into

consideration

• the processing guidelines of the used dowel pins were observed during assembly.

4.5  Design variants

Sliding bi-fold shutters

FSR1 

Ceiling installation

FSR2 

Wall installation

FSH1 

Ceiling installation

FSH2 

Ceiling installation

Содержание FSH1

Страница 1: ...he material The sliding bi fold shutter is a product for which not only the dimensional and geometric tolerances but also the straightness and parallel alignment of the running and guide elements must...

Страница 2: ...5 3 2 Mounting accessories 5 3 3 Marking 6 4 Mounting 6 4 1 Preparation for mounting 6 4 2 Installation tolerances 6 4 3 Installation in an elevated area 6 4 4 Fasteners 7 4 5 Design variants 7 4 6 In...

Страница 3: ...ser AST GmbH hereby declares that the sliding bi fold shutters are in compliance with the basic requirements and other relevant provisions of EN standards This is documented by the CE marking 1 3 Used...

Страница 4: ...ns in terms of their safety Observe the regulations applicable to dowel and fastening material Always work with undamaged and suitable tools Keep plastic films packaging material as well as small part...

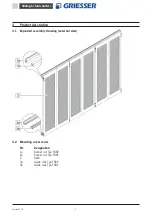
Страница 5: ...description 3 1 Exploded assembly drawing external view 3 2 Mounting accessories Nr Designation 1a Runner rail Typ FSR2 1b Runner rail Typ FSR1 2 Sash 3a Guide rails Typ FSR2 3b Guide rails Typ FSR1...

Страница 6: ...d to Orientation at the installation site Aids table crane ladder etc Check material Distribute material how and where Dimension sheets manufacturing notes Assembly instructions Study documents Instal...

Страница 7: ...when the Runner rails guide rails installed taking the permitted anchor plug extraction force into consideration the processing guidelines of the used dowel pins were observed during assembly 4 5 Desi...

Страница 8: ...il bottom With the fixed sash removed from the package measure the distance to the guide rail bottom Drill fastening holes in line with the runner rail and fasten with fastening material Mount the win...

Страница 9: ...ttom FSH 1 bottom FSR 2 bottom FSH 2 bottom 4 8 Installing the sashes Align the fastening clamps at the top and bottom Fasten the fastening clamps at the top and bottom Remove the connector between hi...

Страница 10: ...OB Beschlag unten 1 1 1 2 2 3 3 4 4 Version 01 18 10 Sliding bi fold shutters FSR Details and safety features for top and bottom top bottom Nominal dimension 2 mm min 1 mm max 3 mm Nominal dimension 2...

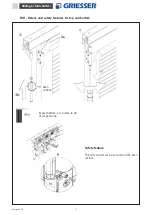
Страница 11: ...1 18 11 Sliding bi fold shutters FSH Details and safety features for top and bottom Safety feature The set screw must be secured on the even surface Impacchettare assicurare le viti di sospensione eve...

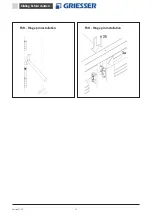
Страница 12: ...Version 01 18 12 Sliding bi fold shutters FSR Hinge pin installation FSH Hinge pin installation...

Страница 13: ...eispiele Anschlagpuffer Anschlagpuffer Winkel mit Anschlagpuffer Version 01 18 13 4 9 Pull latch installation The pull latch is installed on the building after the system has been properly aligned Thi...

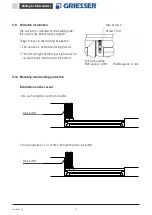
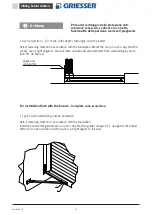
Страница 14: ...are at right angles to the wall when opened and are protected from overwinding by more than 90 to the rail For installation flush with the facade Complete sash projection Type 1 with overwinding outs...

Страница 15: ...t right angles to the wall Step 1 Align the sash and define the position of the scissor holder Art 1430062 Step 2 Fasten the scissor holder Art 1430062 using the two blind rivets 4x13 Art 10050003 Ste...

Страница 16: ...r guide rail not mounted in parallel Correct track or guide rail Blow out dust dirt etc and clean Sashes are not mounted plumb vertical Correct position of fix clamp top or bottom and align with plumb...

Отзывы: