background image

1

Descripción..................................31

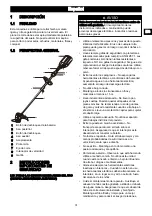
1.1 Finalidad...................................................31
1.2 Perspectiva general..................................31

2

INSTRUCCIONES
IMPORTANTES DE
SEGURIDAD............................... 
31

3

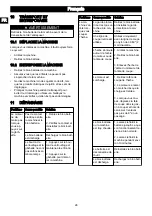
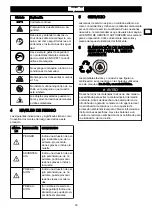
Símbolos en la máquina..............32

4

Niveles de riesgo.........................33

5

Servicio........................................33

6

Eliminación de batería segura
para el medio ambiente...............
33

7

Instalación................................... 34

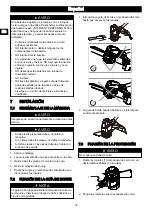
7.1 Desembalaje de la máquina.....................34
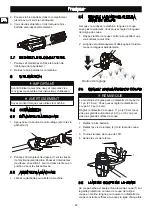
7.2 Fijación de la guía de borde..................... 34
7.3 Fijación de la protección...........................34
7.4 Montaje del eje......................................... 35
7.5 Fijación del asa auxiliar............................ 35
7.6 Instalación de la batería........................... 35
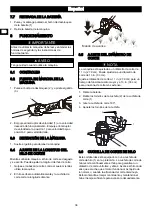
7.7 Retirada de la batería...............................36

8

Funcionamiento...........................36

8.1 Controles.................................................. 36
8.2 Puesta en marcha de la máquina.............36
8.3 Detención de la máquina..........................36
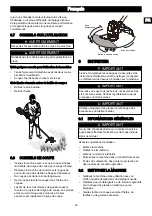
8.4 Ajuste de la longitud del hilo de corte.......36
8.5 Ajuste del diámetro de corte.....................36
8.6 Cuchilla de corte de hilo........................... 36
8.7 Consejos de funcionamiento.................... 37
8.8 Consejos de corte ................................... 37

9

Mantenimiento.............................37

9.1 Información general..................................37
9.2 Limpieza de la máquina........................... 37
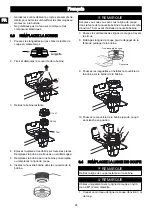
9.3 Sustitución del carrete..............................38
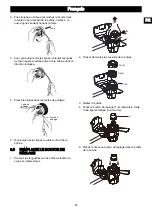
9.4 Sustitución del hilo de corte..................... 38
9.5 Sustitución del mando de avance............ 39

10 Transporte y almacenamiento.....40

10.1 Traslado de la máquina............................40
10.2 Almacenamiento de la máquina............... 40

11 Solución de problemas................40
12 Datos técnicos.............................41
13 Garantía limitada......................... 41
14 Vista despiezada......................... 42

30

Español

ES

Содержание 2103902CT

Страница 1: ...STC301 EN OPERATOR MANUAL FR MANUEL DE L UTILISATEUR STRING TRIMMER COUPE HERBE ES MANUAL DEL OPERADOR CORTABORDES 2103902CT ...

Страница 2: ......

Страница 3: ...he battery pack 8 8 Operation 8 8 1 Controls 8 8 2 Start the machine 8 8 3 Stop the machine 8 8 4 Adjust the length of the cutting line 8 8 5 Adjust the cutting diameter 9 8 6 Line cut off blade 9 8 7 Operation tips 9 8 8 Cutting tips 9 9 Maintenance 9 9 1 General information 10 9 2 Clean the machine 10 9 3 Replace the spool 10 9 4 Replace the cutting line 11 9 5 Replace the bump knob 11 10 Transp...

Страница 4: ...ing outdoors Wear protective hair covering to contain long hair Use right Appliance Do not use appliance for any job except that for which it is intended Avoid Unintentional Starting Don t carry appliance with finger on switch Be sure switch is off when battery is plugged in Don t Force Appliance It will do the job better and with less likelihood of a risk of injury at the rate for which it was de...

Страница 5: ...toxic if swallowed Exercise care in handling batteries in order not to short the battery with conducting materials such as rings bracelets and keys The battery or conductor may overheat and cause burns Follow all charging instructions and do not charge the battery pack or appliance outside of the temperature range specified in the instructions Charging improperly or at temperatures outside of the ...

Страница 6: ... for lithium ion disposal WARNING If the battery pack cracks or breaks with or without leaks do not recharge it and do not use Discard it and replace with a new battery pack DO NOT TRY TO REPAIR IT To prevent injury and risk of fire explosion or electric shock and to avoid damage to the environment Cover the terminals of the battery with heavy duty adhesive tape DO NOT try to remove or destroy any...

Страница 7: ... trimmer head 3 Align the screw holes on the guard with the screw holes on the trimmer head 4 Tighten the screws 7 4 ASSEMBLE THE SHAFT 1 Loosen the knob 1 on the coupler 2 Push in the release button 2 on the lower shaft 3 3 Align the release button 2 with the positioning hole 4 and slide the two shafts 1 5 4 2 3 4 Turn the lower shaft until the button locks into the positioning hole 2 5 Tighten t...

Страница 8: ...a click the battery pack is installed 1 7 7 REMOVE THE BATTERY PACK 1 Push and hold the battery release button 1 2 Remove the battery pack from the machine 8 OPERATION IMPORTANT Before you operate the machine read and understand the safety regulations and the operation instructions WARNING Be careful when you operate the machine 8 1 CONTROLS 8 2 START THE MACHINE 1 Pull the lock out button 2 and p...

Страница 9: ... WARNING Do not operate the machine without guard in place Do these tips when you use the machine Keep a firm hold with the two hands on the machine while you operate the machine Cut tall grass from the top down If grass winds around the trimmer head Remove the battery pack Remove the grass 8 8 CUTTING TIPS Tilt the machine toward the area to be cut Use the tip of the cutting line to cut grass Mov...

Страница 10: ... air vents clean and free of debris to avoid overheating and damage to the motor or the battery Do not spray water onto the motor and electrical components 9 3 REPLACE THE SPOOL 1 Push the tabs on the sides of the trimmer head at the same time Tab 2 Pull and remove the spool cover 3 Remove the remaining spool Tab Cover Spool 4 Clean dirt and debris from all parts Replace spool if it is worn or dam...

Страница 11: ... the loop into the slot in the center rim of the spool Make sure that the line snaps into position in the slot Slot 3 With your finger between the lines wind the lines equally and tightly around the spool in the indicated direction 4 Put the lines in the guide slots 5 Do not wind the lines beyond the edge of the spool 9 5 REPLACE THE BUMP KNOB 1 Push the tabs on the sides of the trimmer head at th...

Страница 12: ...p the machine away from corrosive agents such as garden chemicals and de icing salts Secure the machine during transportion to prevent damage or injury Clean and examine the machine for any damage 11 TROUBLESHOOTING Problem Possible Cause Solution The ma chine does not start when you push the trigger No electrical contact between the machine and the battery pack 1 Remove battery pack 2 Check conta...

Страница 13: ... Lines are tan gled on spool 1 Remove the lines from the spool 2 Wind the lines Problem Possible Cause Solution The line keeps breaking The machine is used incorrectly 1 Cut with the tip of the line avoid stones walls and other hard objects 2 Advance the cutting line regularly to keep full cutting width The grass winds around the trimmer head and motor housing Cut tall grass at ground level 1 Cut ...

Страница 14: ...tained in accordance with the instructions in the owners manual supplied with the product from new ITEMS NOT COVERED BY WARRANTY 1 Any part that has become inoperative due to misuse commercial use abuse neglect accident improper maintenance or alteration or 2 The unit if it has not been operated and or maintained in accordance with the owner s manual or 3 Normal wear except as noted below 4 Routin...

Страница 15: ... Qty Description No Part No Qty Description 1 311061453 1 Auxiliary handle assembly 3 311021459 1 Trimmer head assembly 2 333041444 1 Edge guide 4 311011459 1 Guard assembly Greenworks Tools PO Box 1238 Mooresville NC 28115 15 English EN ...

Страница 16: ... Retirez le bloc batterie 22 8 Utilisation 22 8 1 Commandes 22 8 2 Démarrez la machine 22 8 3 Arrêtez la machine 22 8 4 Réglez la longueur de la ligne de coupe 22 8 5 Réglez le diamètre de coupe 22 8 6 Lame de coupe de la ligne 22 8 7 Conseils sur l utilisation 23 8 8 Conseils de coupe 23 9 Entretien 23 9 1 Informations générales 23 9 2 Nettoyez la machine 23 9 3 Remplacez la bobine 24 9 4 Remplac...

Страница 17: ...endroits poussiéreux Évitez les endroits dangereux N exposez pas les outils électriques à des conditions humides ou mouillées L eau qui pénètre dans un outil électrique augmente le risque de choc électrique N utilisez pas sous la pluie Tenez tous les curieux les enfants et les animaux domestiques à une distance d au moins 15 m 50 pi Habillez vous correctement Ne portez pas de vêtements amples ou d...

Страница 18: ...t contact En cas de contact accidentel rincez avec de l eau En cas de contact avec les yeux consultez également un médecin Le liquide s échappant des batteries peut causer des irritations ou des brûlures N utilisez pas une batterie ou un appareil endommagé ou modifié Les batteries endommagées ou modifiées peuvent présenter un fonctionnement imprévisible et provoquer un incendie une explosion ou un...

Страница 19: ...itée peut entraîner la mort ou des blessures graves SYM BOLE SIGNAL SIGNIFICATION MISE EN GARDE Indique une situation po tentiellement dangereuse qui si elle n est pas évitée pourrait causer des bles sures mineures ou modér ées MISE EN GARDE Sans symbole d alerte de sécurité Indique une situa tion pouvant entraîner des dommages matériels 5 SERVICE L entretien nécessite un soin extrême et une conna...

Страница 20: ...age ou d élimination certifié 7 INSTALLATION 7 1 DÉBALLEZ LA MACHINE AVERTISSEMENT Assurez vous d assembler correctement la machine avant de l utiliser AVERTISSEMENT Si les pièces sont endommagées n utilisez pas la machine Si vous n avez pas toutes les pièces n utilisez pas la machine Si les pièces sont endommagées ou manquantes communiquez avec le centre de service 1 Ouvrez l emballage 2 Lisez la...

Страница 21: ...uton Desserrer Serrer 7 5 ATTACHEZ LA POIGNÉE AUXILIAIRE 1 Dévissez les vis 1 de la poignée à l aide d un tournevis cruciforme non fourni 2 Attachez la poignée auxiliaire 2 et abaissez la bride 3 sur l arbre 1 3 Placez la poignée auxiliaire dans la position la plus confortable pour l utilisation 4 Serrez les vis 2 3 7 6 INSTALLEZ LE BLOC BATTERIE AVERTISSEMENT Si le bloc batterie ou le chargeur es...

Страница 22: ...ter la machine 8 4 RÉGLEZ LA LONGUEUR DE LA LIGNE DE COUPE Lorsque vous utilisez la machine la ligne de coupe s use plus rapidement Vous pouvez régler la longueur de la ligne de coupe 1 Frappez la tête de coupe contre le sol pendant que vous utilisez la machine 2 La ligne est automatiquement débloquée et la lame coupe la longueur excédentaire Bouton de réglage 8 5 RÉGLEZ LE DIAMÈTRE DE COUPE REMAR...

Страница 23: ... et les murs de brique les bordures et le bois peuvent user rapidement la ligne de coupe Zone dangereuse Meilleure zone de coupe Sens de rotation 9 ENTRETIEN IMPORTANT Lisez et comprenez les consignes de sécurité et les instructions d entretien avant de nettoyer de réparer ou d effectuer des travaux d entretien sur la machine IMPORTANT Assurez vous que tous les écrous les boulons et les vis sont b...

Страница 24: ...bobine dans le couvercle de la bobine REMARQUE Assurez vous que vous avez mis la ligne de coupe dans la fente de la nouvelle bobine et qu elle est sortie d environ 15 cm avant d installer la nouvelle bobine 7 Passez les extrémités des lignes de coupe à travers les trous 8 Rallongez la ligne de coupe pour la dégager de la fente de guidage de la bobine Couvercle Trou de sortie de ligne 9 Poussez les...

Страница 25: ...les lignes dans les fentes de guidage Fente de guidage Fente de guidage 5 N enroulez pas les lignes au delà du bord de la bobine 9 5 REMPLACEZ LE BOUTON DE RÉGLAGE 1 Poussez les languettes sur les côtés de la tête de coupe en même temps 2 Tirez et démontez le couvercle de la bobine Tab Cover Spool 3 Retirez la bobine 4 Tenez le bouton de réglage 1 et retirez le à l aide d une tige métallique non f...

Страница 26: ...même temps 1 Appuyez sur le bou ton de verrouillage et maintenez le enfoncé 2 Appuyez sur la gâchette pour démar rer la machine Problème Cause possible Solution La ma chine s ar rête lors que vous couper l herbe La garde protec trice n est pas at tachée à la ma chine Retirez le bloc batterie et installez la garde protectrice à la ma chine Une ligne de coupe lourde est utilisée Utilisez uniquement ...

Страница 27: ...de flux Avance par coups Poids sans batterie 7 89 lbs 3 58 kg La plage de température ambiante recommandée Article Température Plage de température d entreposage du coupe herbe 20 C 4 F 70 C 158 F Plage de température de fonctionnement du coupe herbe 14 C 6 8 F 40 C 104 F Plage de température de rechargement de la batter ie 4 C 39 F 40 C 104 F Plage de température de fonctionnement du char geur 4 ...

Страница 28: ...à l utilisation ou à l exposition ASSISTANCE TÉLÉPHONIQUE Le service de garantie est disponible en appelant notre ligne d assistance téléphonique sans frais au 1 855 345 3934 FRAIS DE TRANSPORT Les frais de transport pour le déplacement de tout équipement motorisé ou accessoire sont à la charge de l acheteur Il incombe à l acheteur de payer les frais de transport pour toute pièce retournée pour re...

Страница 29: ...n 1 311061453 1 Ensemble de la poignée auxiliaire 3 311021459 1 Ensemble de la tête de coupe 2 333041444 1 Guide du coupe herbe 4 311011459 1 Ensemble de la garde protectrice Greenworks Tools PO Box 1238 Mooresville NC 28115 29 Français FR 14 VUE ÉCLATÉES 1 2 4 3 ...

Страница 30: ...ncionamiento 36 8 1 Controles 36 8 2 Puesta en marcha de la máquina 36 8 3 Detención de la máquina 36 8 4 Ajuste de la longitud del hilo de corte 36 8 5 Ajuste del diámetro de corte 36 8 6 Cuchilla de corte de hilo 36 8 7 Consejos de funcionamiento 37 8 8 Consejos de corte 37 9 Mantenimiento 37 9 1 Información general 37 9 2 Limpieza de la máquina 37 9 3 Sustitución del carrete 38 9 4 Sustitución ...

Страница 31: ...de humedad Si penetra agua en una herramienta eléctrica aumentará el riesgo de descarga eléctrica No utilice bajo la lluvia Mantenga a todos los transeúntes niños y mascotas al menos a 15 m Lleve indumentaria adecuada No lleve ropa o joyas sueltas Pueden quedar atrapadas en las piezas móviles Se recomienda el uso de guantes de goma y calzado resistente cuando se trabaje en el exterior Lleve una pr...

Страница 32: ...No utilice una batería o un aparato que haya sufrido daños o modificaciones Las baterías dañadas o modificadas pueden exhibir un comportamiento impredecible que puede dar lugar a un incendio una explosión o un riesgo de lesiones No exponga una batería o un aparato al fuego ni a temperaturas excesivas La exposición al fuego o a una temperatura superior a 265 F 130 C puede provocar una explosión No ...

Страница 33: ...ÓN Indica una situación de pel igro potencial que de no evitarse puede provocar lesiones leves o modera das PRECAU CIÓN Sin símbolo de alerta so bre seguridad Indica una situación que puede provo car daños materiales 5 SERVICIO Las tareas de servicio exigen un cuidado extremo así como conocimientos y deben ser realizadas únicamente por un técnico de servicio cualificado Para cuestiones de servicio...

Страница 34: ...N 7 1 DESEMBALAJE DE LA MÁQUINA AVISO Asegúrese de montar correctamente la máquina antes del uso AVISO Si las piezas presentan daños no utilice la máquina Si no tiene todas las piezas no utilice la máquina Si faltan piezas o hay piezas dañadas hable con el centro de servicio 1 Abra el embalaje 2 Lea la documentación que se encuentra en la caja 3 Retire todas las piezas sin montar de la caja 4 Reti...

Страница 35: ...n destornillador Phillips no suministrado 2 Fije el asa auxiliar 2 y la abrazadera inferior 3 en el eje 1 3 Sitúe el asa auxiliar en la posición de uso más cómoda 4 Apriete los tornillos 2 3 7 6 INSTALACIÓN DE LA BATERÍA AVISO Si la batería o el cargador ha sufrido daños sustituya la batería o el cargador Detenga la máquina y espere hasta que el motor se pare antes de instalar o retirar la batería...

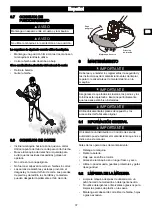
Страница 36: ...contra el suelo mientras utiliza la máquina 2 El hilo se libera automáticamente y la cuchilla de corte corta la longitud sobrante Mando de avance 8 5 AJUSTE DEL DIÁMETRO DE CORTE NOTA La máquina está ajustada a un diámetro de corte de 11 in 27 9 cm Puede ajustarla a un diámetro de corte de 13 in 33 cm Ajuste el diámetro de corte a 11 in 27 9 cm para un tiempo de funcionamiento mayor y a 13 in 33 c...

Страница 37: ...de corte Dirección de rotación 9 MANTENIMIENTO IMPORTANTE Debe leer y entender los reglamentos de seguridad y las instrucciones de mantenimiento antes de limpiar reparar o realizar tareas de mantenimiento en la máquina IMPORTANTE Asegúrese de que todas las tuercas los pernos y los tornillos estén apretados Examine periódicamente que las asas estén bien instaladas IMPORTANTE Utilice únicamente las ...

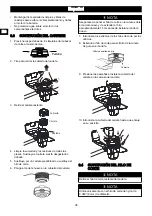
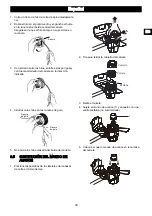
Страница 38: ...ustituya el hilo de corte 6 Ponga el carrete nuevo en la cubierta del carrete NOTA Asegúrese de poner el hilo de corte en la ranura sobre el carrete nuevo y de extender el hilo aproximadamente 15 cm antes de instalar el carrete nuevo 7 Introduzca los extremos de los hilos de corte por los orificios 8 Extienda el hilo de corte para soltarlo de la ranura de guía en el carrete Cubierta Orificio de sa...

Страница 39: ...n la dirección indicada 4 Introduzca los hilos en las ranuras de guía Ranura de guía Ranura de guía 5 No enrolle los hilos más allá del borde del carrete 9 5 SUSTITUCIÓN DEL MANDO DE AVANCE 1 Presione las pestañas de los laterales del cabezal de corte al mismo tiempo 2 Tire para retirar la cubierta del carrete Pestaña Cubierta Carrete 3 Retire el carrete 4 Sujete el mando de avance 1 y sáquelo con...

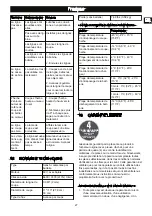
Страница 40: ...botón de desbloqueo y sujételo 2 Apriete el gatillo para poner en marcha la máquina Problema Posible causa Solución La máqui na se de tiene cuando corta La protección no está fijada a la máquina Retire la batería y fije la protección a la má quina Se utiliza un hilo de corte pesado Utilice únicamente con el hilo de corte de ny lon de 0 080 2 mm de diámetro La hierba se en rolla alrededor del eje d...

Страница 41: ...ado Elemento Temperatura Intervalo de temperatura de almacenamiento del cortabordes 4 F 20 C 158 F 70 C Intervalo de temperatura de funcionamiento del cor tabordes 6 8 F 14 C 104 F 40 C Intervalo de temperatura de carga de la batería 39 F 4 C 104 F 40 C Intervalo de temperatura de funcionamiento del car gador 39 F 4 C 113 F 45 C Intervalo de temperatura de almacenamiento de la batería 1 año 32 F 0...

Страница 42: ... a nuestra línea de asistencia telefónica gratuita a 1 855 345 3934 COSTES DE TRANSPORTE Los costes de transporte por el desplazamiento de cualquier unidad o accesorio de equipos eléctricos son responsabilidad del comprador Es responsabilidad del comprador pagar los costes de transporte de cualquier pieza enviada para su sustitución bajo esta garantía a menos que dicha devolución sea solicitada po...

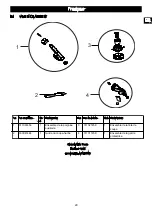
Страница 43: ...5 43 Español ES 14 VISTA DESPIEZADA 1 2 4 3 Nº Nº pieza Ca nt Descripción Nº Nº pieza Ca nt Descripción 1 311061453 1 Conjunto de asa auxiliar 3 311021459 1 Conjunto de cabezal de corte 2 333041444 1 Guía de borde 4 311011459 1 Conjunto de protección ...

Страница 44: ......

Отзывы: