GreenDS GDS+ 3 Скачать руководство пользователя страница 14

                                                            GreenDS

 Auto Fault Computer Diagnostic Equipment


13 


3.1.3 Start Up 

Through  any  one  of  the  four  power  supply  power 

ways  introduced  in  3.1.1  to  supply  power,  press  the 

button [POWER] in the bottom left of the  main unit 

screen.  The  main  unit  will  be  getting  started,  and 

then enter into the running state.   

3.1.4    Shut Down 

After  usage  of  this  equipment,  click  touch  screen  to 

back  to  desktop,  press  the  [POWER]  key  in  the 

bottom left of the main unit screen to shut down.   

Notes:  When  startup  or  shutdown,  the  button 

operation time is generally 1 ~ 2ms, long press the 

On and Off button can cause key failure. 

3.2 Starting Up Interface 

Introduction 

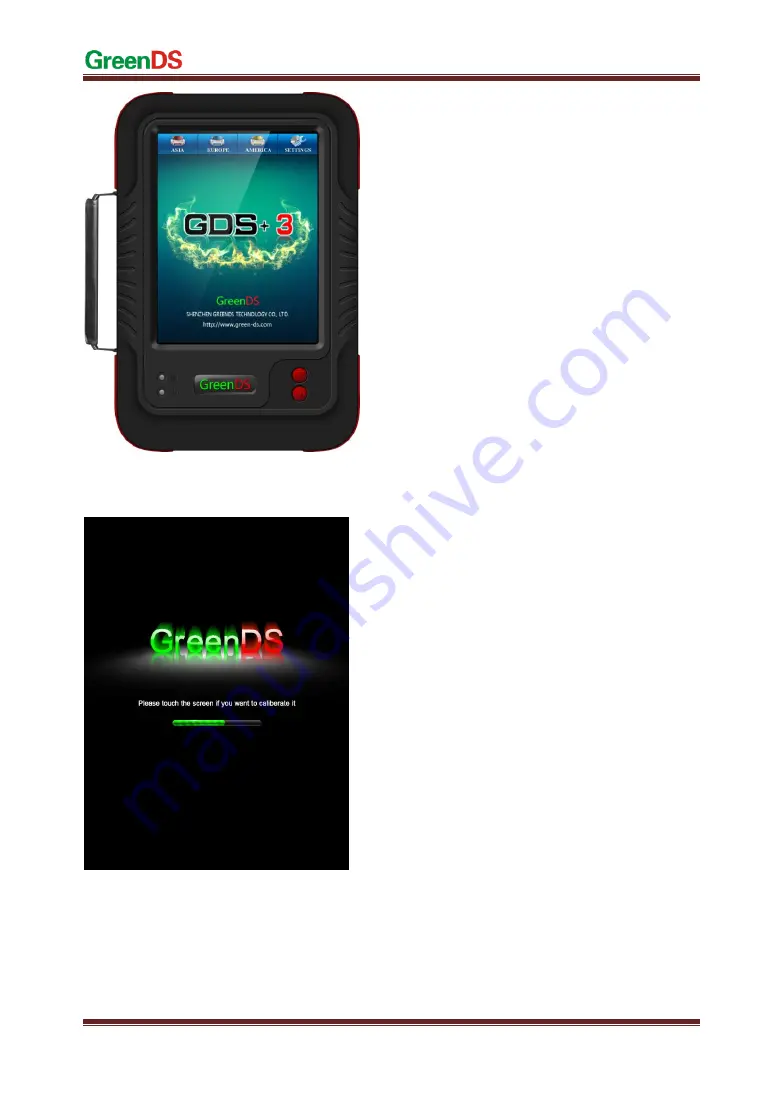
3.2.1    Starting Up Interface 

Connect  the  power  supply,  press  the  power  switch 

key,  GreenDS  product  identification  firstly  appears 

on  the  screen,  then

if  you  want  to  adjust  the  touch 

screen  please,  click  screen  directly

  appears  at  the 

top of the starting up progress bar. 


Notes:  If  you  need  adjust  touch  screen,  please  at 

this time click on anywhere of the screen with the 

touch  pen  to  enter  adjustment  mode.  During 

adjustment, you must use touch pen to adjust. 

If don’t need touch screen adjustment, the system 

will automatically enter desktop in 2s.


Содержание GDS+ 3

Страница 1: ...0 ...

Страница 2: ...ntries where any of the GreenDS trademarks service marks domain names logos and company names etc are not registered GreenDS claims to other rights associated with non registered trademarks service marks domain names logos and company names etc Other products or company names logos sevice marks etc referred to in this manual still belong to their respective owners You may not use any trademarks se...

Страница 3: ...c acid is corrosive to the skin in operation should avoid skin having direct contact with battery fluid Particularly be careful not to splash into the eyes Avoid nearing fire Engine exhaust emissions contains a variety of toxic compounds should avoid inhalation When operating the vehicle should be parked in a well ventilated place When the temperature of the working engine is high should avoid con...

Страница 4: ... is recommended to click the touch screen When electrical components energized you can not disconnect the circuit to prevent the self inductance mutual inductance attacking sensors and automotive ECU When electrical equipment works avoid putting magnetic objects close to the vehicle control unit otherwise the vehicle control unit may be damaged When dismounting vehicle control unit or electrical c...

Страница 5: ...1DSMAIN UNIT FRONT SIDE CONFIGURATION 9 2 1 2 MAIN UNIT PARAMETERS INTRODUCTION 10 2 2 PRINTER PARAMETER INTRODUCTION AND PRINTING PAPER INSTALLATION10 2 2 1 PRINTER PARAMETER 10 2 2 2 PRINTING PAPER INSTALLATION 10 3 OPERATION GUIDE 12 3 1 POWER AND TESTING CABLE CONNECTION 12 3 1 1MAIN UNIT POWER SUPPLY 12 3 1 2CABLE CONNECTION METHOD 12 3 1 3 START UP 13 3 1 4 SHUT DOWN 13 3 2 STARTING UP INTER...

Страница 6: ...MENT 16 3 3 3UNIT ACTIVATION 16 3 3 4LANGUGE 17 3 3 5SELF TEST 17 3 3 6SD CARD TESTING 18 4 PRODUCT UPGRADING 19 5 VEHICLE DIAGNOSIS 20 5 1 CONNECTION OF OBD II CONNECTOR 20 5 2 CONNECTION OF NON OBD II CONNECTOR 20 5 3 STEPS OF VEHICLE DIAGNOSIS 20 6 WARRANT CLAUSE 21 ...

Страница 7: ...dcore of GreenDS auto diagnostic computer follows the international advanced modularized design technology with the excellent performance of high speed stability data collection accurate etc With openning structure design and independent operating system making the future upgrade of system software and diagnostic software more convenient Its working power supply is from Vehicle storage battery whi...

Страница 8: ...rt 3 Put back the machine and cables connectors etc accessories to box to avoid loss 1 3 3 Touch Screen Care 1 Dust may be accumulated on the LCD screen due to electrostatic You are suggested to buy the special LCD screen wiper to clean the screen gently 2 Don t wipe the screen with bare finger to avoid fingerprint attached Never use chemicals to clear the screen 3 Never put GreenDS close to the e...

Страница 9: ...use high quality data transmission device during connection 7 Randomly plug and unplug SD card from main unit are strictly prohibited during the operation of main unit 8 Do not use cleaning liquid or water to clean SD card 9 When insert SD card the insert direction must be correct Error insertion may lead to damage of SD card or SD card slot 10 Do not twist and bend SD card 1 4 Help GDS 3 product ...

Страница 10: ...1 Main unit structure diagram 2 1GreenDS Hardware Introduction 2 1 1DSMain Unit Front side Configuration 2 1 Figure 2 1 1 is the frontside structure diagram of GDS 3Main unit Main unit Back side NO Name 1 Printing Paper Out Button 2 Main unit ON OFF button 3 Touch Pen 4 Power Interface 5 Main Diagnosis Cable Socket 6 SD Slot 7 Printer Cover 8 Printing Paper Outlet ...

Страница 11: ... Parameter Introduction and Printing Paper Installation 2 2 1 Printer Parameter GDS 3 main unit with built in mini thermal printer adopting the way of direct in and bent out reduces the risk of printing stuck 2 2 2 Printing Paper Installation 1 Put main unit flat on desk or other flat surface pull outward printer and take out cover plate on the lower part of main unit Item Unit method Paramete r P...

Страница 12: ...er Put in the printing paper Please be aware that the pringting paper has Face and Back side If wrongly installed the paper can t show the words And you should switch to another side to install again Put the Cover back Push the cover upwards to finish the whole Process ...

Страница 13: ... with power you do not need to connect another power cord The prerequisites for vehicle 1 Confirm the diagnostic socket location shape and whether there is a need for external power supply 2 Select the appropriate connector base on vehicle model and shape of diagnostic socket 3 Connect one end of the main testing line to the other end of main unit diagnostic connector 4 Plug diagnostic connector t...

Страница 14: ...utdown the button operation time is generally 1 2ms long press the On and Off button can cause key failure 3 2 Starting Up Interface Introduction 3 2 1 Starting Up Interface Connect the power supply press the power switch key GreenDS product identification firstly appears on the screen then if you want to adjust the touch screen please click screen directly appears at the top of the starting up pr...

Страница 15: ...ouch pen counter clockwisely from top left corner of the screen After adjustment and the main unit shows correct information then log on to the desktop menu 3 2 3 Desktop Menu Description When the main unit starts normally the main unit will enter the desktop menu The top of desktop is the menu bar Desktop background displays product models service hotline update Web site the service network Deskt...

Страница 16: ...enu appears System info Touch adjust User infor System theme Language System active Clear saved data 3 3 1System Information Select System Information and enter the main menu pop up a dialog box for the hardware information operating system version software version database version memory information of product Operating the button OK on the left side of menu to return to previous menu ...

Страница 17: ...time can the activate the main unit Every time the user use the main uint the prompt the version you are using now is trial you can use it for another XX times Every starting up and connection to the vehicle would count as one time When the remaining times decrease to zero the device needs to be activated Activation Please sign in Company official website to activate the device 1 First log in your...

Страница 18: ...needs rebooting the main unit to come into effect Note Varied language is provided according to different regions and subject to the actual configuration of the product 3 3 5Self Test This function is used to test the main diagnosis cable and standard OBD II connector and only can be performed with a fitted self test connector ...

Страница 19: ...usually have writing and reading speed of 4MB s Usually the position of write protection swith should be at the side without the word LOCK If it is at the side with LOCK then the SD card will be in the write protection status Data can only be read Writing formatting and undating can not be proceeded This function can test the performance of the SD card ...

Страница 20: ...irst sign in Company website to register 2 Then go to the download center to download the full upgrade package on your computer desktop 3 Plug the SD card into your PC computer USB socket through a card reader 4 Foemat the SD card and the doule click the upgrade package to upgrade 5 A prompt will pop out once you finished the upgrade 6 Unplug the SD card and Insert back to your main unit For more ...

Страница 21: ...e main test wire and the main unit of the decoder 5 3 Steps of Vehicle Diagnosis 1 Find the location of vehicle diagnostic socket 2 Select the connector according to the vehicle diagnostic socket model 3 Connect the main unit to the wire or connector of the to be detected vehicle 4 Connect the testing connector to the vehicle diagnostic socket as shown in Figure 5 2A Note If the power supply of di...

Страница 22: ...d card reader touch pen printing supplies etc are not under warranty range 5 Products from the date of purchase subject to valid purchase proof and effective warranty card of the product if the products suffer performance failure caused by non human factors you can choose our maintenance services or replace the product with the same model within a month You can enjoy one year warranty service for ...

Страница 23: ...or shipping to the location 9 If you enjoy your free warranty service under this warrant clause is the only measure for the losses due to product defect within the product warranty period GreenDS technology shall not be liable for your direct or indirect loss 10 All product warranty information product features and specification changes will be posted on GreenDS Technology latest promotional mater...

Страница 24: ...GreenDS Auto Fault Computer Diagnostic Equipment 23 ...

Отзывы: