18 / EN
USER SETTINGS
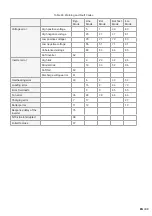
The UPS has setting functions. This user settings can be done under any kind of UPS working mode. The setting will
take effect under certain condition. Below table describes how to set the UPS.
Table 6. User Settings
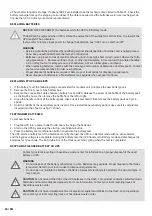
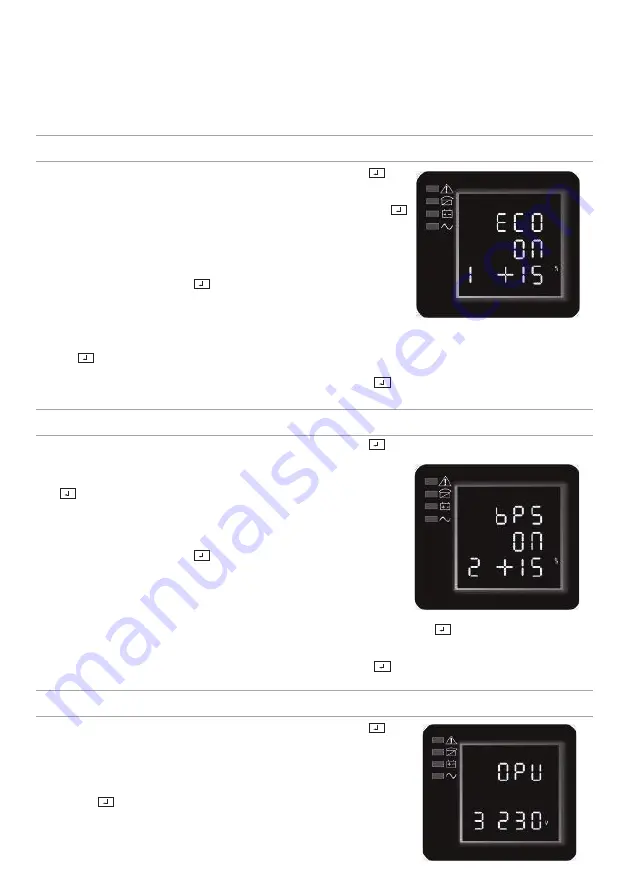
ECO FUNCTION SETTING (1)
1. Enter the setting interface. Press and hold the function setting key
for
more than 2 seconds, then come to setting interface, the letters “ECO” will
fl ash.
2. Enter the ECO setting interface. Press and hold the function setting key
for more than half a second (less than 2 seconds), the letters “ECO” will
stop fl ash. The “ON” (or OFF) below the ECO will fl ash. Press and hold the
scroll keyfor more than half a second (less than 2 seconds) to determine
whether the ECO function is enabled or disabled.
3.
Confi rm the ECO selecting interface. After selecting ON or OFF, press and
hold the function setting key
for more than half a second (less than
2 seconds). Now, the ECO setting function is completed and the “ON” or
“OFF” below the “ECO” will light without fl ash.
4. If you choose “OFF”, then go to step 7, otherwise go ahead to step 5.
5. Set the ECO tolerance range. Short press the scroll keyorfor more than half a second (shorter than 2 seconds)to
select the voltage range in percentage. +5%,+10%,+15%,+25% (default is +25%) then short press function setting
key
for more than half a second (shorter than 2 seconds)to confi rm the selection, then to set the minus range
6. To set the minus range in the same way.
7.
After the minus range is confi rmed. Long press function setting key
for more than 2 seconds to exit setting
menu.
BYPASS FUNCTION SETTING (2)
1. Enter the setting interface. Press and hold the function setting key
for more than 2 seconds, then come to
setting interface ,short press the scroll keyfor more than half a second
(less than 2 seconds) to select BPS setting, the letters “bPS” will fl ash.
2. Enter the BPS setting interface. Press and hold the function setting key
for more than half a second (less than 2 seconds) at this time, the
letters “bPS” will stop fl ashing. The “ON” (or OFF) below the bPS will fl ash.
Press and hold the scroll keyfor more than half a second (less than 2
seconds) to determine whether the BPS function is enabled or disabled.
3.
Confi rm the BPS selecting interface. After selecting ON or OFF, press and
hold the function setting key
for more than half a second (less than
2 seconds). Now, the BPS setting function is completed and the “ON” or
“OFF” below the “bPS” will light without fl ashing.
4. If you choose “OFF”, then go to step 7, otherwise go ahead to step 5.
5. Set the BPS tolerance range. Short press the scroll keyorfor more than half
a second (shorter than 2 seconds)to select the voltage range in percenta-
ge. +5%,+10%,+15%,+25% (default is +25%) then short press function setting key
for more than half a second
(shorter than 2 seconds)to confi rm the selection, then to set the minus range
6. To set the minus range in the same way.
7.
After the minus range is confi rmed. Long press function setting key
for more than 2 seconds to exit setting
menu.
OUTPUT VOLTAGE SETTING (3)
1. Enter the setting interface. Press and hold the function setting key
for
more than 2 seconds, then come to setting interface, Press and hold the
scroll keyfor more than half a second (less than 2 seconds), select the
function setting, choose output voltage setting interface, at the moment, the
letters “OPU” will fl ash.
2. Enter the output voltage selecting interface. Press and hold the function set-
ting key
for more than half a second (less than 2 seconds), then come
to setting interface of output voltage OPU, at this time, the letters “OPU” will
light for a long time. The numerical value below the OPU will fl ash. Press
and hold the scroll keyfor more than half a second (less than 2 seconds), se-


