background image

Version 202001 Updated 08/2020

Index

1. Introduction

........................................................................................

2

2. Safey and Security Measures

.......................................................

2

3. Warning Signs

....................................................................................

8

4. Machine Symbols

..............................................................................

9

5. Machine Description

......................................................................

10

6. Operating Instructions

.................................................................

13

7. Using the Machine

..........................................................................

22

8. Maintenance and Service

............................................................

23

9. Troubleshooting

..............................................................................

29

10. Transportation

..............................................................................

30

11. Storage

.............................................................................................

30

12. Recycling and Machine Disposal

............................................

30

13. Warranty Conditions

...................................................................

31

14. Spare Parts Diagram

...................................................................

32

15. Spare Parts List

.............................................................................

33

Содержание GBD601A

Страница 1: ...K65K GBK65 GBK65H and GBK65K GBD601 Series Please read through this owner s manual carefully before using the product to insure the safety of yourself and others Due to continuing improvements actual...

Страница 2: ...gns 8 4 Machine Symbols 9 5 Machine Description 10 6 Operating Instructions 13 7 Using the Machine 22 8 Maintenance and Service 23 9 Troubleshooting 29 10 Transportation 30 11 Storage 30 12 Recycling...

Страница 3: ...member that the machine operator is responsible for the damages and accidents caused to other people or things The manufacturer will not be liable in any way for damages caused by improper or incorrec...

Страница 4: ...use this machine improperly Warning Only lend this machine to persons who are familiar with this type of machine and know how to use it Always lend the machine along with the user instruction manual s...

Страница 5: ...ain balance at all times When using this machine wear the following protective equipment Eye and hearing protection and safety gloves The noise caused by this machine can cause hearing damage Use audi...

Страница 6: ...erson to ensure safety Do not use this machine at night with fog or low visibility which will not allow you to see the working area clearly Keep the working area clean and work with good lighting Only...

Страница 7: ...ay from the spillage area and avoid any source of ignition until all vapours are gone Add fuel before starting the machine Never remove the cap of the fuel tank while the engine is running or when the...

Страница 8: ...hine as possible Whilst introducing the wood into the machine for shredding maintain both feet at the same level as those of the wheels Turn off the machine disconnect the spark plug and make sure tha...

Страница 9: ...t of this machine when it is running danger of injury Keep people away from the work area Blades and rotating parts in operation Keep hands and feet away Danger of injury Do not insert hands or any ot...

Страница 10: ...trash containers Comply with the CE directives EU standards 4 MACHINE SYMBOLS In order to guarantee safe and proper use and maintenance of the machine the following symbols appear on the machine Fuel...

Страница 11: ...e chipper is only designed to shred pieces of wood It is prohibited to shred any other materials for example metal stones plastics and any other materials If you want to shred roots remove the sand mu...

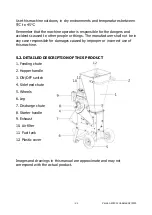
Страница 12: ...e manufacturer shall not be in any case responsible for damages caused by improper or incorrect use of this machine 5 2 DETAILED DESCRIPTION OF THIS PRODUCT 1 Feeding chute 2 Hopper handle 3 ON OFF sw...

Страница 13: ...pm 2400rpm Net weight 75kgs 75kgs Brand Greatbull Greatbull Greatbull Model GBD601C GBD601CK GBD601CH Engine Briggs Stratton 13 5HP Briggs Stratton 13 5HP Honda GX390 Displacement 420cc 420cc 389cc Fu...

Страница 14: ...ncludes the following items that you will find inside the box 1 Machine 2 Front feet 3 Wheels 2 4 Axle 5 Side feed chute 6 Transport handle 7 Discharge chute 8 Tool bag 9 Gloves 2 10 Fuel can 11 Prote...

Страница 15: ...Version 202001 Updated 08 2020 6 2 ASSEMBLY Step 1 Wheels and wheel axle Step 2 Support feet and discharge chute cover...

Страница 16: ...Version 202001 Updated 08 2020 Step 3 Side feed chute Step 4 Attach transport handle Step 5 For key start models connect the wires...

Страница 17: ...Remove the fuel thank cap and fill with fuel 3 Tightly close the fuel tank cap and remove all any spilled fuel with a dry cloth WARNING Stop the engine before refuelling Do not start the machine in a...

Страница 18: ...r the first time you must put oil the engine This engine uses quality 4 stroke SAE30 10W30 oil depending on the model Filling the oil sump Place the machine on a flat horizontal and uncluttered surfac...

Страница 19: ...f well clear of the discharge area whilst the machine is working If the blades hit a foreign object any other objects different to wood or if the machine starts to make strange noises and or it vibrat...

Страница 20: ...ed rotating Transportation of the machine should be carried out by two persons to avoid possible injuries Two blades opposite on a rotor and another counter blade on the chassis 6 4 2 STARTING THE ENG...

Страница 21: ...ther hand grip the recoil starter cord handle and pull slowly until resistance is felt indicating that the recoil starter is engaged When resistance is felt pull the cord sharply Pic 14 Continue this...

Страница 22: ...tion indicated by a tortoise 6 4 3 STOPPING THE ENGINE Note If the machine starts to make an unusual noise stop the machine immediately allow the engine to cool and inspect thoroughly 1 To stop the en...

Страница 23: ...u Pic 19 4 When finished chipping turn OFF the machine allow all moving parts to come to a complete stop Disconnect the spark plug wire before moving the machine emptying the bag unclogging the inlets...

Страница 24: ...g Tips Feed materials into the chipper shredder slowly if the motor begins to bog down you are feeding too fast Roots and dirty materials will dull or damage the blades Remove the chips often Allowing...

Страница 25: ...remove the spark plug Brush off or vacuum excess wood chippings and wipe off the remaining dust from the exterior of the machine with a dry cloth Do not expose the machine to water or attempt to clean...

Страница 26: ...ry surface and follow the previous instructions to start up the machine Allow the engine to warm for several minutes before turning off the engine 2 Remove the Oil filler cap as seen in Pic 21 3 Place...

Страница 27: ...ed degreasing agent Allow to dry fully before replacing the air filter NOTE Never attempt to run the machine without an Air Filter inserted 8 1 3 4 FUEL FILTER After approximately 150 hours of use or...

Страница 28: ...riginal blades professionally sharpened or order a replacement set then re install the blades 5 Replace the side cover plate and re attach the spark plug wire 8 3 REPLACING THE V BELT Replace or tight...

Страница 29: ...f non official spare parts may cause accident injury to the user and scrapping of the machine Perform maintenance frequently as indicated in the following table PIECES ACTION Each use First month 20 h...

Страница 30: ...not run smoothly Engine is warm and the choke is still in the CHOKE position Move the choke to the RUN position Air filter is dirty Clean the air filter Stale fuel water or dirt in fuel blocked fuel...

Страница 31: ...ain hot after turning the engine off Never store the machine in places near flammable materials dried grass or wood gas or fuels Be sure to store the machine in a place not accessible to children or t...

Страница 32: ...riod for the chipper shredder is 1 year from the purchase date Engine warranty is 3 years 13 2 EXCLUSIONS Warranty will not cover Pieces worn out due to normal wear and tear Misuse negligence of care...

Страница 33: ...Version 202001 Updated 08 2020 14 SPARE PARTS DIAGRAM...

Страница 34: ...s 1 9 GBD601009 Bearing 2 10 GBD601010 Bearing Seat Cover 1 11 GBD601011 Chute Rubber Pad Inward 1 12 GBD601012 Spacer Right 1 13 GBD601013 Spacer Left 1 14 GBD601014 Bearing 2205 25mmx52mmx18mm 2 15...

Страница 35: ...lt Cover Inner Plate 1 26 GBD601026 Feeding Chute 1 27 GBD601027 A models GBD601A AH Drive Belt Pulley Small 1 GBD601027 C models GBD601C CK CH Drive Belt Pulley Small 1 28 GBD601028 A models GBD601A...

Страница 36: ...ide Plate Upper Spacer 2 49 GBD601049 Bearing Washer 2 50 GBD601050 Pulley Bush Small 1 51 GBD601051 Pulley Washer Small 1 52 GBD601052 Flat Washer n8xn28x3 1 53 GBD601053 Support Tube 1 54 GBD601054...

Страница 37: ...M8x40 4 73 GBD601073 M8x190 Six Outer Hexagon Bolt 3 74 GBD601074 Split Pin 2 75 GBD601075 Support Tube 1 76 GBD601076 M8x16 Six Outer Hexagon Bolt 8 77 GBD601077 M8x25 Six Outer Hexagon Bolt 20 78 GB...

Страница 38: ...020 Customer Service 303 Warrigal Road Cheltenham Victoria 3192 Australia Telephone 1300 454 585 Website www BWMachinery com au Email admin bwmachinery com au Spare parts are available from our dealer...

Отзывы: