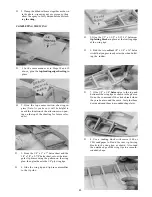


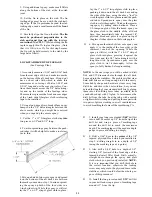


1. From the small scrap of 1/32" ply (included),
cut four small pieces and tack glue them to the
1/16" ply spinner ring as shown, using a very
small amount of thick CA (these will be re-
moved later).
2 Now center your 3" diameter spinner back-
plate over the spinner ring, and tack glue it
to the 1/32" ply spacers.
D 4. Find the "U"-shaped 5/8" balsa spinner fil-
ler block and trial fit it behind the 1/16" ply
spinner ring. Sand the bottom of this block to
a bevel to mate with the top of the chin block,
and carve it as necessary to fit around the en-
gine parts.
WItH
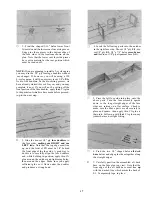
5. Glue the spinner ring, spinner filler block
and chin block together.
3. Trial fit the spinner ring and spinner back-
plate assembly onto the engine crankshaft.
You will note that you are not able to seat the
backplate fully against the thrust washer be-
cause the chin block is slightly too long. Re-
move the spinner backplate and, using a sand-
ing block, sand the front of the chin block
slightly. Repeat this procedure until you have
the front of the chin block sanded just enough
to permit the spinner backplate to rest against
the thrust washer.Then temporarily bolt on the
propeller to hold the spinner backplate and
spinner ring in place.
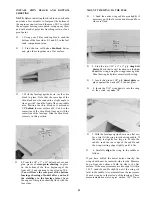
D 6. Remove the propeller, then break the spin-
ner backplate free. Remove the 1/32" ply spac-
ers.
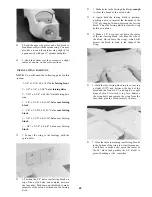
D 7. If you are using the hardwood engine mount-
ing rails, find the two 3/16" x 5/8" x 4-7/8" balsa
engine rail fillers and glue them to the outside
edge of the hardwood rails. Sand flush with
the top and bottom of the rails.
7a. If you are using a custom mount for your
engine, find the two 1/2" x 5/8" x 4-13/16" balsa
nose side fillers and the shaped 5/8" balsa
upper and lower nose sides, and glue them
together to make the nose side assemblies.
27


