42
Maintenance
Step 3: Upgrade the ATP-2000
2 Click
Import Upgrade Package(s)
in the dialog and
browse to the upgrade package to be uploaded.
3 Select the package and click
Open
.
The package is imported into GV Orbit Client.
After the package has been imported, it is listed under ‘Available Packages’ in the
Orbit
Upgrade
window.
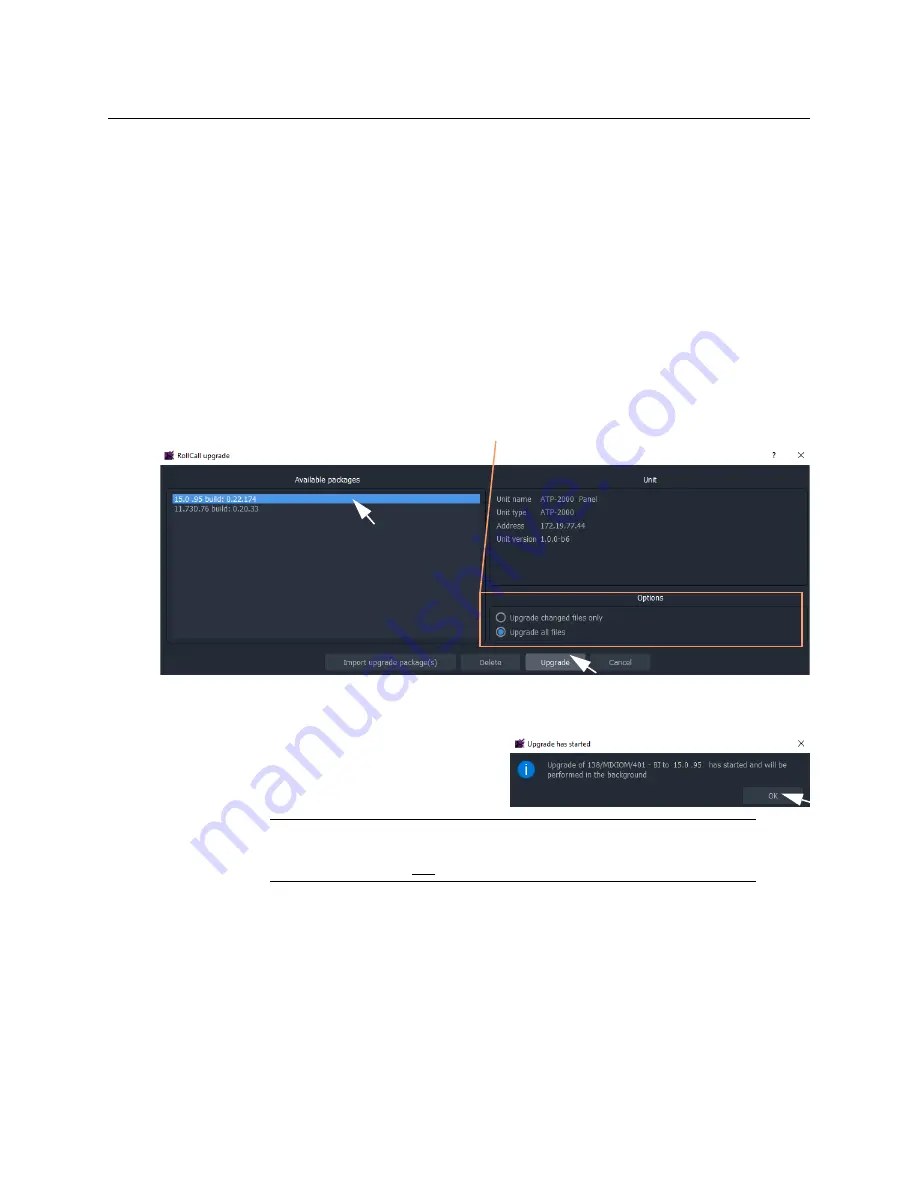
Step 3: Upgrade the ATP-2000
1 Select a package in the ‘Available Packages’ list of the
Orbit Upgrade
window.
2 Select
Upgrade All Files
in the ‘Options’ pane to upgrade
all files
on the device,
regardless of whether a file is the same on the device and in the upgrade package.
(Deselect
Upgrade All Files
for a quicker upgrade.)
Fig. 6-8: Example Orbit Upgrade Window
3 Click the
Upgrade
button to start the upgrade of the device.
A message box appears informing you
that the upgrade has started and will
proceed in the background.
Click
OK
.
4 When the device has been upgraded, this is indicated by a pop-up notification
message in the Windows
TM
system tray.
Step 4: Finally, Check the Upgraded Software Version
1 Right-click on the
Network
window upgraded-device item and select ‘Info’.
A
Details
window is shown displaying unit information.
2 Check that the ATP-2000’s current (upgraded) version of software/firmware is correct.
Options pane
Note:
The user may continue using the GV Orbit project in the Client while
the upgrade proceeds.
However,
only one upgrade can be running at any one time
.
Содержание ATP-2000
Страница 1: ...User Guide 13 03082 230 AA 24 November 2020 ATP 2000 ADVANCED TOUCH PANEL ...
Страница 4: ...iv Notices ...
Страница 21: ...xxi Table of Contents ...
Страница 25: ...4 Introduction This Document ...
Страница 41: ...20 Getting Started Configure Initial Settings in the Control Screen ...
Страница 47: ...26 ATP 2000 Control Screen Web Page ATP 2000 Control Screen Web Page ...
Страница 67: ...46 Maintenance Replacing the Battery ...
Страница 73: ...52 Hardware Specification External Connectors ...
Страница 75: ...54 Unit Dimensions ...
Страница 80: ...59 Power Supply Unit Power Supply Unit DC Power Supply Module 60 Physical 60 Electrical 60 ...
Страница 89: ...68 Battery Replacement Step 6 Re Install in Rack ...


