background image

8

1. 

CAUTION! Use precaution measures.

2. 

Read instruction manual, observe warnings and safety conditions 

therein!

3. 

Use personal protection equipment (protective goggles, earmuff 

protectors).

4. 

Use dust mask!

5. 

Use protective gloves.

6. 

Keep the tool away from children.

7. 

Use protective clothes.

8. 

Protect the tool from moisture.

9. 

Remove the battery from the device before starting any 

adjustments or cleaning related tasks.

10. 

This device is designed to operate indoors.

11. 

Maximum permissible cell temperature 45°C.

12. 

Do not throw cells into fire.

13. 

Recycling.

14. 

Charger protection class 2.

15. 

Do not throw cells into water. 

CONSTRUCTION AND USE

Reciprocating saw is a battery-powered tool. It is driven with a DC 

commutator motor whose rotary movement is transformed to 

reciprocating movement. The tool is designed for making straight, 

coarse cuts, curved cuts and holes in wood, wood-based materials, 

plastics and metals (provided that appropriate blade is used). Range of 

use covers repair and building works, and any work from the range of 

individual, amateur activities (tinkering).

Use the power tool in accordance with the manufacturer’s 

instructions only.
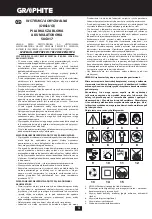
DESCRIPTION OF DRAWING PAGES

Below enumeration refers to the device elements depicted on the 

drawing pages of this manual.

1. 

Blade

2. 

Base

3. 

Lever for quick blade installation

4. 

Front handle

5. 

Switch lock button

6. 

Switch

7. 

Main handle

8. 

Battery lock button

9. 

Battery

10. 

LED diodes

11. 

Charger

12. 

Button for battery level indication

13. 

Battery level indicator (LED)

* Differences may appear between the product and drawing.

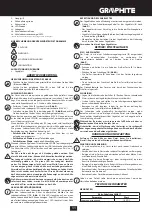
MEANING OF SYMBOLS

 CAUTION

 WARNING

  ASSEMBLY / SETTINGS

 INFORMATION

EQUIPMENT AND ACCESSORIES

1. 

Blade 


- 1 pce

PREPARATION FOR OPERATION

REMOVING AND INSERTING THE BATTERY


Push the battery lock button (

8

) and slide out the battery (

9

) (

fig. A

).


Insert charged battery (

9

) into the handle holder, you should hear 

when the battery lock button (

8

) snaps.

BATTERY CHARGING

The device is supplied with partially charged battery. The battery 

should be charged in ambient temperature between 4°C and 40°C. New 

battery, or one that has not been used for a long time, will reach full 

efficiency after approximately 3 to 5 charge/discharge cycles.


Remove the battery (

9

) from the device (

fig. A

).


Connect the charger (

11

) to mains socket (230 V AC).


Slide the battery (

9

) into the charger (

11

) (

fig. B

). Ensure the battery is 

properly fitted (pushed to the end).

When the charger is connected to a mains socket (230 V AC), the green 

diode (

10

) on the charger turns on to indicate connected supply.

When the battery (

9

) is placed in the charger (

11

), the red diode (

10

) on 

the charger turns on to indicate that the charging is in progress.

At the same time green diodes (

13

) of the battery level indication are 

flashing in different configurations, see description below.

 • All diodes are flashing

 – the battery is empty and requires charging.

 • 2 diodes are flashing

 – the battery is partially discharged.

 • 1 diode is flashing 

– the battery level is high.

Once the battery is charged, the diode (

10

) on the charger lights green, 

and all battery level diodes (

13

) light continuously. After some time 

(approx. 15 s) the battery level indication diodes (

13

) turn off.  

Do not charge the battery for more than 8 hours. Exceeding this time 

limit may cause damage to battery cells. The charger does not turn 

off automatically when the battery is full. Green diode on the charger 

will remain on. Battery level indication diodes turn off after some 

time. Disconnect power supply before removing the battery from the 

charger socket. Avoid consecutive short chargings. Do not charge the 

battery after short use of the tool. Significant decrease of the period 

between chargings indicates the battery is worn out and should be 

replaced.

Batteries heat up when charging. Do not operate just after charging – 

wait for the battery to cool down to room temperature. It will prevent 

battery damage.

BATTERY LEVEL INDICATION

The battery is equipped with signalisation of the battery level (3 LED 

diodes) (

13

). To check battery level status, press the button for battery 

level indication (

12

) (

fig. C

). When all diodes are lit, the battery level is 

high. When 2 diodes are on, the battery is partially discharged. When 

only one diode is lit, the battery is discharged and must be recharged.

BLADE INSTALLATION

Installation and removal of the blade is tool free.


Pull the lever for quick blade installation (

3

) upwards (

fig. D

).


Slide blade into cut out of the tool holder, push to the limit 


Lower the lever for quick blade installation (

3

) (the lever will return to 

its default position automatically) (

fig. E

).


Pull the blade lightly to make sure it is properly fixed.

Use correct blades for the planned task. 

OPERATION / SETTINGS

SWITCHING ON / OFF

The device is equipped with the switch lock button (

5

) that protects 

against accidental start up. The safety switch is located on both sides 

of the tool body (

fig. F

).

Switching on


Press one end of the switch lock button (

5

) and hold.


Press the switch button (

6

) (

fig. G

).


You can release the switch lock button (

5

) after starting the device. 

Switching off 


Release pressure on the switch button (

6

) to stop the tool.

Device speed within its range is controlled with pressure on the switch 

button.

CUTTING


Place the front part of the base (

2

) flat on the material for processing, 

so the blade does not have contact with the material.


Start the saw and adjust working speed to properties of processed 

material.


Move the saw slowly and guide the blade along previously set cutting 

line (

fig. H, I

). 

Cut at a steady rate, be careful not to overload the saw. Excessive 

pressure applied on the blade will suppress operation and will affect 

cutting efficiency unfavourably. 

During operation whole surface of the base should contact surface of 

the processed material. 

Make sure that the working tool is installed properly. Improperly or 

inaccurately installed working tools can slip during operation and 

cause risk for the user.

OPERATION AND MAINTENANCE

Remove the battery from the device before commencing any 

activities related to installation, adjustment, repair or maintenance.

Содержание 58G017

Страница 1: ...SABLJASTA AGA G 0621 Cz ci zamienne do tego produktu kupisz w gtxservice pl przez min 10 lat od jego zakupu Sklep gtxservice pl realizuje min 95 zam wie w skali roku TIESINIS PJ KLAS AKUMULIATORINIS...

Страница 2: ...POU V N 25 PREKLAD P VODN HO N VODU NA POU ITIE 28 PREVOD IZVIRNIH NAVODIL 31 ORIGINALIOS INSTRUKCIJOS VERTIMAS 33 INSTRUKCIJU TULKOJUMS NO ORI IN LVALODAS 36 ALGUP RASE KASUTUSJUHENDI T LGE 39 42 PR...

Страница 3: ...3 1 2 3 4 7 6 5 A 9 8 B 9 11 10 12 9 13 C 1 3 D 2 E 1 2 3 F 7 5 H I 5 6 1 2 G...

Страница 4: ...w lub gdziekolwiek tam gdzie temperatura przekracza 50 C WSKAZ WKI BEZPIECZE STWA DOTYCZ CE ADOWARKI AKUMULATORA Niniejszy sprz t nie jest przeznaczony do u ytkowania przez osoby w tym dzieci o ogran...

Страница 5: ...m uk adzie patrz opis poni ej wiecenie pulsacyjne wszystkich diod sygnalizuje wyczerpanie akumulatora i konieczno jego na adowania wiecenie pulsacyjne 2 diod sygnalizuje cz ciowe roz adowanie wiecenie...

Страница 6: ...ormacje na temat ha asu i wibracji Poziom emitowanego ha asu przez urz dzenie opisano poprzez poziom emitowanego ci nienia akustycznego LpA oraz poziom mocy akustycznej LwA gdzie K oznacza niepewno po...

Страница 7: ...tact with eyes additionally seek medical attention Leaked electrolyte may cause eye irritation or burns Do not disassemble the battery there is a risk of short circuiting Do not use power tool battery...

Страница 8: ...is flashing the battery level is high Once the battery is charged the diode 10 on the charger lights green and all battery level diodes 13 light continuously After some time approx 15 s the battery le...

Страница 9: ...actors may lead to higher exposure to vibrations during whole working time To precisely define exposure to vibrations include periods when the device is switched off and when it is switched on but not...

Страница 10: ...brauch den Zustand von Ladeger t Kabel und Stecker Wenn Sch den festgestellt werden verwenden Sie das Ladeger t nicht Versuchen Sie nicht das Ladeger t zu zerlegen berlassen Sie alle Wartungsarbeiten...

Страница 11: ...bb C Alle LEDs leuchten auf um einen hohen Ladezustand der Akku anzuzeigen Zwei LEDs leuchten auf um eine Teilentladung anzuzeigen Wenn nur 1 LED leuchtet ist der Akku leer und muss wieder aufgeladen...

Страница 12: ...reichende oder zu geringe Wartung des Ger tes verursacht Die oben genannten Gr nde k nnen die Exposition gegen ber Vibrationen w hrend der gesamten Arbeitszeit erh hen Zur genauen Absch tzung der Vibr...

Страница 13: ...13 50 C Li Ion Li Ion 1 2 3 4 5 6 8 9 10 11 13 14 15 12 7 1 2 3 4 5 6 7 8 9 10 11 45 C 12 13 14 15...

Страница 14: ...14 1 2 3 4 5 6 7 8 9 10 11 12 13 1 1 8 9 A 9 8 4 C 40 C 3 5 9 A 11 230 AC 9 11 B 230 AC 10 9 11 10 13 2 1 10 13 15 13 8 3 13 12 C 2 1 3 D 3 E 5 F 5 6 G 5 6...

Страница 15: ...000 4000 4 C 40 C 4 C 40 C 58G002 1 2 0 400 0 650 2021 2021 Graphite Enery 58G002 230 V AC 50 Hz 22 V DC 2300 mA 40 C 400 C 58G001 1 h 58G004 2 h II 0 300 kg 2021 LpA 82 31 A K 3 A LwA 93 31 A K 3 A a...

Страница 16: ...Topex Sp ka z ograniczon odpowiedzialno ci Sp ka komandytowa ul Pograniczna 2 4 Grupa Topex Grupa Topex 4 1994 90 631 Grupa Topex 2 YYG 2 YY G GRUPA TOPEX Sp z o o Sp k ul Pograniczna 2 4 02 285 Warsz...

Страница 17: ...17 1 2 3 4 5 6 8 9 10 11 13 14 15 12 7 1 2 3 4 5 6 7 8 9 10 11 45o C 12 13 Recykling 14 II 15 1 2 3 4 5 6 7 8 9 10 LED 11 12 13 LED 1 1 8 9 A 9 8 4 40o C 3 5 9 A 11 230 9 11 B 230 10 9 11 10 13...

Страница 18: ...C 3 D 3 E 5 F 5 6 G 5 6 2 H I 58G017 18 0 3000 1 22 60 6 III 1 85 2021 58G017 Graphite Energy 58G001 58G004 18 18 Li Ion Li Ion 2000 A 4000 A 4 400 C 4 400 C 58G002 1 h 2 h 0 400 0 650 2021 2021 Graph...

Страница 19: ...y azokban nincs villamos vezet k Tilos a f r szg pet letenni m g mozg sban van Tilos a f r szg pek bekapcsolni m g nem veszi a kez be A f r szlap cser j hez el tte kapcsolja ki a f r szt a kapcsol val...

Страница 20: ...is vezethet Az alkalmazott jelz sek magyar zata 1 2 3 4 5 6 8 9 10 11 13 14 15 12 7 1 FIGYELEM K l n sen vatosan j rjon el 2 Olvassa el a haszn lati utas t st tartsa be a benne tal lhat figyelmeztet s...

Страница 21: ...a berendez s burkolat nak mindk t oldal n megtal lhat F bra Bekapcsol s Nyomja be a biztons gi kapcsol t 5 az egyik oldalon s tartsa ebben a helyzetben lenyomva Nyomja be az ind t kapcsol gombj t 6 G...

Страница 22: ...y r szlet nek haszonszerz s c lj b l t rt n m sol sa feldolgoz sa k zz t tele megv ltoztat sa a Grupa Topex r sos enged lye n lk l polg rjogi s b ntet jogi felel ss gre von s terhe mellett szigor an t...

Страница 23: ...u adecvate Domeniile sale de utilizare sunt executarea de lucr ri de repara ii i construc ie i oric ror lucr ri n domeniul activit ii independente de amator me terit Nu este permis utilizarea sculei...

Страница 24: ...crat Verifica i corectitudinea fix rii uneltei de lucru Uneltele de lucru montate gre it sau inexact pot aluneca n timpul func ion rii i periclita operatorul OPERAREA I NTRE INEREA nainte de a ncepe a...

Страница 25: ...e zda je pod obr b n m materi lem dostatek m sta aby nedo lo k po kozen stolu i podlahy pilov m listem Dr te pilu ob ma rukama P ed stisknut m zap na e se p esv d te zda se pilov list nedot k materi l...

Страница 26: ...cyklech nabit a vybit Vyjm te akumul tor 9 ze za zen obr A Zapojte nab je ku 11 do s ov z suvky 230 V AC Zasu te akumul tor 9 do nab je ky 11 obr B Zkontrolujte zda je akumul tor spr vn vlo en zasunu...

Страница 27: ...ta Akumul tor 58G001 58G004 Nap t akumul toru 18 V DC 18 V DC Typ akumul toru Li Ion Li Ion Kapacita akumul toru 2000 mAh 4000 mAh Rozsah okoln teploty 40 C 400 C 40 C 400 C Nab jec as nab je kou 58G0...

Страница 28: ...d js k unikaniu v parov Miestnos vyvetrajte a v pr pade probl mov vyh adajte lek ra V pary m u sp sobi po kodenie d chac ch ciest Vpr padenespr vnychpodmienokpou vaniam ed js kvytekaniu elektrolytu z...

Страница 29: ...zuje e prebieha proces nab jania akumul tora S asne blikaj zelen di dy stavu nabitia akumul tora 13 v r znom usporiadan pozri nasleduj ci opis Ak blikaj v etky di dy znamen to vy erpanie akumul tora a...

Страница 30: ...hluku emitovan ho zariaden m je ur en hladinou akustick ho tlaku LpA a hladinou akustick ho v konu LwA kde K ozna uje neistotu merania Vibrovanie zariadenia je ur en hodnotou zr chlen vibr ci ah kde...

Страница 31: ...e da se ne igrajo z orodjem Polnilnika ni dovoljeno izpostavljati vlagi ali vodi e v polnilnik prodre voda se pove a nevarnost elektri nega udara Polnilnik je mogo e uporabljati le v suhih prostorih P...

Страница 32: ...LNITVE BATERIJE Baterija je opremljena s signalizacijo stanja napolnitve baterije 3 diode LED 13 Za preveritev stanja napolnitve baterije je treba pritisniti tipko signalizacije stanja napolnitve bate...

Страница 33: ...dpadkov so na voljo pri prodajalcu ali lokalnih oblasteh Izrabljeno elektri no in elektronsko orodje vsebuje okolju kodljive snovi Orodje ki ni oddano v recikla o predstavlja potencialno nevarnost za...

Страница 34: ...asmens arba specialisto prie i ros Tokie asmenys krovikliu gali naudotis netinkamai ir d l to susi aloti Kai krovikliu nesinaudojama j b tina i jungti i elektros tampos tinklo D MESIO rankis yra skir...

Страница 35: ...ja apie dalin akumuliatoriaus i sikrovim vie iantis tik 1 diodas rei kia kad akumuliatorius yra pilnai i sikrov s ir j reikia krauti PJ KLIUKO TVIRTINIMAS Pj kliukas kei iamas ir tvirtinamas nenaudoj...

Страница 36: ...akumulatori nav piln b izl d ju ies tie j aizsarg no ssavienojumiem Izlietot s baterijas var bez maksas nodot atpaka tirdzniec bas viet s Pre u pirc jam ir pien kums atgriezt izlietot s baterijas Pas...

Страница 37: ...n dro bas noteikumus 3 Lietot person gos aizsargl dzek us aizsargbrilles un dzirdes aizsargus 4 Str d t pretputek u mask 5 Str d t aizsargcimdos 6 Nepielaist b rnus pie ier ces 7 Str d t aizsargap rb...

Страница 38: ...z i un izv l ties darba trumu atbilsto i z jam materi la pa b m L ni p rvietot zobenz i virzot asmeni gar iepriek atz m tu z juma l niju H I att Z ana ir j veic vienm r gi piev r ot uzman bu tam lai n...

Страница 39: ...p hjalikult t deldavat pinda Samuti on keelatud saagida materjale mille m dud paksus letavad sae tehnilistes andmetes esitatud m te Enne t alustamist veenduge et t deldava pinna all oleks piisavalt r...

Страница 40: ...a 11 vooluv rgu 230 V AC pesasse Paigaldage aku 9 laadijasse 11 joonis B Kontrollige kas aku asetseb igesti on l puni laadijasse l katud P rast laadija hendamist toitev rgu pesasse 230 V AC s ttib laa...

Страница 41: ...tase puidu l ikamine p hik epide ah 18 728 m s2 K 1 5 m s2 M detud vibratsioonitase puidu l ikamine lisak epide ah 15 044 m s2 K 1 5 m s2 M detud vibratsioonitase pleki l ikamine p hik epide ah 6 422...

Страница 42: ...42 58G017 50 C Li Ion Li Ion 1 2 3 4 5 6 8 9 10 11 13 14 15 12 7 1...

Страница 43: ...43 2 3 4 5 6 7 8 9 10 11 45 C 12 13 14 15 1 2 3 4 5 6 7 8 9 10 LED 11 12 13 LED 1 1 8 9 A 9 8 40 C 400 C 3 5 9 A 11 230 V AC 9 11 B 230 V AC 10 9 11 10 13 2 1 10 13 15 13 8 3LED 13 12 C 2 1 3 D 3 E...

Страница 44: ...0 mAh 40 C 400 C 40 C 400 C 58G002 1 h 2 h 0 400 kg 0 650 kg 2021 2021 Graphite Energy 58G002 230 V AC 50 Hz 22 V DC 2300 mA 40 C 400 C 58G001 1 h 58G004 2 h II 0 300 kg 2021 LpA 82 31 dB A K 3 dB A L...

Страница 45: ...mo e uzrokovati nadra aj ko e ili nastanak opeklina Ne otvarajte aku bateriju opasnost od nastanka kratkog spoja Aku bateriju elektri nog alata ne koristite na ki i Aku bateriju treba uvijek dr ati da...

Страница 46: ...i pra njenja Izvadite aku bateriju 9 iz ure aja crte A Punja 11 uklju ite u mre nu uti nicu 230 V AC Aku bateriju 9 stavite u punja 11 crte B Provjerite je li aku baterija pravilno namje tena gurnuta...

Страница 47: ...t Tip punja a 58G002 Napon napajanja 230 V AC Frekvencija napajanja 50 Hz Napon punjenja 22 V DC Max struja punjenja 2300 mA Raspon temperature okoline 40 C 400 C Vrijeme punjenja aku baterije 58G001...

Страница 48: ...t s istim Ukoliko slu ajno do e do kontakta elektrolit treba oprati sa velikom koli inom vode U slu aju kontakta s o ima dodatno se konsultovati sa lekarom Elektrolit koji je istekao mo e da dovede do...

Страница 49: ...kumualtora 13 svetle bez prekida Nakon nekog vremena oko 15s diode stanja napunjenosti akumulatora 13 e se isklju iti Akumulator ne treba da se puni du e od 8 asova Prekora enje tog vremena mo e doves...

Страница 50: ...ava nepreciznost dimenzije Dati u uputstvu nivo emitovanog akusti nog pritiska LpA nivo akusti ne snage LwA kao i vrednost brzine podrhtavanja ah izmereni su u skladu sa normom EN 60745 1 Dati nivo po...

Страница 51: ...51 58G017 50 C Li ion Li ion 1 2 3 4 5 6 8 9 10 11 13 14 15 12 7...

Страница 52: ...52 1 2 3 4 5 6 7 8 9 10 11 45 C 12 13 14 15 1 2 3 4 5 6 7 8 9 10 11 12 13 1 1 8 9 A 9 8 4 C 40 C 3 5 9 A 11 230 V AC 9 11 B 230 V AC 10 9 11 10 13 2 1 10 13 15 13 8 3 13 12 C 2 1...

Страница 53: ...Li Ion 2000 mAh 4000 mAh 40 C 400 C 40 C 400 C 58G002 1 h 2 h 0 400 kg 0 650 kg 2021 2021 Graphite Energy 58G002 230 V AC 50 Hz 22 V DC 2300 mA 40 C 400 C 58G001 1 h 58G004 2 h II 0 300 kg 2021 LpA 8...

Страница 54: ...mienta el ctrica oye ruidos extra os debe desconectarla inmediatamente y quitar la bater a de la sierra Para asegurar que la herramienta se enfr a bien los orificios en la carcasa deben estar destapad...

Страница 55: ...de protecci n 2 del cargador 15 No arroje las c lulas al fuego ESTRUCTURA Y APLICACI N La sierra de sable es una herramienta el ctrica alimentada a bater a La propulsi n es de motor conmutador de cor...

Страница 56: ...la presi n ejercida sobre el interruptor CORTE Coloque la parte delantera de la base 2 sobre el material a cortar para que la hoja no toque el material Ponga la sierra en marcha y elija la velocidad...

Страница 57: ...s Instrucciones sin el permiso expreso de Grupa Topex por escrito El no cumplimiento de esta prohibici n puede acarrear la responsabilidad civil y penal TRADUZIONE DELLE ISTRUZIONI ORIGINALI SEGA UNIV...

Страница 58: ...11 Temperatura massima ammissibile delle celle 45 C 12 Non gettare le batterie nel fuoco 13 Riciclaggio 14 Seconda classe di isolamento del caricabatterie 15 Non gettare le batterie in acqua CARATTERI...

Страница 59: ...Rilasciando il pulsante dell interruttore 6 il dispositivo si fermer La gamma di velocit di funzionamento del dispositivo viene regolata tramite il grado di pressione esercitata sul pulsante dell int...

Страница 60: ...re sul contenuto del presente manuale detto di seguito Manuale che riguardano tra l altro il testo le fotografie gli schemi e i disegni contenuti e anche la sua composizione appartengono esclusivament...

Страница 61: ...en niet in het vuur werpen OPBOUW EN TOEPASSING De sabelzaag is een elektrogereedschap door de accu aangedreven Het wordt door cumutator gelijkstroommotor aangedreven waarvan het toerental naar heen e...

Страница 62: ...worden losgelaten Uitzetten Het loslaten van de hoofdschakelaar 6 stopt het toestel Het bereik de werksnelheid van het toestel wordt door de drukkracht op de hoofdschakelaar geregeld SNIJDEN Plaats h...

Страница 63: ...orden op basis van de Wet van 4 februari 1994 inzake auteursrechten en aanverwante rechten Stb 2006 Nr 90 Pos 631 met latere aanpassingen beschermd Kopi ren bewerken publiceren en modificeren voor han...

Страница 64: ...ispositif est con u pour effectuer des coupes de s paration des coupes courbes et des coupes dans le bois les mat riaux base de bois et les plastiques et m taux condition d utiliser une lame appropri...

Страница 65: ...scie le long de la ligne de coupe pr alablement d termin e fig H I Effectuer la coupe de fa on uniforme en prenant toujours soin de ne pas surcharger la scie Une pression trop lev e sur la lame provoq...

Страница 66: ...re appropri e des mains et une bonne organisation du travail PROTECTION DE L ENVIRONNEMENT Les appareils lectriques usag s ne doivent pas tre jet s avec les ordures m nag res mais apport s dans un poi...

Страница 67: ...nia typu WE numer Number of EC type certificate Az EK t pus bizony tv nytan s tv nya Certifik t po et typu osved enia ES slo certifik tu EU p ezkou en typu Num rul certificatului de examinare CE de ti...

Страница 68: ...68...
Отзывы: