background image

Page 10

ES-20

Operating instructions

4. Operation of 

ES-20

4.1. 

Connect the unit to a grounded power socket. Set the Power switch to position I (ON).

4.2. 

The display will turn on with the upper line (Set p.) showing the previously set time, speed 
and  temperature  and  the  lower  line  (Actual  p.)  showing  current  readings  of  the  same 
parameters (STOP – time, 000 – rpm, incubator temperature °C, which automatically starts 
rising according to the temperature set in the upper line). 

Setting the parameters

Use  the  readings  in  the  upper  line  of  the  display  (Set  p.),  while  setting  the  parameters 
required.

Setting time (Time)

4.3.  

Using the 

p

 and 

q


Time

 keys (Fig. 2/

u

) set the required working time interval in hours and 

minutes (increment - 1 min). Pressing the key for more than 3 sec will increase the increment.

Setting speed (RPM)

4.4.  

Using the 

p

 and 

q


RPM 

keys (Fig. 2/

v

) set the required shaking speed (increment 10 

RPM). Pressing the key for more than 3 sec will increase the increment.

Setting temperature(Temp.ºC)

4.5.  

Using the 

p

 and 

q


Temp.

 keys (Fig. 2/

w

) set the required temperature (increment 0.1ºC). 

Pressing the key for more than 3 sec will increase the increment.

Fig.2 Control panel

Shaker

Timer

Time

RPM

Temp.

PROCEEDING PARAMETERS

SET PARAMETERS

Time (hr


:


min)

RPM

Temp. °C

Set p.

Actual p.

Run/Stop

STOP 

000 

+37.0 

+37.0 

160 

00:25 

Version 2.02 - July 2013

Содержание ES-20

Страница 1: ...Operating instructions Shaker Incubator ES 20 For version V 2GD ...

Страница 2: ...Page 2 ES 20 Operating instructions Version 2 02 July 2013 ...

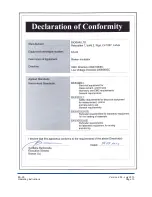
Страница 3: ...tents 1 Safety 4 2 General Information 5 3 Getting Started 6 4 Operation of ES 20 7 5 Specifications 9 6 Guarantee and service 10 7 Declaration of Conformity 11 ES 20 Operating instructions Version 2 02 July 2013 ...

Страница 4: ...ntamination methods recommended by the manufacturer Do not make modifications in design of the unit ELECTRICAL SAFETY Connect only to electric circuit with voltage corresponding to that on the serial number label Ensure that the electric circuit switch and the plug are easily accessible during use Disconnect the unit from the electric circuit before moving Disconnect the power cord plug from power...

Страница 5: ...s switched on Do not operate the unit if it is faulty or has been installed incorrectly Do not use outside laboratory rooms Do not place a load exceeding the maximum load value mentioned in the specifications section of these operating instructions BIOLOGICAL SAFETY It is the user s responsibility to carry out appropriate decontamination if hazardous material is spilt on or penetrates into the equ...

Страница 6: ... tachometer rpm and digital timer regardless of the temperature The unit is equipped with the direct drive system ensuring most reliable stable long time operation up to 30 24 hour cycles The ES 20 is easy to operate The two line LCD display shows both set and actual values for temperature time and speed The device consists of a thermal regulator and control block shaking block and a plexiglass ch...

Страница 7: ...r growing cell cultures in flasks and other laboratory glassware extracting tissue samples at physiological temperatures other sample preparation processes The unit is applicable in all the areas of clinical biotechnology and microbiology laboratory research fuse holder fig 1 Version 2 02 July 2013 ...

Страница 8: ... not cover in transit damage 3 2 The ES 20 set includes Shaker Incubator ES 20 1 piece Power cord 1 piece Control cable 1 piece Spare fuse 1 piece Operating Instructions Declaration of Conformity 1 copy ES 20 Shaker IncubatorAssembling Instruction 1 copy Optional accessories PUP 12 platform u on request PP 4 platform v on request P12 100 platform w on request P6 250 platform x on request P16 88 pl...

Страница 9: ...even working surface Remove protective film from the display Connect the shaker control cable fig 1 x into the corresponding sockets on the rear of the thermostatic and shaking blocks Plug the mains cable into the socket on the rear fig 1 y and position the unit so that there is easy access to the power switch and connector 3 4 Platform installation Install the platform by inserting the pins on th...

Страница 10: ...he parameters required Setting time Time 4 3 Using the p and q Time keys Fig 2 u set the required working time interval in hours and minutes increment 1 min Pressing the key for more than 3 sec will increase the increment Setting speed RPM 4 4 Using the p and q RPM keys Fig 2 v set the required shaking speed increment 10 RPM Pressing the key for more than 3 sec will increase the increment Setting ...

Страница 11: ...stopped ONLY manually by reducing the temperature using the q Temp key Fig 2 w the lower key till the OFF sign appears in the upper line of the display 4 9 If the working time is not set the timer indicator in the upper line shows 00 00 pressing the Shaker Run Stop key will start continuous operation of the unit with countdown timer in the lower line and indication OFF in the upper line until the ...

Страница 12: ... mm Current power consumption 230 V 0 7 A 160 W or 120 V 1 6 A 170 W Voltage 230 V 50 60 Hz or 120 V 50 60 Hz Weight 13 2 kg Accurate within 10 Grant is committed to a continuous programme of improvement specifications may be changed without notice Description Optional accessories Metallic flat platform with non slip rubber mat Working dim 215x215 mm PP 4 Universal platform with adjustable bars fo...

Страница 13: ...ss surface Caution Clean the door and side panels with a mild detergent never use organic based compounds pure alcohol alcohol containing cleaners more than 15 or ammonia containing cleaners for Plexiglass Do not use abrasive pads or cleansers For decontamination it is recommended to use a special DNA RNA removing solution e g TM TM DNA Exitus Plus RNase Exitus Plus The table below shows the inter...

Страница 14: ...r fig 1 z Replace with the correct fuse for 230 V T1 A for 120 V T2 A 6 3 Routine safety tests If routine tests are to be made we recommend a test of the integrity of the protective earth conductor and an insulation test at 500 Vdc Routine flash tests are not recommended for any electrical equipment because repeated high voltage tests degrade insulation materials Version 2 02 July 2013 ...

Страница 15: ...Page 15 ES 20 Operating instructions Version 2 02 July 2013 ...

Страница 16: ...er Incubator ES 20 28711 2 02 Grant Instruments Cambridge Ltd Shepreth Cambridgeshire SG8 6GB UK Tel 44 0 1763 260811 Fax 44 0 1763 262410 Email scientificsales grantinstruments com www grantinstruments com ...

Отзывы: