


5/13
2.
Using a drill, make a hole on each marked dot. Put a plastic expansion bolt and screw (not provided) into each hole. Leave enough space on the
screws to mount the GHP62X.
3.
Attach the wall mount spacers to the slot for the wall mount spacer on the back of the phones.
4.
Mount the GHP62X on the screws using its
“Wall
Mount
Slots”.
Connecting the GHP6XX/W
To set up the phone, follow the steps below:
1.
Connect the phone cord with the handset (RJ-11 port) and the base.
2.
Connect the LAN port of the phone to the RJ-45 socket of a hub/switch on a router ( LAN side of the router) using the Ethernet cable. This step
can be skipped if using GHP6xxW with Wi-Fi.
3.
Powering the phone:
For GHP6XX/W: Connect the 12V DC output plug into the power jack if the phone; plug the power adapter into the electrical outlet.
For GHP6XX & GHP6XX: A PoE switch must be used in step 2.
Note
For easy deployment, the GHP6xxW is out-of-the-box pre-configured to connect to default SSID named
wp_master
with a password (WPA/WPA2 PSK)
equal to
wp!987@dmin
, users can adapt these settings from the web UI as well to make it easier for deployment on a c
ustomer’s site.
Phone Configuration Via Web Browser
1.
Ensure your phone is powered up and connected to the internet.
2.
Locate the MAC address on the MAC tag of the unit which is on the underside of the device, or on the package.
3.
From a computer connected to the same network as the GHP6XX, type in the following address using
GHP6XX’s
MAC address on your
browser:
https://<mac>.local
Example:
https://c074adffffff.local
Note:
The user can dial
**47#
and the IP address will be read by the IVR.
4.
Enter the
admin’s
username and password to access the configuration menu. (The factory default username is
password can be found on the sticker at the back of the unit).
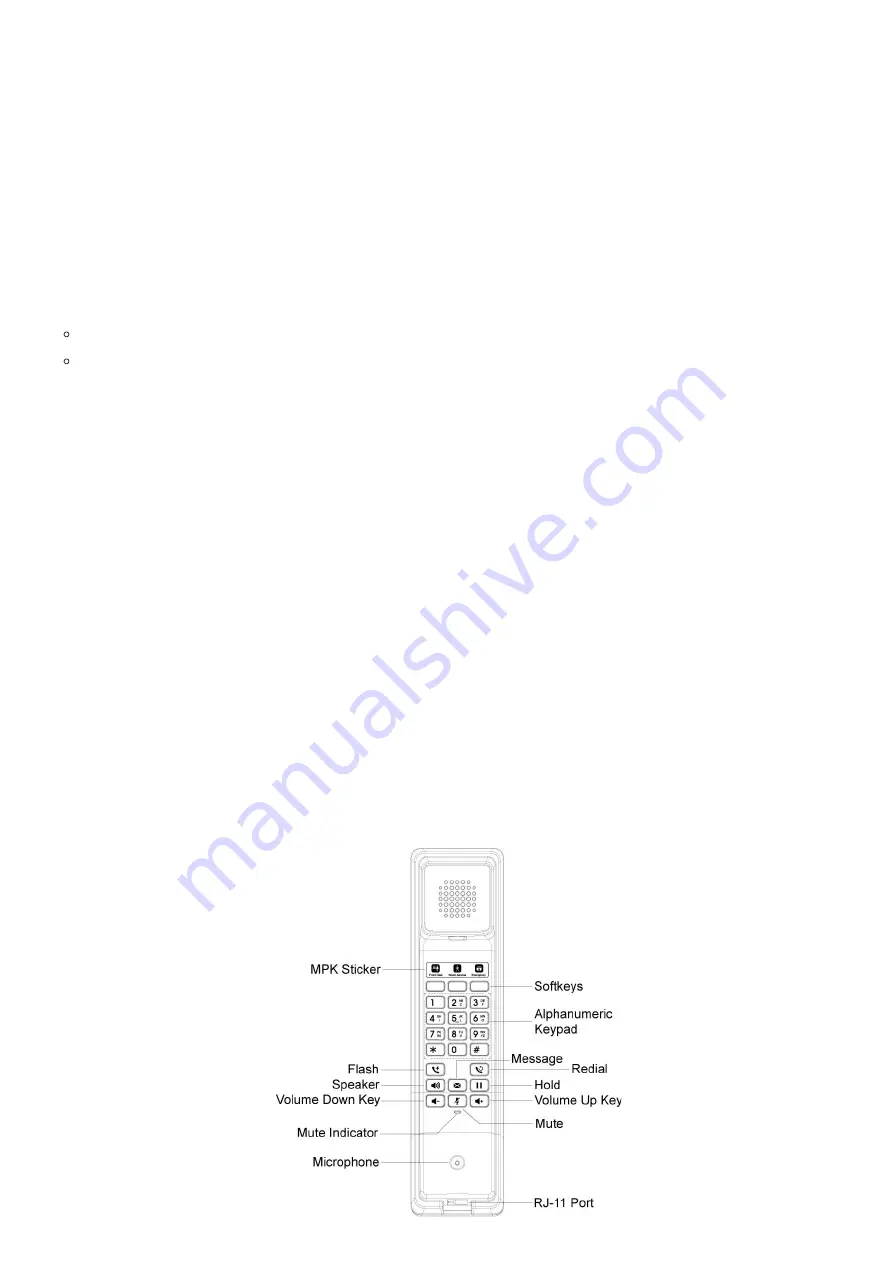
Getting To Know The GHP6XX/W
GHP61X/W


