Assembly Instructions IT2612ALP
1
CAUTION
: While it is possible for one person to assemble this grill, obtain assistance from another person
when handling some of the large, heavy pieces.
2
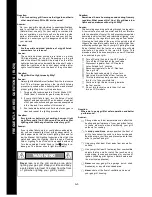
Place Cart Top Panel on top of the assembled Cart. Position the panel so that the hose hole is positioned to the
right front of Cart as shown.
Align the 4 holes on the edge of Cart Top Panel with the 4 holes on the 2nd hole(from both side) of the 2nd row
of Side Panels. See
FIG. 1
. Tighten 3 holes with 3 Phillips Head Screws 3/16"x3/8", except for the left front one.
Use a Phillips Head Bolt 3/16"x3/8" to attach the Lighting Stick and secure the hole as shown.
Install Cart Top Panel and Lighting Stick
Install Cart Side Panels, Bottom Shelf and Cart Front Panel
Remove all packaging materials.
Lay a piece of cardboard on the ground (refer to Pre-Assembly Instructions).
Attach Cart Side Panels onto the Cart Bottom Shelf, making sure that the hole in the panels are
aligned. Insert 4 Phillips Head Screws 3/16"x3/8" and tighten securely.
Attach the Cart Front Panel between the Cart Side Panels as shown; Align the 4 holes on the edge
of Cart Front Panel with the 4 holes in the front of Cart Side Panels. Insert 4 Phillips Head Screws
3/16"x3/8" and tighten securely.
Phillips Head Screw 3/16"x3/8"
Qty. 8
Part # S112G03066
Phillips Head Screw 3/16"x3/8"
Qty. 3
Part # S112G03066
Cart Front Panel
The tank hole located on
the right side.
(with fastening strap)
Left Side Panel
Right Side Panel
Bottom Shelf
Hose Hole
Cart Top Panel
Lighting Stick
2nd hole,
2nd row
Phillips Head Bolt 3/16"x3/8"
Qty. 1
Part # S03110019A
Bolt 3/16"x3/8"
Phillips Head
Screw 3/16"x3/8"
Phillips Head
Screw 3/16"x3/8"
7
FIG. 1
Содержание IT2612ALP
Страница 5: ...Parts Diagram for Models IT2612ALP 5 ...


