6
6.2 Accessing a USB Device
The USB Server allows you to share the resources, such as scanning function, of a
multi-functional printer over the network. To use a multi-function printer connected to a server,
you must first establish a connection to the printer. You can utilize the printer you want to use
by using the OS built-in printer management application on your PC. To connect to a printer,
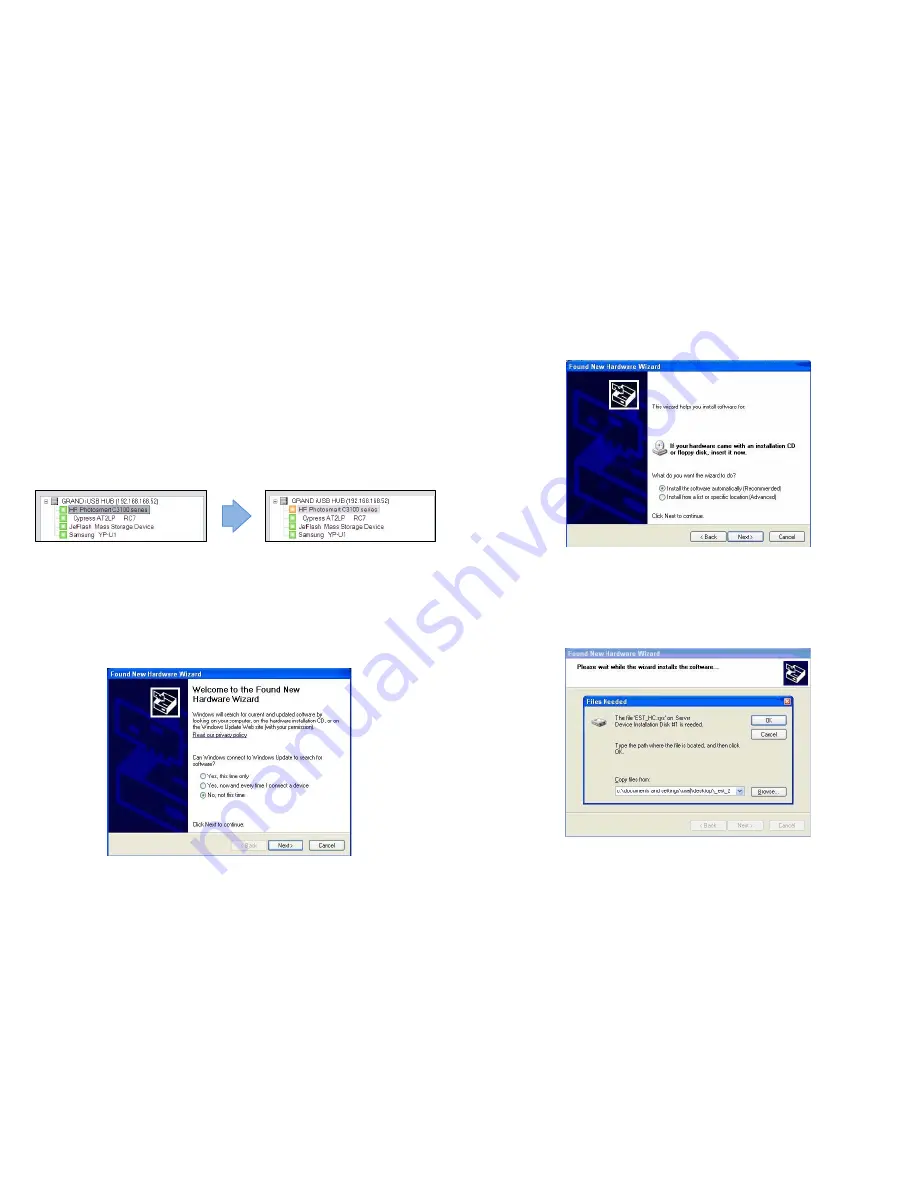
please select the target printer on the tree view and click on “
Connect
” button, or the
“
Connect
” option on the right-click menu, to establish the connection. When you see the
green icon turns red, it means you are successfully connected and are ready to work. You
can now bring up the corresponding control applications of the printer to perform the desired
tasks. You may also connect to a device by double clicking it on the tree view. If you select a
connected device on the UI, you can see that the
Connect
button is changed to
Disconnect
.
Clicking on the button disconnects you from the selected device. Once you see the icon turns
green, the device has been completely disconnected.
NOTE:
At the first time you connect to a device, you will be prompted to install the driver for
USB Server:
Step 1:
Select “No, not this time” when you see this prompt and then click on “Next” button.
7
Step 2:
Choose “Install the software automatically” option and then click on “Next” button to
start installation. If you already have the drivers installed on the PC, then the installation will
complete by itself. Otherwise, you will be prompted to provide the path to the driver on your
PC.
Step 3:
Click on “OK” to continue with the installation once you have provided the path to the
driver. The driver will then install automatically if the path is correct.


